Hello fellow stampers. Mel Pilling here with a simple pop up card. This week we are highlighting the fabulous company KATZELKRAFT . I adore this company. So many wonderful designs. I can’t get enough of their stamps. ☺️ , but today I was feeling their charming RAT set .
I began by making the simple 3-D card I’ve included a picture of the map so you know how to build it. This card can be adapted to any size as long as your initial card stock width is divisible by four.
First I built the card base and 3D inner strip according to the above map. I used printed paper to decorate the two sides of the card inside, also to decorate the inner band in the centre. I then attached the inner band according to the glue zones to the left and right, as on the map. There should be a tiny space between each panel where you can see the 3-D band when you attach your panels later.
TIP: Make sure you put the glue on the band only when adhering the panels to the band later, or the card won’t open properly.
I know this all sounds complicated at first, but honestly after you’ve done this twice it will be easy peazy lemon squeazy.
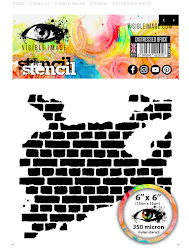
I decorated the front panel and the four inner panels as follows. I coloured the panel using distress inks top and bottom. Then I stencilled the brick design using moulding paste. Tip: Make sure you don’t put bricks where your character is going to be placed.
NOTE: The moulding paste will absorb the ink colour as it dries. You can also add colour on top with a paint brush, once it is dry if the colour isn’t strong enough.
Stamp, watercolour and fussy cut the characters and glue them onto your panels. Then put glue on the 3-D strip only and adhere the finished panels on the strip and your card front.
STAMPS USED
STENCIL USED


No comments:
Post a Comment