Thursday, October 31, 2024

Happy Halloween!

BOO! Lisa Hoel here. Hello, and Happy Halloween! I'm back with another Topflight Stamps card for you. Of course I had to make another Halloween card since it's the actual day…

Lisa Hoel for Topflight Stamps #creativejuicefreshsqueezed #topflightstamps

I pulled out the handy Distress Plaid Paper Pad from Creative Expressions for the background. (Love that paper!) I also love the funky die sets from AALL & Create so I included several bits cut using the SkyCrossed Paradise set. Hobby Art and PaperArtsy stamps finished it off!

Thanks for stopping by and be sure to check out the Topflight Stamps store for a wide selection of different and hard to find stamps, stencils and other paper crafting supplies from all around the world! Also keep an eye here on the Topflight Stamps blog. There is new inspiration posted daily…


Topflight Stamps Supplies Used:

Hobby Art stamp set - Fungi

PaperArtsy Kate Crane Mini stamp - KCM003

PaperArtsy stamp set - ESN27

AALL & Create Die Set - SkyCrossed Paradise

Creative Expressions paper pad - Distress Plaid

PaperArtsy Infusions - Golden Sands

Versafine Pigment Ink Pad - Onyx Black
Versafine Clair Ink Pad - Shady Lane


Wednesday, October 30, 2024

PaperArtsy Mixed Media Card

Hello, Lisa Hoel here. I'm back with another Topflight Stamps card for you! This week's theme is "Anything Goes" so I had the pleasure of going through my stamp stash to find my inspiration.

Lisa Hoel for Topflight Stamps #creativejuicefreshsqueezed #topflightstamps

My focal image for this collage card is from one of my favorite PaperArtsy designers, Lynne Perrella (set LPC048). I paired it with a gel print background and die cuts (Masterpiece Design - Tag It).

Thanks for stopping by and be sure to check out the Topflight Stamps store for a wide selection of different and hard to find stamps, stencils and other paper crafting supplies from all around the world! Also keep an eye here on the Topflight Stamps blog. There is new inspiration posted daily!


Topflight Stamps Supplies Used:

PaperArtsy Stamp Set - LPC048

Masterpiece Design Die Set - Tag It

Lavinia Stencil - Flourish

Masterpiece Design Stamp Set - Label Mania
Versafine Pigment Ink Pad - Onyx Black
embossing powder

Tuesday, October 29, 2024

Witching Hour

It's Tuesday so you've got Kathi here to share a project with you. It's an "Anything Goes" week and Halloween is Thursday. 

However, before I get to my card, I want to remind you about the sale going on at Topflight Stamps! There are loads of new products that you'll want to get for your friends or yourself!


Here's one of my last Halloween cards for the year (maybe) that was created with FabaMarcie, and Hocus and Pocus Clear Polymer Stamps by Lavinia Stamps plus Elements Inks by Lavinia Stamps.


Low-tack tape was placed across the bottom of a piece of Mixed Media cardstock and  one of the Acetate Circles Masks by Lavinia Stamps was secured to the top center of the panel. Dark Denim and Blue Lagoon Elements Inks by Lavinia Stamps were sponged over the tape and the circle mask to create a night sky.

The tape was moved to cover the the bottom part of the sky. Olive and Pine Elements Inks by Lavinia Stamps were sponged over the tape onto the bottom of the panel to create a lawn. The circle mask and low-tack tape were removed. White Metallic PanPastels were used to add white shimmer to the moon.

Nocturne VersaFine Clair Ink by Imagine Crafts/Tsukineko was used to stamp both Faba  and Marcie on the top of the lawn. Hocus and Pocus were stamped between the witches using Nocturne VersaFine Clair Ink.

The image panel was heat set. Markers were used to color the witches hair, the details of their dresses, the broom, and the lantern. A Gelly Roll Bold Line Stardust Clear Glittering Ink by Sakura was used to glitter to the center of the lantern and around the moon.

The image panel was trimmed, edged with a black marker, and adhered to a black card. A sticker sentiment was added to finish the card.

Please pop over to my blog, Kat's Tales of Stamping, for step-by-step instructions and complete supply lists.

Topflight Stamps Products Used:


Thanks for visiting today!

Monday, October 28, 2024

Quick Coloring for your Christmas Cards

Hi friends. Alanna here on the blog with you today with a quick and easy Christmas card to share with you today. I don't know about you but sometimes I feel like images that need to be colored need to have a lot of time taken in coloring the image. But for Christmas cards, we don't always have that kind of time.

On my card today, I stamped the image from the Sketchy Holly set from Craft Consortium onto white cardstock with alcohol friendly black ink using my Misti. Note that the stamp comes with the coordinating die which is amazing.

After my image was stamped, I took my OLO markers and quickly colored in the image, just adding a touch of shading. I then put my panel back into my Misti and stamped the image again, this time using my favorite Versafine Claire Nocturne ink. I love how crisp this makes the image. 

I then trimmed this panel down and added splatter with some mica spray from my stash. I added the sentiment which is from the Season's Greetings Wordies Sentiments Sheets from Creative Expressions. These are so nice as there are lots of sentiments with both black and white backgrounds, perfect for your holiday cardmaking.

After my sentiment was added, I added my panel to a piece of black cardstock, trimmed slightly larger. This was then added to a white A2 notecard to finish off the card.

Find these products I used below in the Topflight Stamps store. 
Crafty hugs! ~ Alanna

Friday, October 25, 2024

Festive Fun: A Bright and Bold Mixed Media Christmas Card


Hello, friends!
Ericka from Strangely Creative here, and I’m so excited to share a festive mixed media Christmas card with you today! I wanted to create something a little unconventional, so I went bright and playful with some fabulous supplies from PaperArtsy. Let’s dive into the details!

Building the Background

I started with a gel press print in a soft pink from my stash, which already had a great texture and color base to work with. Next, I pulled out the PaperArtsy Printed Tissue 9—such a fun collection of designs! I chose a few sections that would fit perfectly with the holiday theme and layered them on the background, gluing everything down with PaperArtsy Mattint in The Pink (one of my absolute favorite shades). For a little added contrast, I mixed in a touch of the new Mattint in Ladybug—a perfect Christmas red.

Adding Festive Details

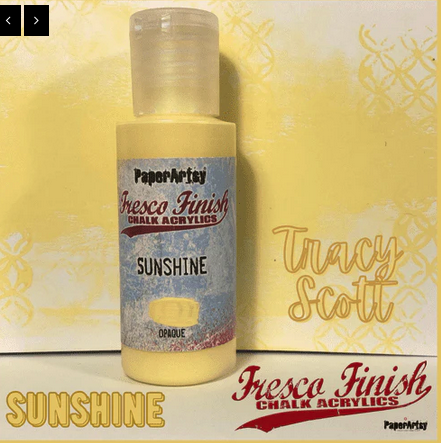
Once the background was dry, I wanted to bring in some classic holiday imagery, so I used PaperArtsy Fresco Paint in Gumboots and Gold to give the holly leaves a vibrant green pop, while Tomato added richness to the berries. For the stars, I reached for Sunshine to make them glow—because what’s a holiday card without a little sparkle, right?


The Star of the Show – Santa!

For the focal point, I stamped and cut out this jolly Santa from the PaperArtsy Kate Crane 007 set. I love how whimsical he looks! I painted him with a mix of Tomato and Ladybug to really bring out those bold, cheerful Christmas vibes, and gave him some dimension by adhering him with foam tape.


Finishing Touches

To complete the card, I hand-drew a simple frame around the edges, which added a bit of custom flair. And of course, I had to bring in a bit of texture, so I stitched a line down the side using gold thread. That little touch of shimmer adds such a festive sparkle and ties everything together beautifully.

And voilà! A bright, bold, and joyful Christmas card ready to send some holiday cheer. Thank you so much for stopping by today, and I hope this inspires you to create something uniquely festive! Have a wonderful weekend, and happy crafting!


Topflight Stamp Supplies

PaperArtsy Printed Tissue 9
Shop at:
TP
PaperArtsy - Kate Crane 007
Shop at:
TP
Tsukineko - VersaFine Clair - Nocturn
Shop at:
CS | AZ | TP
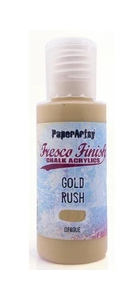
PaperArtsy - Fresco Chalk Paint - Gold
Shop at:
TP
PaperArtsy - Fresco Chalk Paint - Gumboots
Shop at:
TP
PaperArtsy - Fresco Chalk Paint - Sunshine
Shop at:
TP
PaperArtsy - Mattint The Pink
Shop at:
TP
PaperArtsy - Fresco Chalk Paint Tomato
Shop at:
TP
PaperArtsy - Mattint Greenstone
Shop at:
TP
PaperArtsy - Mattint Ladybug
Shop at:
TP
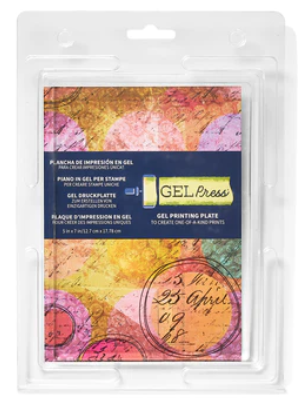
Gel Press - Reusable Gel Printing Plate
Shop at:
AZ | TP | Misc
Speedball - 2
Speedball - 2" Brayer
Shop at:
TP

Thursday, October 24, 2024

Merry Christmas with a Stenciled Background

 Hi friends. Alanna here with you today and this week, our focus is on Christmas and winter. I have a somewhat unique Christmas card to share with you today. I started by blending on two shades of green ink through the Leafy stencil from Visible Image directly onto my kraft A2 notecard.

I then stamped the sentiments which are from the Holly Jolly set from Studio Light with Versafine Claire Nocturne ink. I rounded the right-hand corners and then added in some small red gems to mimic berries and that completes this card.

Find these products I used in the Topflight Stamps store below.
Crafty hugs! ~ Alanna

Wednesday, October 23, 2024

Getting a Start on Christmas Cards!

Hello, Lisa Hoel here. I know it's only October but if you want to make a bunch of cards to send out in December, it pays to get an early start! This week on the Topflight Stamps blog we are focusing on "Christmas and Winter" for our projects. 

Lisa Hoel for Topflight Stamps #creativejuicefreshsqueezed #topflightstamps

There are SO MANY cute Christmas stamps in the store. This one really caught my eye. It's called Raccoons and Gingerbread from Katzelkraft. It makes me smile.

Thanks for stopping by and be sure to check out the Topflight Stamps store for a wide selection of different and hard to find stamps, stencils and other paper crafting supplies from all around the world! Also keep an eye here on the Topflight Stamps blog. There is new inspiration posted daily!

Topflight Stamps Supplies Used:

Katzelkraft Stamp - Raccoons and Gingerbread

Creative Expressions - 8x8 Paper Pad Christmas Plaid

AALL & Create Die Set - Season's Cheer #63

Versafine Pigment Ink Pad - Onyx Black

Tuesday, October 22, 2024

Holiday Cheers!

 It's Tuesday so you've got Kathi here to share a project with you. This week the team is focusing on Christmas or Winter. My favorite part of the holidays is gathering with friends and family and celebrating with a bit of Holiday Cheer. 


Use Tuxedo Black Memento Ink by Imagine Crafts/Tsukineko to stamp the coupe-style cocktail glass from the Holiday Cheers Clear Stamp Set by Jane's Doodles for Creative Expressions twice — once onto white cardstock and once onto repositionable sticker paper. 

Fussy-cut the sticker paper version and place it atop its counterpart on the image panel as a mask. Position the tall/candy cane cocktail glass from the same stamp set to the right of the other glass and a little bit lower on the image panel. Use Tuxedo Black Memento Ink to stamp the glass. 

Remove the sticker paper mask and color the images with Copic markers. Trim the image panel and mat with dark green cardstock.

Cut a piece of green plaid patterned paper from the Distress Plaid 8x8 Paper Pad by Taylor Made Journals for Creative Expressions to 4" wide. Adhere the matted image panel to the plaid paper.

Position the "Holiday Cheers" sentiment on the plaid paper as shown. Use Spruce VersaFine Clair Ink by Imagine Crafts/Tsukineko to stamp the sentiment. Trim the plaid paper to 5.25" and edge with Spruce VersaFine Clair Ink by Imagine Crafts/Tsukineko. Adhere the card front onto a dark green A2 card.

Please pop over to my blog, Kat's Tales of Stamping, for more detailed instructions and complete supply lists.

Topflight Stamps Products Used:


01 09 10