Greetings! It's Tuesday so you've got Kathi here today to share a project with you. This week my TFS teammates and I are focusing on ink! My card uses nine colors of Elements Inks by Lavinia Stamps. I love these dye inks as they have such vibrancy, great coverage, and are reactive to water/isopropyl alcohol.
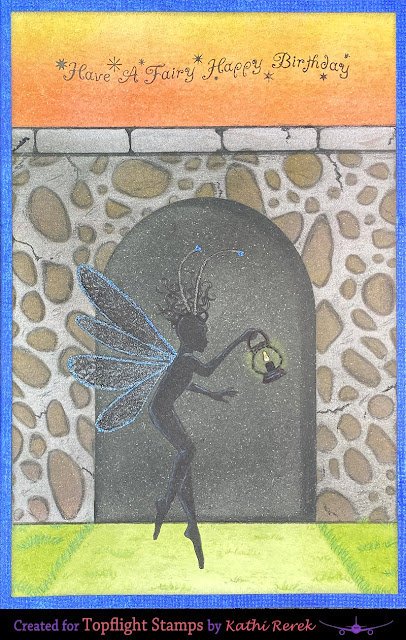
Here's my card created with the arch from the Sticker Stencils 5 - Silhouette Collection, Stones Stencil, the Dragonfly Keeper Clear Polymer Stamp, the Have a Fairy Happy Birthday Clear Polymer Stamp, and Elements Inks by Lavinia Stamps.
I placed the arch part of the arch sticker stencil from the Sticker Stencils 5 - Silhouette Collection by Lavinia Stamps about 1" up from the base of a piece of white cardstock and covered the bottom and top with low-tack tape. I brushed Graphite and Paprika Elements Inks over the sticker mask and the strips of low-tack tape to create a grey mortar background.
Keeping the arch sticker stencil and tape strips in place, the Stones Stencil by Lavinia Stamps was placed over the panel. Graphite, Sahara, Paprika, and Russet Orange Elements Inks by Lavinia Stamps were brushed over the stencil, masks, and tape strips to create a stone wall. The Stones Stencil was removed and chalk pencils were used to add detail to the stones and the wall.
I removed the arch part of the arch sticker stencil and placed the arch over the image panel. Graphite Elements Ink was brushed over the stencil to darken the arch section. the arch stencil and the tape strips were removed. Chalk pencils were used to darken and add depth to the archway.
The bottom portion of the stone was was covered with low-tack tape. Pine and Olive Elements Inks by Lavinia Stamps were brushed over the tape to create a grassy area.
The top portion of the stone was covered with low-tack tape. Sundance and Confetti Elements Inks by Lavinia Stamp were brushed over the tape to create a sunset.
The image panel was placed onto a stamping platform. Nocturne VersaFine Clair Ink by Imagine Crafts/Tsukineko was used to stamp the Dragonfly Keeper Clear Polymer Stamp by Lavinia Stamps and the Have a Fairy Happy Birthday Clear Polymer Stamp by Lavinia Stamps. Both the fairy and the sentiment were heat set.
White chalk pencil was used to enhance the fairy. A yellow and orange chalk pencil were used to add a glow to the lantern. A Sparkle Glitter Brush Pen Clear Overlay by Spectrum Noir was used to add glitter to the fairy's wings. A blue glitter pen was used to outline the wings and to add detail to the fairy's antenna.
The image panel was trimmed to 6.25" x 4.25" and edged with Nocturne VersaFine Clair Ink by Imagine Crafts/Tsukineko then adhered to a blue shimmer-inked white A6 card.
Please pop over to my blog, Kat's Tales of Stamping, for step by step instructions and complete supply lists.
Topflight Stamps Products Used:
Graphite, Sahara, Paprika, Russet Orange, Pine, Olive, Sundance, and Confetti Elements Inks by Lavinia Stamps
Thanks for visiting today!


No comments:
Post a Comment