Saturday, April 29, 2023

With Sympathy

Hello friends. Alanna back on the blog today and I have a very pretty, although maybe somewhat unusual sympathy card to share with you today. To get started, I took the Stripes stencil from Chou & Flowers and then I took the Raspberry Shimmer Pearl ink pad and smooshed it through the stencil. I love the imperfect look it gives. 

After this ink was dry, I took the Butterfly Collage image from Studio Light and stamped it directly over top of the stenciled background with Versafine Claire Nocturne ink. I then trimmed this panel down and added it to a piece of black card stock. I adhered this to a white notecard which is slightly smaller than A2 size.

Sidebar - I used this Butterfly Collage set on a previous card. Click here to check that post out if you missed it.

I stamped the sentiment which is from the With Sympathy set from Visible Image. I then trimmed my paper down and rounded the corners. I popped it up with some thin foam tape and added it to the card. Some clear confetti finishes off the card.


I hope you've been inspired. Crafty hugs! ~ Alanna

Find these products I used on my cards at Topflight Stamps.
Friday, April 28, 2023

Carabelle Studio Texture Plate


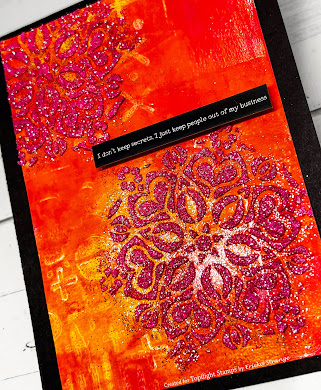
Hello friends! Ericka from Strangely Creative and today I have two cards I made using my gel press along with the Carabelle Studio Mix & Match Texture Plate. I also paired my prints with the Carabelle Studio Art Stamp and Stencil combo called Doily #2

I had so much fun playing with this great texture plate and I love all the different marks it makes on the gel press. I used the PaperArtsy Fresco Paints in Prawn, Coral, and Tango and placed the texture plate on my gel press. The results are so fun!

I then cut my gel print into A4 size and stamped the Doily #2 stamp and heat embossed it with WOW! Embossing in Pea Coat. I added the sentiment from the AALL & Create Ephemera #2 Bite Me package. I love these snarky says even if they are a little small.

For my other card, I used the Doily #2 stencil with embossing paste and sprinkled WOW! Petalicious embossing power on top. Once the texture paste was dry, I heat embossed it for a fun sparkly look. I also added another sentiment from the AALL & Create Ephemera #2 Bite Me package to finish my card.

Thank you for stopping by and I hope you have a wonderful weekend.

Topflight Stamps Supplies Used


Thursday, April 27, 2023

Carabelle Studio Badass Chicken

      Hi Everyone,

Cornelia here today. This week we are featuring Carabelle Studio stamps on the Topflight blog

I used an old background from my stash, made with sprays. I stamped the chickens, colored them with alcohol ink markers and cut them out. I stamped the stamps onto the background and added the cut outs. Heat embossed the sentiment. Added it with foam tape.
I hope you liked this. Thanks for visiting. 
See you next week with more Topflight Stamps inspiration.

And here are the stamp supplies I used: 

Wednesday, April 26, 2023

Happy Birthday Gender Neutral Card


Hi everyone! Today marks the last day of posting for Topflight Stamps! I have enjoyed my time here tremendously and really loved playing with all of their products! This week we're celebrating Carabelle Studios, and today's card is a gender-neutral birthday card using Carabelle Studios texture plates! I like that this card can be used for man or woman! I need many many more of these in my stash!

Step 1 was to create the background using Carabelle Studio's Scalloped Flower texture plate and a gelli plate. The texture plates can be used to create an image on a gelli plate, but they can also be used to stamp! I started by applying color onto the gelli plate with my brayer, and then I placed the Scalloped Flowers texture plate over the color and pressed gently to embed an image (on a side note, you can immediately stamp that inky texture plate onto another card panel and get 2 backgrounds!). I added a white card panel to create an impression. Then I went back and added ink directly onto impression by using it as a stamp! I trimmed it down and adhered it over the other card panel that was stamped with that left over ink on my texture plate! 


Next, I created a 2nd background using Carabelle Studio's Rounds texture plate. This is a fun, abstract texture plate with circles that's just so much fun for a background! I used the same technique that I did with the 1st texture plate. Only this time, I die cut my finished panel with a heart die from Scribbled Hearts by Paper Rose. I adhered the heart at an angle over the background card panel. Then I die cut the Birthday sentiment from Paper Rose using the remains of both texture plate card panels and adhered the layers together. So, save your gelli plate scraps because you can use them for your sentiments! I finished by adhering my sentiment over the heart. 


Playing with gelli plates and texture plates can be so relaxing and also time consuming, so make several card panels at once and then set them aside for future use! Carabelle Studios has a wide array of texture plates to choose from - and remember you can also use them as a stamp! 

Thanks for stopping by today! 

SUPPLIES USED:


Tuesday, April 25, 2023

A Friendship Card

  It's Tuesday, so. you've got Kathi here to share a project with you. This week my teammates and I are showcasing Carabelle Studio's fabulous products. 

Here's my friendship card created with the Head and Shoulders Cling Stamp Set by Kate Crane for Carabelle Studio.


I started the card by brushing SundanceConfettiViolet Chalk, and Mulberry Elements Inks by Lavinia Stamps over the Divine Stencil by Lavinia Stamps onto friendship text patterned paper. This panel was trimmed, edged with black ink, and adhered to a 7" x 5" black card.

 Three of the four ladies from the Head and Shoulders Cling Stamp Set by Kate Crane for Carabelle Studio were stamped with Copic friendly black ink onto white cardstock and onto repositionable label paper. The label paper versions were fussy-cut and placed over their counterparts as masks.

The image panels were die-cut, then each panel was brushed with Sundance Elements Ink by Lavinia Stamps. The masks were lifted and the image panels were colored with Copic markers. Several layers of Glaze pen were added to their earrings to create dimension and shine. A gold glitter pen was used to add sparkle to the crown.

Black cardstock was cut with a slightly larger die, then used to mat the image panels.

The matted image panels were adhered to the background panel, then one of the sentiments from the Bite Me Black Ephemera Die-Cuts #2 by AALL and Create and two idea-ology Chit-Chat stickers were adhered to finish the card.

Please visit my blog, Kat's Tales of Stamping, for more detailed instructions and complete supply lists. 

Topflight Stamps Products Used:


Monday, April 24, 2023

Romance is in the air - a wedding themed tutorial

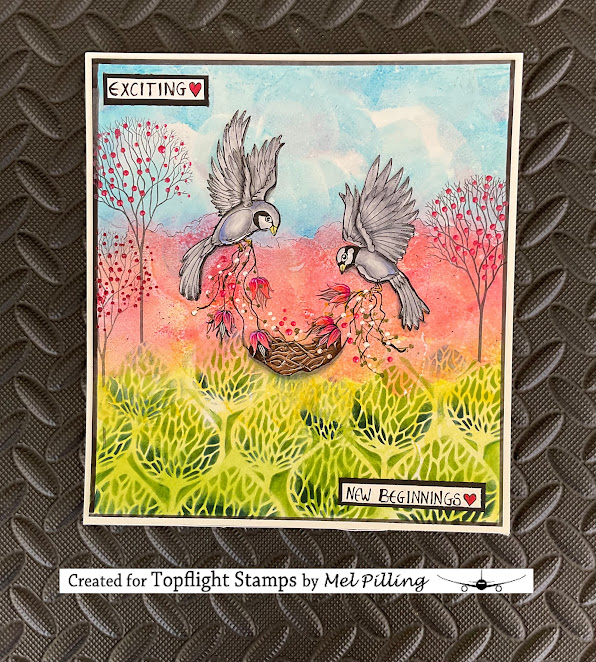
Hi,  MEL PILLING  here today with a wedding card or art journal page starring the Carabelle Studio bird trio. My fellow team members and I are highlighting the beautiful  Stamps by CARABELLE STUDIO  this week. 


'

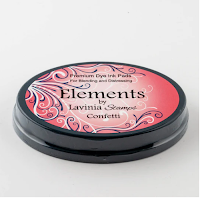
I began with the background using a  12x12 GEL PRESS.  I pressed directly onto the  GEL PRESS with. ELEMENTS INK PADS in BLUE LAGOON , CONFETTI , SUNDANCE  and LIME PUNCH . I then dabbed the press lightly with a make up blender.  I lightly spritzed this with water and took a print. 

Once dry, I used the blender again for the trees at the base.  Using a Lavinia stencil and ELEMENTS INK  in  OLIVE  and DARK DENIM .  I stamped the LAVINIA skeleton trees and the CARABELLE STUDIO  birds in VERSAFINE CLAIR  in NOCTURNE directly onto the background.  I drew the vines holding the nest freehand.  I then stamped the birds again on clean Bristol card.  I coloured them with watercolour markers, fussy cut and glued them onto the background over the previously stamped images.   I fussy cut two of the bell flowers also, to glue on top of the nest for dimension.

CARABELLE STUDIO STAMPS USED


LAVINIA STAMPS PRODUCTS USED


I adore this Carabelle Studio bird set and was inspired by the set to come up with a wedding card.  I have always felt that wedding cards have to be a little extra special, and this set was perfect for it.

Thanks for visiting the blog today. See you soon. 


Saturday, April 22, 2023

And unexpected field trip

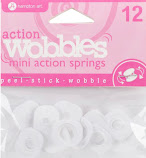
 Hi everyone,  MEL PILLING  here today with a motion card using  WOBBLE SPRINGS . They give you that little extra dimension that you’re looking for sometimes. You just have to touch the right ear of the cat, and it will swing back and forth repeatedly on the Wobble spring.  So fun!!


Using the Square Gel Press , I brayered on ELEMENTS INK  in Della Blue  and splattered lightly with water droplets using a Fan Brush. Then I took a print. 

I used a hill mask and a stencil brush to do two hilltops in Elements ink Truffle . I then used the stencil brush to do the base grass with Elements Lime Punch and Elements Ink Pine . The grass blades were done with watercolour markers gently flicked up from the base.

I stamped the trees in VERSAFINE CLAIR INK in Nocturne .  I stamped the main character on clean card and coloured with watercolour markers. I then fussy cut and stuck onto the card using a self adhesive wobble spring.  I then added the sentiment.


STAMPS USED

,


I hope you give this easy card a try.  These jiggly Wobble cards are a lot of fun to make, but even more fun to receive. 

Thank you for joining us today at the Topflight Stamps blog.  See you soon. 

HAPPY CRAFTING!!! 


-


Friday, April 21, 2023

Patterned Paper Card with Kaisercraft


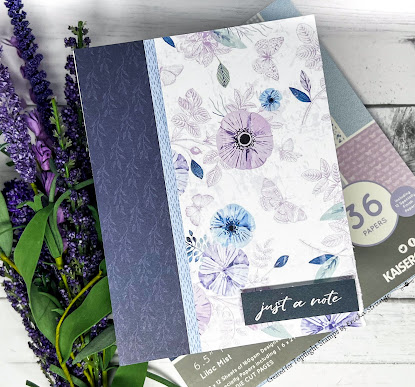
Hello friends! Ericka with Strangely Creative here and today I have two quick cards I made using the lovely Kaisercraft Paper Pad in Lilac Mist. The patterns in this pad are beautiful and I love that it includes several pages of ephemera to coordinate sentiments with your design.

I chose a couple of papers in the pad to work with and designed two cards using a couple of layouts. All these papers go really well with each other and its was fun to pick a couple for my card deigns.  


Once I finished my cards, I add some Hunkydory Precious Pearls Gemstones. Thank you for stopping by and I hope you have a wonderful weekend.

Topflight Stamp Supplies Used


Thursday, April 20, 2023

Be Hoppy with AALL&Create

  Hi Everyone,

Cornelia here today. This week the theme is "anything goes" at the Topflight blog
I finally managed to add those fun frogs from AALL&Create to my collection.  I smeared Gesso onto a card base and then sprayed it with sprays in green and blue. Added the border stamp. I stamped the frogs onto scarp paper and colored them with alcohol ink markers. Cut them out. Stamped the water lily leaf. Stamped the frogs again onto the card and added the cut outs. Added the dragon flies and added a bit of Stickles to their wings. Stamped the sentiment, drew a frame around the words and added them.
I hope you liked this. Thanks for visiting. 
See you next week with more Topflight Stamps inspiration.

And here are the stamp supplies I used: 
01 09 10