Wednesday, January 31, 2024

Wishing You A Happy Birthday!

Hello Crafty Friends, Mary Key here! I will be using several products - Darkroom Door, AALL & Create #169 Wheelies Stencil and Lavinia Dinkles - Deep Yellow and Sepia.

I am going to use watercolor paper for my card. First, I am going to spritz a little water onto my mat and sprinkle a little bit of Lavinia Dinkles - Deep Yellow. I then smoosh my watercolor paper onto the color and then heat dry using my heat gun. 


While its drying, I smoosh the 2nd time to get it a little darker and then heat dry. is same way - spritz water onto my mat and use Lavinia Dinkles Sepia and smoosh my watercolor paper onto the corners of my card and heat dry. This is how its looking.


After my watercolor paper is dry, I will start to use AALL & Create #169 Wheelies stencil with a distress yellow color and blending in some areas. 


Then, using Darkroom Door - Sheet Music textured stamp stamp on the corners first and then here and there of my watercolor paper.  

Now for my stentiment, I used AALL & Create #169 Wheelies stencil with the same distress color and then Darkroom Door - Sheet Music and stamped with Tsukineko Versafine Onyx Black Darkroom Door - Birthday

Now to complete my card, I first distress (with my scissors, the sides) my watercolor paper and my sentiment. This would make a nice Birthday card for a guy, I think. I used foam tape to raise my sentiment and then added to black cardstock to give it some variation. Here is my final card. 


Topflight Stamps Supplies Used:


Tuesday, January 30, 2024

Yet Another Calendar Card!

It's Tuesday so you've got Kathi to share a project with you. I've made another calendar card since a New Year's resolution was to actually use all the mini calendars that I purchased AND mail them. This card features the cranky, yet adorable Dragon Unmounted Red Rubber Stamp by Katzelkraft standing in front of a castle wall made with the Stones Stencil by Lavinia Stamps.


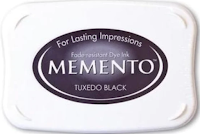
Tuxedo Black Memento Ink by Imagine Crafts/Tsukineko was used to stamp the Dragon Unmounted Red Rubber Stamp by Katzelkraft twice — once onto Bristol Paper and once onto masking paper. 

The Dragon  on the Bristol Paper was colored with Copic markers. The masking paper Dragon  was fussy-cut and placed over his counterpart on the image panel as a mask.

A piece of low-tack tape was placed horizontally over the bottom of the Dragon .

A castle stencil that I've had forever was placed onto the image panel towards the top. Della Blue then Confetti Elements Inks by Lavinia Stamps were brushed over the ramparts of the castle to create a sky.

The stencil was inverted to cover the ramparts/crenellations and light grey ink was brushed between the castle stencil and the tape to start a stone castle wall. The Stones Stencil by Lavinia Stamps was placed over the light grey inked area, then darker grey ink was brushed over the stencil onto the image panel.

My "pouncy tool" (looks like steel wool attached to a stamp block) was used to randomly pounce Russet OrangePaprikaSaharaBermuda, and Graphite Elements Inks by Lavinia Stamps onto the stones to make them more look stonier.

Watercolor markers were used to outline the rocks and add details to the castle's crenellation/ramparts. 

The tape was removed. With the mask still covering the Dragon, tan ink was brushed along the bottom of the image panel. Chalk pencils were used to add shadows and detail to the ground and yellow palette chalk was used to add a glow around the dragon.

The Dragon's mask was finally removed and glittery watercolors were used to add details to the Dragon's scales, eyes, and the ornaments on his head and tail.

Nocturne VersaFine Clair Ink by Imagine Crafts/Tsukineko was used to stamp the sentiment from the Classic Sentiments Clear Stamp Set by Heffy Doodle onto Copic colored white cardstock. A flag die was used to cut the sentiment. A thin strip die was used to cut metallic copper cardstock. The thin piece of copper cardstock was adhered over the Dragon on the image panel. The flag was adhered to the copper cardstock "flagpole" as shown.

The image panel was edged with black ink, trimmed to 4.625" x 6.625" and matted with a piece of 4.75" x 6.75" metallic copper cardstock. The mini calendar received the same matting treatment. The image panel was then adhered to a 5" x 7" black card.

Please pop over to my blog, Kat's Tales of Stamping, for step-by-step instructions and complete supply lists.

Topflight Stamps Products Used:


Thanks for visiting today!


Thursday, January 25, 2024

Mixed Media Red & Pink Valentines


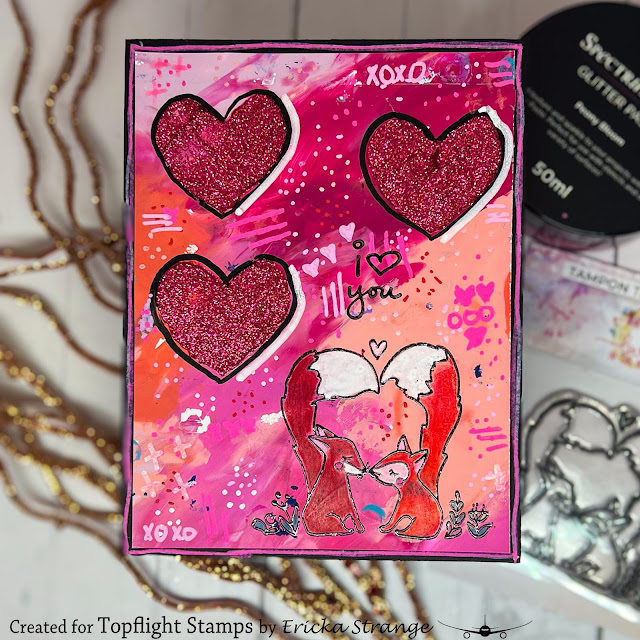
Hello friends! Ericka from Strangely Creative here and today I'm playing with my gel press and some PaperArtsy Fresco Acrylics to make a mixed media valentines.I started by applying PaperArtsy Fresco Acrylics in Blah Mange, Bubble Gum, Cerise, Peach Nectar and Peachy Keen to my gel press with my finger to make a fun print. 


I then stamped this cute Love in the Moon stamp and heat embossed it and colored it in with some pencils. 


I then added the PaperArtsy Frances Papillon PS377 stencil using the Spectrum Noir Glitter Paste in Peony Bloom. I added some Posca pen marks around my card and finished with a Darkroom Door sentiment from the Hearts set. 


Thank you for stopping by and I hope you have a wonderful weekend!

Topflight Stamp Supplies


Red and Pink

 Hi Everyone,

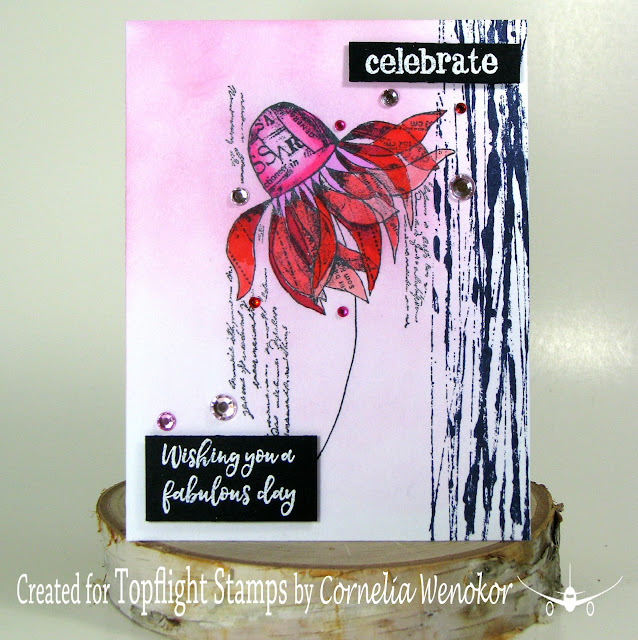
Cornelia here today. This week's theme is "Red and Pink".. 
I guess it's because we are close to Valentine's Day. I first was hesitant about the color combination and it took me a while to come up with something, but I am quite happy with the result!
I used this pretty flower from Crafty Individuals and colored it in red and pink shades. Did some light brushing with distress ink (Kitsch Flamingo) in the back of the flower. I added the stamp Abstract 04 onto the side. Added the heat embossed sentiments with foam tape. I also added a bunch of gems for some sparkle..
I hope you liked this. Thanks for visiting. 
See you next week with more Topflight Stamps inspiration.

And here are the stamp supplies I used: 
(not exactly what I used, but it would work)


Wednesday, January 24, 2024

Make Each Day Count

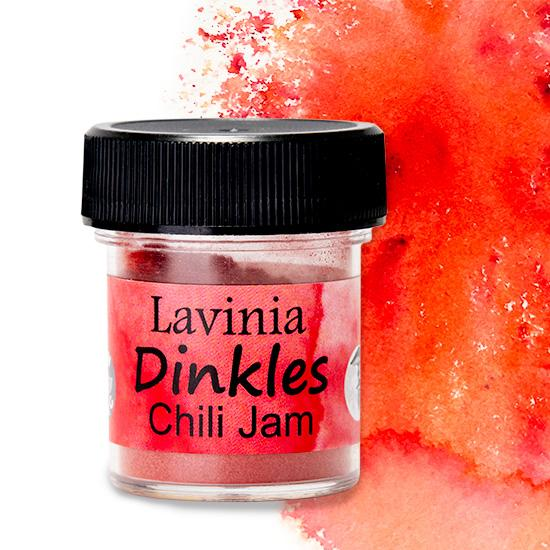
Hello Crafty Friends, Mary Key here! This week is "Red and Pink" along with my DT members. I will be using AALL & Create #233 Flower Moments, along with some Lavinia Dinkles colors I will be using is Pink and Chili Jam along with WOW! Embossing Powder Petalicious Jo Firth-Young,  

This is a very easy slimline card that I will be making using watercolor paper and using Tsukineko Versafine Onyx Black. I like using Versafine for so many of my watercolor cards/mixed media and ATC's. 

Next, I stamp my image onto watercolor paper and spritz some water onto my mat and then use a little color of Dinkles - Pink with my watercolor brush. I just spread the color with my brush and then dry and add a little more pink to get it darker, then dry and added splaters of water and use a paper towel to dab the excess off and heat dry using my embossing heat gun. I stamped an extra piece of the stamp of the flowers to watercolor using Dinkles - Chili Jam. I use my watercolor brush with some water to just add a light color and then use a little more Dinkles Chili Jam to get an intense red color and I just outline where it will show the dark color and then I start to fussy cut both flowers separately and outline in black ink.

Now to start putting my slimline card together. I just stress my watercolor cardstock with scissors and then I started to use WOW! Petalicious embossing powder outlining my card and then heat embossed. 

For my sentiment I use WOW! Opaque Bright White embossing powder with some black cardstock, heat embossing sentiment on black cardstock, then using my scissors I started to stress the edges. The flowers I added some foam tape to look dimensional. 

Here is my final card with some white cardstock and black cardstock to complete my card.


Thank you for stopping by and keep creating!

Topflight Stamps Supplies Used:


Tuesday, January 23, 2024

Lovebirds! A Red and Pink Valentine's Day Card

Greetings! It's Tuesday so you've got Kathi here to share a project with you. This week my Topflight Stamps teammates and I are focusing on a red and pink color scheme, so I've created a Valentine's Day card with PaperArtsy paints, stamps, and a stencil. 

Here it is!


Tuxedo Black Memento Ink by Imagine Crafts/Tsukineko was used to stamp the birds from the JOFY Lovebirds JM20 Cling Rubber Stamp by PaperArtsy onto white cardstock. I took some creative license and filled in the line art on the bird's tails to facilitate fussy-cutting. Both birds were colored with Copic markers, and edged with a black marker. A dot of white gel pen was used to add accents to their pupils and a white pencil was used to add highlights to their beaks.

Small drops of Blah MangeTaro Milk Tea, and Bubble Gum Fresco Finish Chalk Acrylic Paints by PaperArtsy were added to a piece of foam which was smooshed onto a craft mat to get the foam to absorb into the paint. The foam was then pounced onto a piece of mixed media paper until the panel was mostly covered. 

Small drops of ClaretBlood Orange, and London Bus Fresco Finish Chalk Acrylic Paints were added to a second piece of foam. This was randomly pounced over the pink background to add translucent reds to the background. 

Small drops of Blah MangeTaro Milk Tea, and Bubble Gum Fresco Finish Chalk Acrylic Paints were placed onto the craft mat one color at a time, spread with the 2" Speedball Breyer, then randomly rolled over the background to knock back the bolder colors. 

Small drops ClaretBlood Orange, and London Bus Fresco Finish Chalk Acrylic Paints were placed onto the craft mat one color at a time and spread with the 2" Speedball Breyer. A color at a time, a wiry pouncy tool was pressed onto the paint, then pounced onto the background to create visual interest. The pink/red background was trimmed to 4.5" x 6.5" and set aside.

True confessions, I hated the first version of the background, so I "rescued" it by brayering the ClaretBlood Orange, and London Bus Fresco Finish Chalk Acrylic Paints overtop.

Black/Gold pigment ink was used to stamp the clock heart from the Darcy 02 Cling Rubber Stamp Set by PaperArtsy onto the red painted background, embossed with clear detail embossing powder, and fussy-cut. The red background was trimmed to 4.75" x 6.75", edged with the black/gold ink, heat set, and adhered to a red 5" x 7" card.

Two decorative ribbon slider sentiment dies were used to cut another remaining piece of red painted cardstock. Both were edged with the black/gold pigment ink.

The Scrapcosy PS374 Stencil by PaperArtsy was placed over the remaining piece of red painted background. The black/gold pigment ink was sponged over the stencil onto the red painted background. This was cut into two strips which were then edged with the same ink.

Nocturne VersaFine Clair Ink by Imagine Crafts/Tsukineko was used to stamp the "Lovebirds" sentiment from the JOFY Lovebirds JM20 Cling Rubber Stamp by PaperArtsy onto a strip of the pink/red painted paper. The stamp was re-inked with the black/gold pigment ink, heat embossed with clear detail embossing powder, then cut with a small rectangle die-cut. 

The pink/red panel was edged with the gold/black pigment ink and matted with the red background panel. The bottom strip was adhered to the pink panel as shown. The heart was centered and adhered, then both birds were adhered perching upon the heart. 

The small red painted strip was threaded through the large ribbon slide die and adhered to the top of the card as shown. The smaller ribbon slide die was adhered atop the larger one, and the sentiment die-cut was adhered to finish the card.

Please pop over to my blog, Kat's Tales of Stamping, for more information including complete supply lists.

Topflight Stamps Products Used:


Thanks for visiting today!
01 09 10