Friday, August 31, 2018

Dreams

Hi! Its Ericka here again with another fun Friday post. Today I am using the Visible Image set No Space for Dreams.
https://topflightstamps.com/products/visible-image-no-space-for-dreams-clear-polymer-stamp-set


I've been playing around with my gel press making fun backgrounds. I thought this one would be perfect for this set.

Once the paint had dried, I stamped the image in Versmark ink and used the Magical Mysteries Midnight Magic Embossing Powder. It melted like liquid metal and was so fun to watch it turn into this beautiful blue.


For more information on how I created this card, pop on over to my blog at Strangely Creative and say hi. Have an awesome weekend and I hope you dream well!

Here are a few more items I used to make my card:
https://topflightstamps.com/products/rita-barakat-emerald-creek-magical-mysteries-embossing-powder-midnight-magic

https://topflightstamps.com/products/gel-press-reusable-gel-printing-plate-6-x-6-round-gel-plate


Wednesday, August 29, 2018

Choose Happiness


Hello!  Toni here again with a happy happy journal page.  This is actually the first page of a journal--who wouldn't want to keep flipping through those pages when greeted by this inspirational/aspirational message?

I stamped the smileys from Visible Image Choose Happiness then stenciled soft blue clouds, not masking the smileys but avoiding inking them. The smileys are colored with Zig markers. I stamped that bold sentiment last. I love how eye-catching it is, don't you?!


Please check out my blog, Frankie Helps Craft, for more of my designs.  I'll see you next week!

Tuesday, August 28, 2018

Visible Image Alice in Wonderland Series

Hello there, Lisa Hoel here with a wild and crazy 'tea party' card courtesy of 
the Mad Hatter stamp set by Visible Image.


You can see more details about this card in the blogpost on my blog Creative Juice. 
In the meantime, following are the Topflight Stamps products used:

The Mad Hatter

Fibres

Emerald Creek - Dragons Egg


Have a great week and thanks for stopping by!!


Monday, August 27, 2018

Studio Light - No Line Watercolor Butterfly

Hi Everyone and welcome to the Topflight Stamps blog! It's Jenny here, and today I have a card project that uses a simple but effective 'no line' watercolor technique to give a soft and pretty effect to a beautiful stamped image.


The stamp I'm using today is the Studio Light So Spring Mixed Media Butterfly Collage.  This is a great set which has a main 'collage' butterfly stamp, a separate smaller butterfly stamp, and unique and versatile sentiment. 


To create the card, I first stamped the main image in the centre of an A2 panel of coldpress watercolor paper (I used Canson XL) using a soft ink - Antique Linen Distress Ink.  Basically a light ink that is watersoluble and therefore fades out when you paint it, but leaves some of the stamped image behind.  I also stamped the small butterfly image on a separate scrap of watercolor cardstock.


I then used pan watercolors and a waterbrush (I'm using the new set by Altenew) to color in the image.  I used the wet on wet technique, wetting each area with a paintbrush first with clear water, then dropping in the colors and letting them wick out.   When dry I trimmed out the small butterfly, and added some white gel pen highlights to the butterfly wings and the florals.    I also stamped the main sentiment over the top in Versafine Onyx Black ink. 

I adhered the main panel to a card base, then popped the small butterfly up on foam tape.  As a finishing touch I added some clear confetti sequins. 

Hope you like it! I love no -line watercolor, it really is easier than it looks - I strongly recommend you give it a try!  You can check out the other supplies that I used over at my blog. 

Have a wonderful day!
Jenny x

Friday, August 24, 2018

Queen of Hearts

Hello and Happy Friday! It's Ericka here and I'm also showcasing one of the new Visible Images from the Alice in Wonderland set. All of these are such fun images and today I'm using the Queen of Hearts.


I love the sentiments in this set, it was hard to decide which one to use but I settled on this one.
 
For more information on how I created this card, check out Strangely Creative. Thanks for stopping by and have a fantastic weekend.

Wednesday, August 22, 2018

The Clock is Ticking


Hi, everyone!  Toni here with you to showcase the new Visible Image Alice in Wonderland stamps that have arrived in the shop. Have you seen them in all their fabulous glory?  They're so very fun!

Here I'm using the Visible Image Alice in Wonderland White Rabbit for a birthday card. 29 again, are you? LOL.


I created the background by sponging Distress Oxide onto the card front then using the Visible Image Time Tunnel stencil as a mask, lifting off ink using a baby wipe.  
 

Both the numbers and letters are embossed.  The numbers were stamped in Distress Oxide Picked Raspberry then gone over with a Copic to make them brighter before a coat of Glossy Accents was added. Shiny!


Please check out my blog, Frankie Helps Craft, for a full product listing.  I'll see you next week!

Monday, August 20, 2018

Visible Image Tweedle Dum Another Way

HI Everyone and welcome to the Topflight Stamps blog. It's Jenny here and I have another card using the same cool stamp set by Visible Image that I used last week from their new Alice in Wonderland collection.
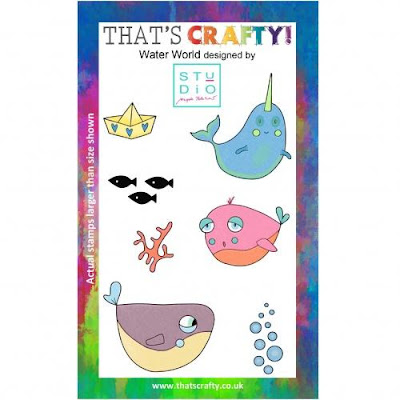


It's the Tweedledum and Tweedledee set shown below.


This this week I used it in a different way, along side the 
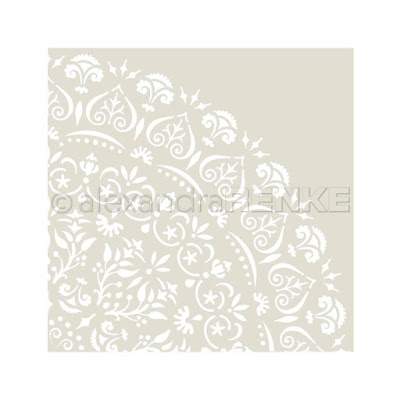
Visible Image Distorted Chess stencil.

To create my card, I used my Gel Press with some Paperartsy acrylic paints. I laid down some blues to create an ombre blue base with my press.  I then laid down some purple, overlaid the stencil and then laid over my blue base again, to get the effect you see here.  I then flicked on some white ink.

When it was dry, I stamped one of the faces from the stamp set in black ink slightly above the centre.  I filled in the eyes with white gel pen. I was going for a 'fading cheshire cat' look (for those that know the book/movie), so that only TD's face was there.


I then stamped the sentiment from the set in embossing ink on black card stock and heat embossed in white.  I trimmed it out and popped it up on foam tape below the face.  I backed the entire panel to a white card base.

Hope you like it, I admit, it's a  little weird, but then, that's very Alice!  Be sure to check out the whole collection over on the Topflight Stamps store.

Have a wonderful day all!

Jenny x

Friday, August 17, 2018

Mandala

Happy Friday! It's Ericka here with a fun stencil post. I just received this beautiful Mandala Stencil by Alexandra Renke.
https://topflightstamps.com/products/alexandra-renke-mandala-stencil
Here is the fun card I made using resist ink, shimmer spray and the stencil.

I love this look and it was so easy to make, I just traced the image with the resist pen and sprayed it with shimmer spray.

For more information on the supplies I used and a short little video showing the process. Check out Strangely Creative.

Thanks for stopping by and have a wonderful weekend!


Wednesday, August 15, 2018

Never Too Late


Hi, all!  Toni here today sharing a page from a new journal I've started.  Over the coming months I'll be exploring self-love and self-acknowledgment, and sharing the pages with you.  I'm excited!

This particular page uses images and sentiment that I associate with time.  The slooooow (but steady!) Katzelkraft Snail, a sentiment from Katzelkraft Dreamer paired with another from Tim Holtz and a clock from the same Tim Holtz set.


Katzelkraft - Dreamer - Sentiments - Unmounted Red Rubber Stamp Set

After masking off the Katzelkraft Snail, I randomly sponged Distress Oxide onto the background (using my fav colors, of course), then stamped the clocks before spritzing with water. I love how the colors are translucent . . .sometimes.

I thought the result lacked a bit of depth and interest so added a bit of Visible Image Meshing Around in purple. Love the results!


Do stop by my blog, Frankie Helps Craft, for a full product listing.  Have a great rest of your week!


Monday, August 13, 2018

Visible Image - Tweedle Dum and Tweedle Dee

Hi Everyone, it' Jenny here with a card that showcases the new Alice in Wonderland range from Visible Image.  


I'm using the Visible Image Tweedledee and Tweedledum set from their new Alice in Wonderland collection.  It comes with interchangeable faces for the main image so you can stamp it twice for dee and dum!  


The background also uses the Gel Press printing plate carried by Topflight, along with the Alexandra Renke Hearts stencil and Darkroom Door Polka Dots stencil.   The acrylic paints I used are by Paperartsy also carried by Topflight.


I first created the background by using the Gel Press with acrylic paint and laying down the Polka Dot stencil to take a print.  When dry, I added more paint and laid down the Alexandra Renke stencil for a layered look, trimmed it down and set it aside to dry. 


I stamped the main image twice onto Bristol Smooth cardstock in Versafine Onyx Black ink, masking off the face the second time and stamping the other face included in the set instead so the lads look like they are looking at each other.  I also stamped the sentiments, and the hats.   I then colored them in using my Zig Clean Color real brush markers, which blend great on Bristol paper. 

I trimmed out the images and adhered them directly to the panel, with the hats popped up on foam tape.  I also outlined the sentiments in white gel pen so that they stood out more.  I hope you like it, something a little different from me - I can't wait to play with my Gel Press more!

I hope you like it - be sure to check out the Alice in Wonderland collection by Visible Image over on the Topflight Stamps shop, they're fab!  You can also see a full list of the supplies I used over on my blog.

Jenny 

Sunday, August 12, 2018

Visible Image Sentiment Wood Block

Welcome to the Topflight Stamps Blog!

Today, I'm sharing a project I made using a recycled wooden block. I painted the block first with my favorite Indigo Blue Gesso. Then I added the Crackle Stencil from Darkroom Door with PaperArtsy Grunge Paste

After it dried completely, I added four different PaperArtsy Paints to finish off the wood block. Finally, I stamped the sentiment stamp from Visible Image called Outside the Lines, cut out the words and glued it to the wood block with DecoArt DecoPage medium. 

These little inspirational word blocks are fun to make and give to friends and family on any occasion. 


Thanks for stopping by! Donna


Visible Image - Outside the Lines


IndigoBlu - Gesso
Darkroom Door - Crackle Stencil

Saturday, August 11, 2018

Paperartsy Jofy Stencil

Welcome to the Topflight Stamps blog.  It's Clare with you today and this week I wanted to share with you a little make where I just used a stencil and added a personal touch.


I stencilled the flower onto some craft card using Nougat Paperartsy Fresco paint and Jofy flower stencil PS082


On top of the white, chalky flower I added some colour using Neocolour II water soluble crayons and pencils.  Using a fine black pen I traced around the edges and added in my own doodles.


Not quite to the standard of Jofy's gorgeous stamps but nice to put a personal spin on a beautiful bloom.

Pop over to Topflight Stamps online store to check out endless amounts of stamping delights!

Happy Crafting,

Clare.

Friday, August 10, 2018

Water World

Welcome to the Topflight Stamp blog! It's Ericka here and I have a fish card today using a fun set from Magda Polakow - Water World.

https://topflightstamps.com/collections/magda-polakow/products/thats-crafty-clear-stamp-set-water-world-preorder

For the background I used Distress Oxide Inks on photopaper. I also stamped the background images using the Distress Oxide Inks. I stamped the fish and used Sharpies to color them. I fussy cut them and then added them to the card using foam tape.
I added a little gel pen to the fish to give them more details. I love how fun this set it to color.
Check my blog here for more details on how I created this underwater card. Thank for stopping by and have a fun weekend!


01 09 10