Tuesday, September 1, 2026

Sunflower Best Wishes Card

It's Tuesday which means you've got Kathi here to share a project with you. It's another "Anything Goes" week and the beginning of September so sunflowers are in bloom! 


Here it is!


I wanted to use the "no-lines" coloring technique to color the beautiful large sunflower from the Sunflowers Clear Stamp Set TE33 by Tracy Evans Boutique. Use yellow and orange/yellow Memento Ink to stamp the sunflower onto white Copic-friendly cardstock then color it with Copic markers. 

Use the largest die from the Polaroid Pop Die Set DI-89 by AALL and Create to cut the image panel, then fill in the area around the sunflower with overlapping blue dots to create a pointillistic background. 

Position the beetle and the bee stamps from the Sunflowers Clear Stamp Set TE33 facedown on the image panel die-cut. Ink both stamps with Nocturne VersaFine Clair Ink by Imagine Crafts/Tsukineko and stamp. Remove the beetle stamp, then clean and dry the bee stamp thoroughly. Reposition the bee stamp facedown in another place on the image panel die-cut. Ink the stamp with Nocturne VersaFine Clair Ink and stamp. Heat set the image panel die-cut.

Use a Fine-tip marker to add red dots and lines to the beetle. Use a white gel pen to add white to his eyes. When dry, add green pupils. Use a clear glaze pen to add dimension and shine to the beetle's body. Let the glaze gel ink dry, then add another layer to build up the dimension to its body.

Use a yellow marker to add yellow to the bees' bodies. Use a Sparkle Clear Overlay Brush Pen by Spectrum Noir to add glitter to the bees' wings. Set the image panel die-cut aside.

Cut a piece of patterned paper to 4" x 6" to create the background panel.. I used patterned paper that is no longer available, but thought that the primarily orange paper from the Ink Drops - Sunset 6x6 Patterned Paper Pad by Craft Consortium would be a good substitute for what I used.

Use Russet Orange Elements Premium Dye Ink by Lavinia Stamps to stamp the small sunflower onto the background panel. Position the "Best Wishes" sentiment stamp from the Flower Power Clear Stamp Set TE37 by Tracy Evans Boutique facedown towards the bottom of the background panel. Ink the sentiment stamp with Nocturne VersaFine Clair Ink and stamp.

Edge the background panel with  Russet Orange Elements Premium Dye Ink and Nocturne VersaFine Clair Ink. Heat set the background panel. 

Adhere the image panel die-cut to the background panel, then adhere the background panel to a 4" x 6" black card.

Please pop over to my blog, Kat's Tales of Stamping, for step-by-step instructions and complete supply lists.

Topflight Stamps Products Used:


Thank you for visiting today!

Sunday, August 30, 2026

Golden Layers: Adding Foil to Gel Prints


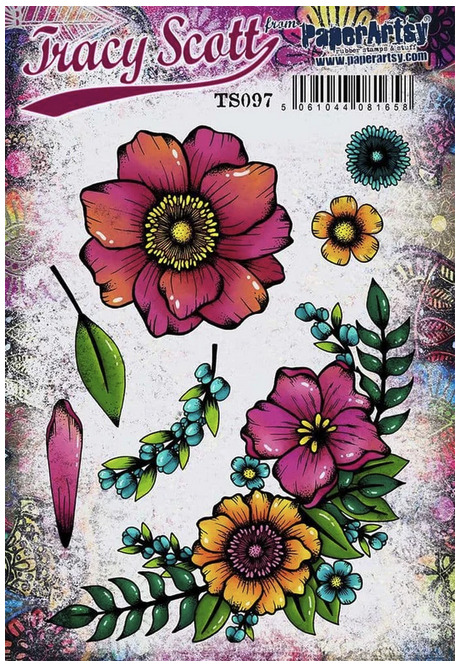
Hello friends! Ericka from Strangely Creative here, and today I’m sharing a colorful mixed media journal page featuring a beautiful PaperArtsy Tracy Scott bloom and a gel print with a little unexpected sparkle.

If you’ve followed me for a while, you know how much I love experimenting with my gel plate. Sometimes I start with a plan, and other times I simply wonder, “What would happen if I tried this?”

For this background, I decided to experiment with adding pieces of gold foil directly to my gel plate, and I love the random bits of shine it created!

Adding Gold to the Gel Plate

I started by placing small pieces of gold foil randomly across my gel plate.

Rather than trying to create a specific pattern, I let the pieces fall where they wanted. I then added acrylic paint and pulled my print as usual.

The result was a colorful background with unexpected flecks and patches of gold scattered throughout.

I love techniques like this because you never know exactly what you’re going to get. Those imperfect little bits of gold catch the light and add so much interest without taking over the entire background.


Creating the Watercolor Bloom

With my background finished, I reached for the gorgeous PaperArtsy Tracy Scott 97 stamp.

I stamped and heat embossed the flower in white, which created a beautiful resist for my watercoloring.

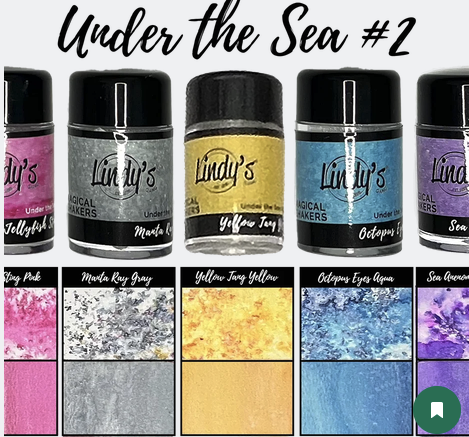
For color, I used the Lindy’s Gang Under the Sea #2 set, letting the colors flow and blend within the embossed lines. The white embossing keeps the bloom feeling light and airy while allowing those vibrant Lindy’s colors to really shine.

Once everything was dry, I fussy cut the flower so I could layer it over my gel-printed background.

Bringing the Layers Together

After positioning the bloom, I added a few simple white marks along the side of the page.

I didn’t want to add too much and compete with the flower or those beautiful flashes of gold. Sometimes a few simple marks are all you need to bring a mixed media piece together.

The contrast between the loose gel print, metallic foil, crisp white embossing, and watercolor creates plenty of texture and movement without needing lots of additional embellishments.


Adding One More Layer of Texture

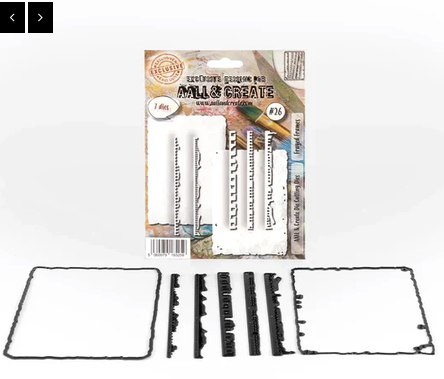
For my final step, I ran the entire piece through my die-cutting machine using the AALL & Create #26 Frayed Frames die.

I love the slightly imperfect, distressed edge it gives the page. It works beautifully with the unpredictable nature of the gel print and gives the finished piece another layer of texture before adding it to my journal.


Thank you so much for stopping by today! I hope this journal page inspires you to pull out your gel plate, experiment with your supplies, and see what happens when you add a little unexpected sparkle to your next print.

Have a wonderful week and happy creating!


Topflight Stamp Supplies 

PaperArtsy - Tracy Scott 97
Shop at:
TP
AALL & Create - 26 Frayed Frames
Shop at:
TP
Embossing - Bright White Ultra Fine
Shop at:
TP
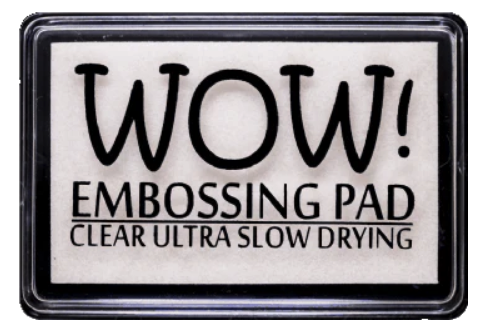
WOW! Embossing - Clear Embossing Pad
Shop at:
TP
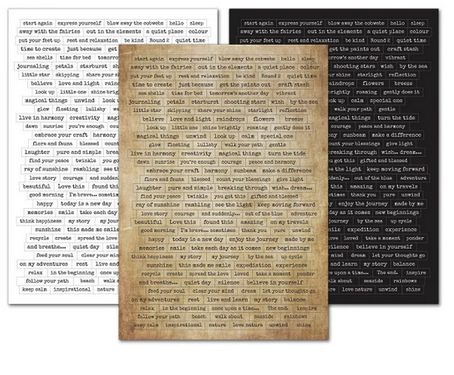
Lavinia - Sentiment Stickers - Uplifting Collection
Shop at:
TP
Lindy's Gang - Magical Shakers - Under the Sea #2
Shop at:
TP
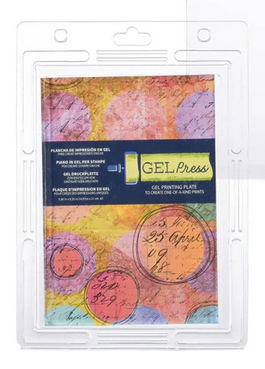
Gel Press - Reusable Gel Printing Plate
Shop at:
TP
Speedball - 2
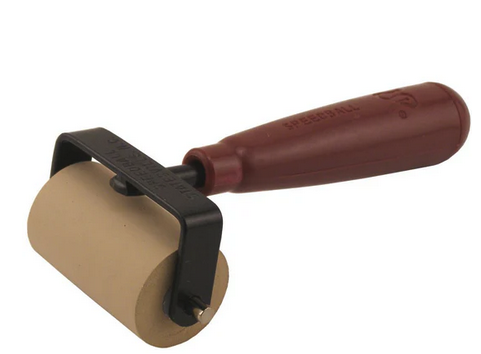
Speedball - 2" Brayer
Shop at:
TP

Wednesday, August 26, 2026

Forest Friends Lavinia Card

Hello, Lisa Hoel here. This week at Topflight Stamps our theme is Anything Goes. I had a hankering to build a scene with Lavinia stamps (so satisfying). The background is created with the Lindy's Magicals Pigment Powders set Enchanted Forest. Those powders pack a punch and are fun to use!

Lisa Hoel for Topflight Stamps #creativejuicefreshsqueezed #topflightstamps


Thanks for stopping by and be sure to check out the Topflight Stamps store for a wide selection of different and hard to find stamps, stencils and other paper crafting supplies from all around the world! Also keep an eye here on the Topflight Stamps blog. There is new inspiration posted often!


Topflight Stamps Supplies Used:

Lavinia stamps - Ashryn

Lavinia stamps - Forest Arch

Lavinia stamps - Fairy Foragers

Lavinia stamps - Fern Heads

Lavinia stamps - Flora Set

Lavinia stamps - Woodland Fern

Lavinia stamps - Oak Leaf Flourish

Lindy's Magicals Pigment Powders - Enchanted Forest

Lavinia Elements Ink - Soft Cygnet, Pixie Green, Pine
Versafine Clair ink - Nocturne
AALL & Create stamp set - Everyday Sentiments
watercolors


Tuesday, August 25, 2026

A Scenic Card with Lavinia Stamps

Greetings! It's Tuesday and you've got Kathi here with a project created for an "Anything Goes" week. I missed last week's "Outdoors" theme so I decided to create a scenic card with products by Lavinia Stamps. I've used the Acorn Abode Clear Polymer Stamp, the Hanging Lanterns Clear Clear Polymer Stamp, Dana Clear Polymer Stamp, and the Texture 2 Clear Polymer Stamp with six colors of Elements Premium Dye Ink and the ever-so-useful Hills Acetate Mask.


Use Tuxedo Black Memento Ink by Imagine Crafts/Tsukineko to stamp the Acorn Abode Clear Polymer Stamp by Lavinia Stamps twice - once on panel of Bristol paper and once onto repositionable sticker paper.

Heat set the image stamped onto the Bristol paper, which will become the image panel. Fussy-cut the sticker-paper version and adhere it atop its counterpart on the image panel.

Place the flatttest mask from the Hills Acetate Mask by Lavinia Stamps just above the rocks so that it's covering the bottom of the image panel. Brush Soft Cygnet Elements Premium Dye Ink by Lavinia Stamps over the top of the Hills Acetate mask and around the masked Acorn Abode. Next brush Lemon Drop Elements Premium Dye Ink onto the image panel blending the ink colors as you go. Continue this process with the Lime Punch, Pine, and Olive Elements Premium Dye Inks working from the center of the image panel outwards. 

Use a water-filled Fine Spray Misters by Spectrum Noir to mist the ink to add some white speckles and splatter. Remove the Hills Acetate Mask and heat set the panel.

Trace the Hills Acetate Mask onto scrap cardstock or thin acetate, cut along the traced line, and place the upper part of the temporary mask to cover the top part of the image panel.

Brush Bermuda Elements Premium Dye Ink over the temporary mask to ground the 
 masked Acorn Abode. Press the Texture 2 Clear Polymer Stamp by Lavinia Stamps onto the Bermuda Elements Premium Dye Inkpad and randomly stamp over the temporary mask and the masked Acorn Abode to add texture and interest.

Remove the temporary mask and the mask from the Acorn Abode. Color the image with Copic markers. Trim the image panel to 4.25" x 6".

Place the image panel onto a stamping platform so that it's against the bottom, but centered horizontally. Place the Hanging Lanterns Clear Clear Polymer Stamp by Lavinia Stamps facedown onto the right side of the panel so that it's a bit over the right edge. Ink the stamp with Nocturne VersaFine Clair Ink by Imagine Crafts/Tsukineko and stamp. Remember that you can always re-ink and stamp again if needed to attain a good impression

Clean and dry the stamp. Position the Hanging Lanterns Clear Clear Polymer Stamp facedown in the center of the image panel, but with the end of the stamp slightly above the stamped Hanging Lanterns. Ink the stamp with Nocturne VersaFine Clair Ink and stamp. Make sure that the image panel didn't move before inking and stamping again. Unlike me. Oops.

Repeat the above with the Hanging Lanterns Clear Clear Polymer Stamp on the left.

Position the Dana Fairy Clear Polymer Stamp by Lavinia Stamps facedown on the image panel so that her feet and hand are on the stem of the Acorn Abode. Ink the stamp with  Nocturne VersaFine Clair Ink and stamp.

Remove the image panel from the stamping platform and thoroughly heat set it. Use watercolor pens to color the Hanging Lanterns and Dana's wings and lantern. Use glitter markers to add yellow glitter to the circles and black glitter to the dots in the Hanging Lanterns.

Edge the image panel with Bermuda and Pine Elements Premium Dye Inks, then edge again with Nocturne VersaFine Clair Ink.

Finish by adhering the image panel to an A6 black textured card.

Please pop over to my blog, Kat's Tales of Stamping, for step-by-step instructions and complete supply lists.

Topflight Stamps Products Used:


Thank you for visiting today!

Monday, August 24, 2026

Notes of Love with PaperArtsy

Hi, friends!  Welcome back to the blog.  It's Walter with you today as I kick off a new week's theme, which is . . . anything goes.  I really enjoy the designs of Mags Woodcock.  I first came across her work in Somerset Studio magazine and was so excited to see her products with PaperArtsy on the Top Flight Stamp website.  This week, I used two of her coordinating products, PaperArtsy - Mags Woodcock - EMW004 - Rubber Cling Mounted Stamp Set and PaperArtsy - Stencil - Mags Woodcock - PS517 to create my card.  Let's jump into my process!


I began with an A2 sized piece of watercolor paper that I spritzed with water. Instead of painting with watercolors, I decided to paint with Distress Oxide Ink smooshed on my craft surface and mixed with water.  Using the oxide inks mixed with water gives an opaque, almost paint-like look.  I used a mop brush to first move Tattered Rose around the inside of the paper and then Antique Linen around the edges.


Once dry, I stamped the heart stamp onto the panel using Versafine Fallen Leaves ink.  I also stamped the large heart and small heart onto masking paper and set that aside.  I then stamped the image of the word Love repeated several times using Ground Espresso Distress ink.


I fussy cut each of the heart masks from the masking paper and applied them to the images.  I wanted the brown color of the stenciling to be lighter than the dark shade of Fallen Leaves so I used Ground Espresso Distress Ink to add that contrast.


I removed the masks and added spots of a varying pink color to the hearts and did that with a mixture of Spun Sugar Distress Oxide ink and water.  I then tapped the entire panel with a brush loaded with Tea Dye Distress ink to some vintage grunge.  Some subtle shine was added to the panel using the ovals on the stencil and Delicata Golden Glitz ink.  I also added some splatter using Old Paper Distress Spray Ink.  In order to add further age to the panel, I used a plastic knife to distress the edges and then ran Ground Espresso Distress ink around them.

Some kind of a floral element was needed to truly complete the design.  I stamped three of the small flowers, colored them with alcohol markers, Accented the petals with a gold gel pen, added grunge with Tea Dye Distress ink, and fussy cut them.  They were adhered with double-sided foam tape and embellished with acrylic drops that I colored gold using a Studio Light Gold Metallic Martker.


I'm really happy with this design.  With elements of love, nature, and music . . . it truly strikes the right note!  Thanks for spending some time with me on the blog today.  I'll see you again next week.  Until then . . . be well!

Top Flight Stamps Products Used:


01 09 10