Wednesday, May 21, 2025

Set of Thank You Cards with L'Encre Stamps

Hello, Lisa Hoel here. This week at Topflight Stamps our brand focus is on L'Encre! I made a set of thank you cards using the In the Heart of the Woods stamp set. 


Lisa Hoel for Topflight Stamps #creativejuicefreshsqueezed #topflightstamps

I stamped the images onto Gel Press prints with permanent ink and then used acrylic paint to color the images in. The new AALL & Create Die Set, Quirky Post cuts a great frame for the focal images. 

Thanks for stopping by and be sure to check out the Topflight Stamps store for a wide selection of different and hard to find stamps, stencils and other paper crafting supplies from all around the world! Also keep an eye here on the Topflight Stamps blog. There is new inspiration posted daily!

Topflight Stamps Supplies Used:

L'Encre stamp set - In the Heart of the Woods


AALL & Create Die Set - Quirky Post


AALL & Create Stamp Set - Everyday Sentiments

Versafine Pigment Ink Pad - Onyx Black
Masterpiece Designs Die Set - Tag Mini Album

Tuesday, May 20, 2025

Thank You Card

 Greetings! It's Tuesday so you have Kathi here today to share a project with you. This week the team is showcasing products by L'Encre et L'Image, a French company that makes wonderful and whimsical stamps, great stencils, and other fab products.

Here's a Thank You card created with the A Stroll in the Garden Clear Stamp Set. 


Use Tuxedo Black Memento Ink by Imagine Crafts/Tsukineko to stamp the big planter from A Stroll in the Garden Clear Stamp Set twice — once in the center of a 6.5" x 4.5" piece of white cardstock and once onto repositionable sticker paper.

Fussy-cut the sticker paper version and place it over its counterpart on the image panel as a mask. Use  Tuxedo Black Memento Ink to stamp the watering can/house/planter from A Stroll in the Garden Clear Stamp Set onto the left of the planter. Clean and dry the stamp and stamp it again onto the right side of the planter.

Use the second largest die from the Quirky Post Die Set DI-87 by AALL and Create to cut the image panel.

Remove the mask from the image panel die-cut and color the scene with Copic markers and Copic Colorless Blender Solution. Use a white colored pencil to add highlights to the planters and watering cans. Use a purple glitter marker to add glittery centers to the pink flowers.

Use the largest die from the Quirky Post Die Set DI-87 to cut grape cardstock. Cut pink cardstock to the same size and use it to mat the grape die-cut. Adhere the matted background Quirky Post die-cut to a white A6 card.

Adhere the image panel to the card. Add the "Thank You" sentiment sticker from the Uplifting Sentiment Stickers 6 by Lavinia Stamps to finish the card. 

Please pop over to my blog, Kat's Tales of Stamping, for step-by-step instructions and complete supply lists. 

Topflight Stamps Products Used:


Thanks for visiting today!

Friday, May 16, 2025

Blooming Birthday Wishes with Studio Light


Hello crafty friends and happy almost summer!
Ericka from Strangely Creative here, and what a whirlwind of a week it's been—with birthdays, end-of-school celebrations, and sunshine sneaking in a little earlier each day!


To keep the celebratory vibes going, I’ve created a birthday card featuring one of my favorite Studio Light sets: Big Roses. I’m a total sucker for bold blooms, so this stamp set was calling my name!

I started by stamping the roses and white heat embossing them for a crisp, elegant look. To add some soft texture, I reached for the Studio Light Script Background and clear embossed it behind the flowers, which gave the card a beautifully subtle vintage feel.

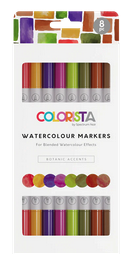
For color, I used my Spectrum Noir Watercolor Markers, keeping things light and loose. Once the coloring was done, I gave the background a light spritz with water to let the colors blend and bloom naturally—just like real roses do after a rain shower.


After letting everything dry, I added a sentiment from the Studio Light Basic Wishes set using Versafine Clair Twilight ink and heat embossed it with clear powder for a smooth, glossy finish.

And that’s it—simple, floral, and perfect for a summer birthday!

Thanks so much for stopping by today. Wishing you sunshine, creativity, and a beautiful weekend ahead!


 Topfight Stamp Supplies

Studio Light - Basic Wishes
Shop at:
TP
Studio Light - Big Roses
Shop at:
TP
Studio Light - Script Background 2
Shop at:
TP
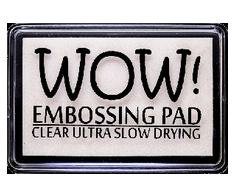
WOW! Embossing - Clear Embossing Pad
Shop at:
TP
Tsukineko - Versafine Clair - Twilight
Shop at:
TP


Spectrum Noir - Colorista Watercolour Markers - Botanical
Shop at:
TP
Spectrum Noir - Colorista Watercolour Markers - Vibrant
Shop at:
TP


Thursday, May 15, 2025

Thank You For Being A Friend

Hello!  This week at Topflight Stamps, we are focusing on a wonderful brand from the Netherlands called Studio Light.  I chose a great set of sentiment stamps called Basic Wishes.  On a white tag, I stamped "thank you" and "for being a friend" with VersaFine Onyx Black ink.  You can mix and match sentiments with this set.  I lightly inked the edges with brown ink, to give a vintage look.  The Craft Consortium Vintage Emporium Paper Pad had the perfect page full of old letters and postcards to use as a backdrop.  Finishing touches from my stash:  a seam binding bow and tiny bit of lace.

Have a beautiful day! ~ Colleen


Supplies Used From Topflight Stamps Store:


Studio Light - Basic Wishes


Wednesday, May 14, 2025

Getting Grungy with Studio Light

Hello, Lisa Hoel here again. This week at Topflight Stamps our brand focus is on Studio Light! I made a graduation card for my son using some of the great "grungy" products from the Studio Light line on top of a Gel Press print. 


Lisa Hoel for Topflight Stamps #creativejuicefreshsqueezed #topflightstamps


Thanks for stopping by and be sure to check out the Topflight Stamps store for a wide selection of different and hard to find stamps, stencils and other paper crafting supplies from all around the world! Also keep an eye here on the Topflight Stamps blog. There is new inspiration posted daily!

Topflight Stamps Supplies Used:

Studio Light Stamp Set- Grunge Bits

Studio Light Mask - X Background

AALL & Create Stamp Set - Everyday Sentiments


Masterpiece Designs Die Set - Tag Mini Album
Clair ink pads - Nocturne, Summertime


Tuesday, May 13, 2025

Happy Bearthday

Greetings! It's Tuesday so you've got Kathi to share a project with you. This week our product focus is Studio Light.


Use Tuxedo Black Memento Ink by Imagine Crafts/Tsukineko to stamp the standing bear from the Bear Hugs Clear Stamp Set by Art by Marlene for Studio Light onto white cardstock. Fussy-cut the bear, color with Copic markers, and edge with a black pen. Set aside.

Use the third largest die from the XXLL Double Stitched Rectangles Die Set by CREAlies to cut a piece of patterned paper from the Ombré Patterned Paper Pad by Craft Consortium to become the background. 

Use the same die to cut the bottom part from another sheet of the same pattern from the same pad. I actually had half a sheet as leftovers from a previous project. Place a wavy border die horizontally across the bottom of the sheet, secure the die with low-tack tape, and run through the die-cut machine. Use a YG Copic marker to edge the top of both sections then layer them onto the bottom of the background die-cut.

Cut white textured cardstock with the second largest die from the XXLL Double Stitched Rectangles Die Set by CREAlies and use to mat the background panel.

Use the solid balloon dies from the Polaroid Pop Die Set DI-89 by AALL and Create to cut white cardstock. Color the balloons with red Copic markers. Use Nocturne VersaFine Clair Ink by Imagine Crafts/Tsukineko to stamp the polka-dots from the Bear Hugs Clear Stamp Set by Art by Marlene for Studio Light onto two of the balloons. Use Bleed-proof White to paint the highlights that were impressed into the die-cuts.

Tie a piece of black thread to the bottom of each of the balloons. Adhere the bear to the background panel as shown. Tie each of the balloon strings around the bear's hand, then knot the three threads together.

Use a birthday greeting die and the matching alphabet dies to cut red cardstock. Adhere the sentiment to the upper left hand corner.

Adhere the matted image panel onto a red A6 card.

Please pop over to my blog, Kat's Tales of Stamping, for step-by-step instructions and complete supply lists. 

Topflight Stamps Products Used:


Thanks for visiting today!

Monday, May 12, 2025

Bold Butterflies Studio Light Card

Hello, Lisa Hoel here. This week at Topflight Stamps our brand focus is on Studio Light! I made a card using the fab Art by Marlene Layered Butterflies stamp set. I love those bold funky butterflies!


Lisa Hoel for Topflight Stamps #creativejuicefreshsqueezed #topflightstamps


Thanks for stopping by and be sure to check out the Topflight Stamps store for a wide selection of different and hard to find stamps, stencils and other paper crafting supplies from all around the world! Also keep an eye here on the Topflight Stamps blog. There is new inspiration posted daily!

Topflight Stamps Supplies Used:

Studio Light Stamp Set- Art by Marlene, Layered Butterflies

AALL & Create Stamp Set - Everyday Sentiments

Clair ink pads - Nocturne, Cheerful
Lavinia Elements ink pad - Confetti
Lavinia Mysticals spray - Pinkella

01 09 10