Wednesday, August 31, 2022

A little Christmas - Paper Rose


Tomorrow is the first of September, and Christmas is right around the corner!! Here are three quick shaker cards that are guaranteed to wow your friends and family!

This is from Paper Rose 20613, Nativity Tree.
Start by die-cutting three A2-sized heavy cardstock bases. 


Apply tape to the back of the base and adhere the clear acetate , slightly cut smaller than A2. Then use double sided foam tape to make a "dam" for the shaker elements .


Place/adhere the glitter cardstock to "seal" the card in the back. Die cut the enclosed "O Holy Night" and adhere it to the front.


I did add three rhinestones to the right of the tree to off-balance the script.


Here is another Paper Rose die for Christmas, https://topflightstamps.com/products/paper-rose-christmas-scene-die
You better get to work on your Christmas cards!!! It will be here before you know it.

Talk soon,
Charmaine


Tuesday, August 30, 2022

Dark & Twisted, Mysterious, and Spooky! It's a Halloween Card!

 It's Tuesday which means that you've got Kathi here to share a project with you! It's the end of August and Halloween stuff is in the store, so it's time to start creating Halloween projects! Here's my first card of the year, which was imagined to be a wizard's room where she captured some bats and put them into  bottles. The other bats are very confused and are trying to liberate their brethren.


Here's the card!


Removeable adhesive was used to adhere the Gothic Arch Mask from the Gothic Arch Small Stencil Set by Darkroom Door to the center of a panel of mixed media cardstock.

Using a stamping platform, Morning Mist VersaFine Clair Ink by Tsukineko was used to stamp the Brick Wall Background Stamp by Darkroom Door over the mask. I had to re-ink and stamp a few times to get good coverage for the brick background. 

The Gothic Arch Mask was cleaned and set aside. 

The Gothic Arch Stencil was placed onto the image panel, covering the brick wall, and secured with tape. 

Nocturne VersaFine Clair Ink by Tsukineko was used to stamp the small rounded bottle from the Bottles Red Rubber Cling Stamp Set by Darkroom Door onto the image panel and onto repositionable label paper which was fussy-cut to be used as a mask, taking care to keep the bottle's outline intact.

The bottle stamp was cleaned, moved to the right of the existing bottle, and stamped with Nocturne VersaFine Clair Ink onto the masked image panel and onto repositionable label paper, which was fussy-cut to be used as a mask.

Repositionable Scotch Tape was placed across the base of both bottles in the open arch area.

Della Blue and Graphite Elements Inks by Lavinia Stamps was brushed over the tape and the bottles in the archway. 

The masks were placed over both bottles and Della BlueGraphiteViolet Chalk, and Blue Lagoon Elements Inks were brushed over the masked images to deepen the colors.

The masks were lifted and the tape was repositioned. Distress ink was brushed below the tape to create a niche for the bottles to sit. 

Nocturne VersaFine Clair Ink was used to stamp the smaller bats from the Twisted Tree Red Rubber Cling Stamp Set by Darkroom Door in the bottles and the larger bats, standing on the lid of the bottle and flying in the night sky.

The masks and stencil were removed and the panel was heat set.

The bottle outline mask was placed around the left bottle and Della Blue and Graphite Elements Inks were lightly brushed along the perimeter to add depth and dimension. The outline mask was moved to the right bottle and the process was repeated.

A white pencil was used to add highlights to both bottles.

The Gothic Arch Mask was placed back over the arched window. Graphite Elements Ink was brushed over the bricks to color the wall. Russet Orange Elements Ink was pounced onto the brick with my pouncy tool to add some visual interest to the bricks.

A Carbon Black chalk pencil was used to outline the Gothic Arch Mask. The mask was removed and a cotton bud was used to soften the chalk. 

A Brown Ochre chalk pencil was used to create shadows under the bottles.

The image panel was trimmed to 4.75" x 4.25" then edged with black ink.

VersaMark ink was used to stamp the three sentiments from the Twisted Tree Red Rubber Cling Stamp Set onto black cardstock. White Detail Embossing Powder was added, the excess was shaken off, and the sentiments were heat set. They were cut with some flag dies, then the flag portions were trimmed.

The image panel was adhered to a black card. The sentiments were adhered to finish the card.

Please pop over to my blog, Kat's Tales of Stamping, for step-by-step instructions, notes, and complete supply lists.

Topflight Stamps Products Used:


Thanks for visiting! 

Monday, August 29, 2022

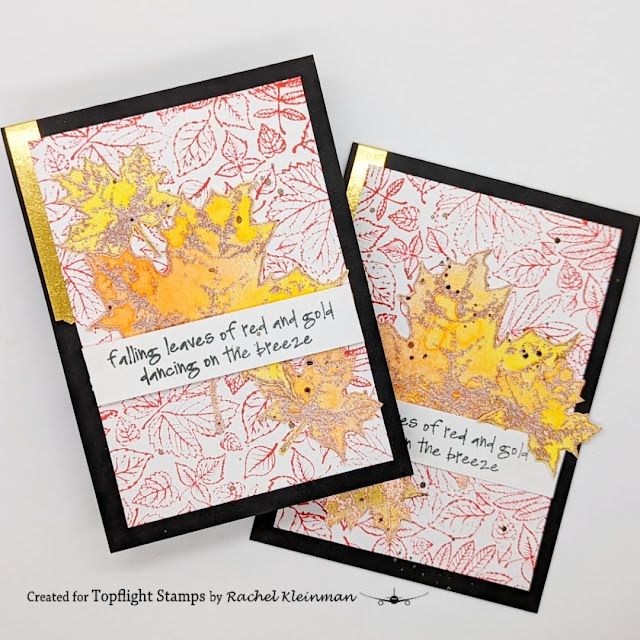
Falling Leaves - Autumn Cards

Does it feel like autumn yet where you live? Here in the bay area, September and October are actually our hottest months... but the leaves still change color and fall! This is Rachel from rwkrafts.com and today I'm sharing a couple of autumnal cards with you all.


 I paired a couple of beautiful leaf-themed stamp sets from the Topflight Stamps store to create these cards. For the base of the panel, I stamped Crafty Individuals "Falling Leaves" with Red Brick Prism ink.


To create the larger leaves, I used the stamp set "Erika's Maple" by Visible Image. I heat embossed the maple leaves using Wow! powder in Brassy Twinkle. The stamped and embossed leaves were then sprayed with Lavinia Mysticals Mist in Bumble Bee and Indian Sunset. Once dried, I fussy cut the leaves and glued to the card panel.


Lastly, the sentiment was stamped with Prism Ink in Slate Gray and added to the panel with foam tape.

Thanks for stopping in! Happy almost-September!

Topflight Stamps supplies used:

Sunday, August 28, 2022

Miss Dee Journal Pages

Greetings! You've got Kathi her to share a project with you. I know it's not Tuesday which is my regular day but I recently decided that I needed to make a mini-album featuring Miss Dee, a wonderfully wry and witty character, created by Janet Klein. AALL and Create has produced several wonderful clear polymer stamp sets featuring Miss Dee. Here are my first two pages created with Miss Dee Barista Clear Stamp Set 760 and Miss Dee Chocolatier Clear Stamp  Set 763. (BTW, both pages are the same size. I guess I got confused when I was editing the photos).


I started the pages by stamping  Miss Dee Chocolatier and Miss Dee Barista in black Copic-friendly ink. I then stamped the chocolate shop and the cafe five times each.

Everything was fussy-cut, which was oddly relaxing. You'll note that on the Miss Dee Barista page, I cutt off the top part of the Chocolatier building. Similarly, I trimmed the top part of the Coffee Shop building on the Miss Dee Chocolatier page. 

All of the images were colored with Copic markers and edged with a black multiliner pen.

The two Miss Dees and all the buildings were set aside while I created two background pages for them.

I selected the rolling hills mask from the Acetate Hill Masks by Lavinia Stamps to use. The mask was placed in the center of a 6" piece of Bristol paper and a plastic ruler was used to cover the base of the panel. Della Blue and Graphite Elements Inks were brushed over the mask to create the sky. This process was repeated to create a second page.

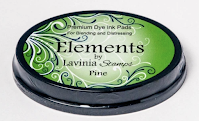
The mask was traced onto a piece of cardstock and fussy-cut. This was placed over the sky as a mask. The rolling hills mask was moved downwards. Pine Elements Ink was brushed downward over the cardstock mask and upwards over the rolling hills mask. The rolling hills mask was flipped and Pine and Olive Elements Inks were brushed over it again. 

The masks were put away and Concrete Fresco Finish Acrylic Paints by PaperArtsy was used to paint the bottom part of both background panels to look somewhat like pavement.

Black and grey chalk pencils were used to add dimension to the pavement. Both background pages were trimmed, edged with black ink, and adhered to black mats.

White cardstock was cut with thought cloud dies and colored with Copic markers. Onyx Black VersaFine  Ink by Tsukineko was used to stamp both sentiments on the die cuts.

All elements were adhered to finish the pages.

Please pop over to my blog, Kat's Tales of Stamping, for step-by-step instructions and complete supply lists. 

Topflight Stamps Products Used:


Thanks for visiting! See you Tuesday!

Friday, August 26, 2022

Jane's Doodles Brew-Tea-Ful


Hello friends. Ericka from Strangely Creative here and today I am playing with the Jane's Doodles Brew-Tea-Ful set for a fun little tea card. I love this set and it pretty coffee cups that you can color up.


I stamped these on Bristol Smooth card stock and clear heat embossed them. I then took my Prism Brush Markers in Blue Lagoon and colored up my tea pot and cups. This is such a cute set and perfect for those of us who love our coffee and tea.


Thank you for stopping by and I hope you have a brew-tea-ful weekend!


Topflight Stamps Supplies Used


Thursday, August 25, 2022

Janes Doodles - Merry Christmas

  Hi Everyone,

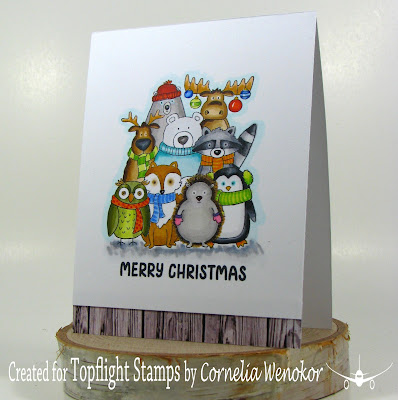
Cornelia here today. This week we are showcasing Janes Doodles stamps on the Topflight blog.  And since it's only 4 more month until Christmas I made a Christmas card. this adorable set comes with two different stamps, where you don't really have to do anything besides color the images. Very convenient!
I stamped the little animal group and colored them with Copics. Although that took a while.....Added the sentiment. Trimmed the card and added a strip of patterned paper at the bottom.
I hope you liked this. Thanks for visiting. 
See you next week with more Topflight Stamps inspiration.

And here are the stamp supplies I used: 
(I used a different one, but that is no longer available, but this one would work as well)


01 09 10