Tuesday, January 31, 2023

Crafty Individuals - Layers of Monochromatic Color


Hi everyone,

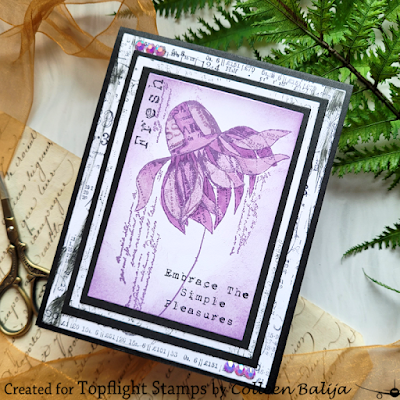
Colleen here of Irishrosecreations sharing a fun monochromatic layered card today!  Monochromatic cards basically focus on one color family.  Here I've focused on purple, with a black and white background to compliment it! 

For this card, I was inspired by a similar version that I saw on Instagram. I changed up the color and stamps to make this card my own! I love to use white and black layers on my card, so I focused on using those colors to help my purple focal point pop! Let's get started on how I made this beauty!

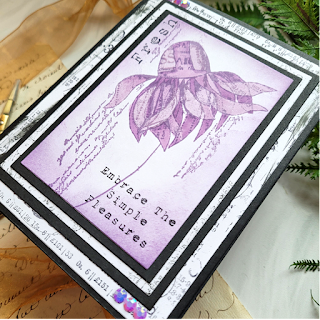
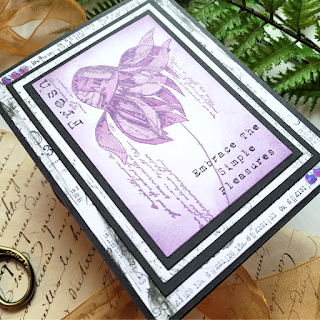
First step was to create and organize the layers I needed to build the card. Using basic rectangle nesting dies (if you don't have these dies, you can measure and trim the layers using your paper trimmer), I created 5 layers - 3 in white and 2 in black. The sizes of the white and black layers alternate so that it's white - black - white - black - white. The 5.5x4.25 card base was black. So, in all, I had 3 white layers and 3 black layers! 

Next, it was time to add some detail to the white layers with my stamps! Using Lavinia dye ink in Violet Chalk, I stamped the Flower from Crafty Individuals onto the smallest white layer. Then I added a couple sentiments from Foliage by AALL & Create in the upper left and lower right corners around the flower in black ink to help bring the black layers forward. I also ink blended Violet Chalk around the edges of the flower to frame it nicely. Finally, I used my alcohol markers to add depth and color to the flower. Adding color to the flower helped all that beautiful detail in that stamp just shine! 

Then, I stamped the next 2 white layers in black ink using Counting Down by Crafty Individuals. The only pop of monochromatic color that I wanted on this card was purple. Everything else remained black and white! 


The final step was to adhere my layers together. I used a liquid glue because it gives me a little wiggle room to place my design elements exactly where I want them. I'm notorious for not lining up my card layers, so liquid glue is my saving grace! I finished with a few purple sequins to compliment the purple flower! 


Monochromatic cards are so easy to make, the only decision is the color and the design of your card! Thanks for stopping by today! 


Supplies Used:


Flower by Crafty Individuals


County Down by Crafty Individuals


Foliage by AALL & Create


A Heart Card

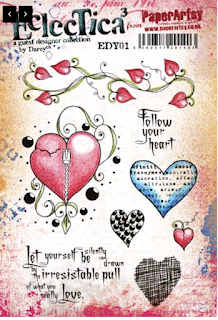
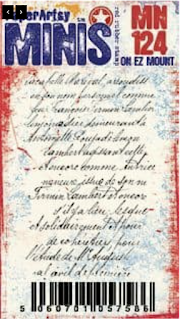
 It's Tuesday so you've got Kathi here to share a project with you. This week's theme over at the Topflight Stamps blog is "Anything Goes".  I've made a card that is heart themed, but not especially Valentine-y with PaperArtsy's Eclectica EDY01 Cling Rubber Stamp Set by DarcyInk and the Dog Mini 124 Rubber Cling Mounted Stamp, and two colors of Fresco Finish Chalk Acrylic Paints.

Here it is!


Drops of Vintage Lace and Blah Mange Fresco Finish Chalk Acrylic Paints by PaperArtsy were applied to Cut 'N' Dry Stamping Foam, pounced on my craft sheet to mix them, then pounced onto a panel of mixed media cardstock. This process was repeated until the panel was covered. The panel was trimmed to 4.75" x 6.75" and heat set.

Pink VersaMagic ink, a chalk pigment ink, was used to repeatedly stamp the Ink and the Dog Mini 124 Rubber Cling Mounted Stamp onto the painted panel. This was also heat set.

Using a stamping platform and Nocturne VersaFine Clair Ink by Imagine Crafts I stamped the heart border from the Eclectica EDY01 Cling Rubber Stamp Set by Darcy for PaperArtsy at the top of the painted, stamped panel and heat set.

With the border stamp still in place on the platform's lid, the panel was rotated 180°, the stamp was reinked, the border was stamped again, and the panel was heat set. 

The zipper heart stamp from the Eclectica EDY01 Cling Rubber Stamp Set by Darcy was centered on the platform's lid, inked with Nocturne VersaFine Clair Ink, stamped onto the image panel, and heat set. It was also stamped onto repositionable label paper, which was fussy-cut to be used as a mask.

Watercolor markers and a metallic paint marker were used to color the images. White colored pencil was used to add highlights to the hearts. Spectrum Noir Clear Sparkle Glitter Brush Pens - Clear Overlay was used to add a touch of sparkle to the gemstone hanging from the focal heart.

While coloring the images with one of the red watercolor markers, I had a bit of a happy accident. I inadvertently got a red fingerprint on the image panel, decided it looked cool, then used a wet finger and the red marker to edge the image panel.

The fussy-cut mask was placed over the heart. Black and silver paint pens were used to add splatter to the image. 

Nocturne VersaFine Clair Ink was used to edge the image panel, which was adhered to an A7 black card.

Please pop over to my blog, Kat's Tales of Stamping, for instructions and complete supply lists.


Thanks for visiting today!

Monday, January 30, 2023

Bonded for life

 Hello there!!  Mel Pilling here today with a timeless story of true love amongst wolves.  This beautiful stamp set by Hobby Art Ltd. certainly spoke to my heart.


. '


For this art journal page, I did the sky and grass with Lavinia stencil brushes, using the following ink pads by Prism  : Olive Green , Rainforest Green , Peacock Green , Canary Yellow  and Blue Lagoon . For the cliffs, I stamped the ink pads on my craft surface. With some water and a brush, I painted a rough streaky cliff.  Once dry, I drew in some detail with a fine black pen. The cliffs were done with prism ink pads  Slate Grey  Wild Mushroom , olive green and Thunder Cloud. I stamped the wolves directly on the project (for edge details), then stamped them again on clean card stock.  I coloured the wolves with watercolour markers then fussy cut them and stuck them on the project. I then drew in some extra hair detail. 
The trees were stamped in .Versafine Clair inks :   Morning Mist  Shady Lane  and. Nocturne    I  added some foliage using Lavinia foliage stamps. Topped off with a few flowers in liquid pearls and a great love story unfolds

Friday, January 27, 2023

Jane's Doodles Fox Hugs


Happy Friday crafty friends! Ericka from Strangely Creative here and today I have a simple card I made using the Jane's Doodles Sleepy Fox along with this great Hugs die. I love this large die and it is perfect to create a card for a friend. 


I started by coloring this cute fox with Spectrum Noir Watercolor Markers and then fussy cut her out. I then used the Lavinia Mystical Mists in Golden Temple and Pinkella and lightly sprayed the corner of my card base. I applied a piece of scrap tissue I had left over from a previous project and glued it down and placed my fox down over it.


I used the Hugs die on some leftover watercolor paper I had and then outlined the bottom to help it pop on my card. I also used my white pen and added dots to my leaves. A fun a quick card perfect for a friends who needs a hug. Thanks for stopping by and I hope you have a wonderful weekend.


Topflight Stamp Supplies Used


Thursday, January 26, 2023

Janes Doodles - Belated Birthday

   Hi Everyone,

Cornelia here today. This week we are featuring Janes Doodles. Since I frequently forget to send out birthday card on time I needed to have this set....
 
I started with the the cupcake on top and worked my way down, masking everything. Brushed the background and added a few water splatters. Colored the animals with alcohol ink markers. Stamped the sentiment and trimmed the card. Added a strip of wood paper on the side. 

I hope you liked this. Thanks for visiting. 
See you next week with more Topflight Stamps inspiration.

And for another 3 days there is  a wonderful sale at Topflight Stamps - grab them while you can!

And here are the stamp supplies I used: 


Wednesday, January 25, 2023

Be Bold Wall Hanging

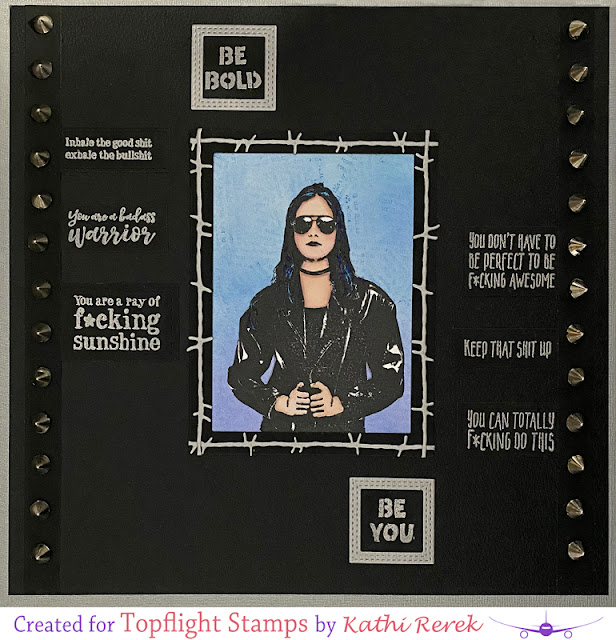
 I know it's not Tuesday but you've got Kathi here again to share another project with you. I've been really inspired by Darkroom Door's Be Bold Red Rubber Cling Stamp Set and Sweary Affirmations Sentiment Strip Red Rubber Cling Stamp.  Actually, when I first saw the Be Bold Red Rubber Cling Stamp Set and Sweary Affirmations Sentiment Strip Red Rubber Cling Stamp, I immediately thought of creating a wall hanging using these fabulous stamp sets with leather-look and brushed silver metallic specialty papers that I had in my stash. I also knew that I had silver (and gold) spiky embellishments and barbed wire cutting dies.

Here it is!


Here's a close-up that shows the spikes and the textured papers.


Using Nocturne VersaFine Clair Ink by Imagine Crafts and my stamping platform, I stamped the leather-clad sunglasses woman from the Be Bold Red Rubber Cling Stamp Set by Darkroom Door onto Mixed Media paper. I did re-ink and re-stamp a few times to get a good impression. The image panel was thoroughly heat set.

I used Distress inks and markers to color the woman's face, hands, and hair. I heat set the image again just because. 

I stamped the image again onto repositionable label paper, fussy-cut it, and placed it over the woman on the image panel as a mask.

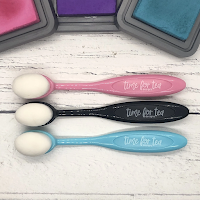
Using the largest brush from the Black Blending Brushes by Time for Tea Designs, I brushed a blue ink up from the bottom of the image panel. When the brush ran dry, I then brushed Turquoise ink from the top downwards, then brushed both colors to soften the blend line. 

The next step was to ink the Torn Text Texture Red Rubber Cling Stamp by Darkroom Door with blue and turquoise inks, stamping the ink off, before second generation stamping onto the image panel. I was going for subtle, which I achieved. 

I used shimmery silver ink to stamp the sentiments from the Be Bold Red Rubber Cling Stamp Set and Sweary Affirmations Sentiment Strip Red Rubber Cling Stamp onto the leather specialty paper, sprinkled the wet ink with detail silver embossing powder, dumped off the excess, and heat set them.

The Sweary Affirmations sentiments were all cut with stitched and plain rectangle dies. The Be Bold and Be You sentiments from the  Be Bold Red Rubber Cling Stamp Set were cut with a tag die, which yielded two square die-cuts. I also cut Brushed Silver Metallic specialty paper with the same tag die to get the stitched frames.

Black leather specialty paper was cut with an ancient border die with evenly spaced holes and with a rectangular frame die.

Brushed silver metallic specialty paper was cut with the barbed wire dies, which were adhered to the frame, which was then adhered over the image panel to frame the image.

A piece of textured black leather specialty paper was trimmed. The framed image panel, sentiment die-cuts, and the two titles were adhered to the textured leather paper. The two border strips were adhered to either side, and the spikes were adhered to cover the holes in the borders. 

Silver metallic cardstock was adhered to two layers of black cardstock to create a sturdy base for the wall hanging.

Please pop over to my blog, Kat's Tales of Stamping, for instructions and complete supply lists.

Topflight Stamps Products Used:

Tuesday, January 24, 2023

Happy Valentine's Day

 It's Tuesday which means you've got Kathi here to share a project with you. This week my teammates and I are showcasing products by Jane's Doodles. You might not know this, but I love penguins almost as much as I love cats. I decided to create a Valentine's Day card with the Sweater Weather Clear Stamp Set and the Snow Globe Clear Stamp Set by Jane's Doodles.

Here's the card.


But before you read how I created this card, I have something important to share with you!

Public Service Announcement:
Do you love AALL and Create's products as much as I do?
Do you love to save money?
Do you love a good sale?
If you answered "yes" to any of those questions, you might want to click over to Topflight Stamps to take advantage of a fabulous sale where you can save 25% off all AALL and Create's goodies!

~~~

Using a stamping platform and Copic friendly ink, I stamped the two penguins from the Sweater Weather Clear Stamp Set by Jane's Doodles onto white cardstock and onto repositionable label paper. Hearts from the You Go Gull Clear Stamp Set and the Perfect Blend Clear Stamp Set by Heffy Doodle were used to stamp hearts on the penguins' sweaters.

The label paper versions of the penguins were fussy-cut and placed atop their counterparts as masks.

The Snow Globe from the Snow Globe Clear Stamp Set by Jane's Doodles was stamped between the penguins onto the image panel and onto label paper. The Snow Globe was fussy-cut in parts the outside of the circle, the Snow Globe, the snow in the globe, and the base) and the globe, snow, and base were placed over their counterparts as masks.

Plastic was placed horizontally over the image panel below the penguins' bodies. The largest brush from the Black Blending Brushes by Time for Tea Designs was used to brush Periwinkle Prism Ink by Hunkydory Crafts over the plastic and the masked images to create a sky background.

The plastic was moved to cover the top part of the image and grey ink was lightly brushed with the medium brush from the Black Blending Brushes by Time for Tea Designs below the sky and the penguins.

The interior globe part of the Snow Globe mask was removed but the snow and the base masks remained  in place. The outside circle was placed around the globe to protect the background. Using the smallest brush from the Black Blending Brushes by Time for Tea Designs set, Copic friendly light blue ink was lightly brushed around the interior of the Snow Globe. 

A heart stencil was placed over the Snow Globe with the masks in place. Emperor Red Elements Ink by Lavinia Stamps was sponged over the stencil onto the interior of the Snow Globe using the Premier Ink Blending Tool by Hunkydory Crafts

The masks were all removed and the penguins, the inside of the snow globe, and the ice background were colored with Copic markers. White gel pen was used to add highlights to the Snow Globe's glass and base.

Snowflakes from the Snow Globe Clear Stamp Set by Jane's Doodles were stamped around the image panel using shimmery white ink. The image panel was heat set. White gel pen and Gelly Roll Bold Line Stardust Clear Glittering Ink by Sakura were used to add white and glittery icy touches to the image panel.

The image panel was trimmed, matted with black cardstock, and adhered to a red A2 card.

Nocturne VersaFine Clair Ink by Imagine Crafts was used to stamp the sentiment from the Classic Sentiments Clear Stamp Set by Heffy Doodle onto red cardstock. The sentiment was heat set, cut with a fancy label cutting die, and adhered to the card. Black gemstones were added to the sentiment die-cut to finish the card.

Please pop over to my blog, Kat's Tales of Stamping, to read step-by-step instructions and complete supply lists. 

Topflight Stamps Products Used:


Thanks for visiting!


01 09 10