Tuesday, July 31, 2018

Steampunk Art Journal Page

Hello, Lisa Hoel here with a steampunk love story. ;-) I have an altered book that I use as 
a steampunk themed art journal so this is a page I just did in that.


The main image is from the Stamperia set Steampunk:


 I also used the Carabelle Steampunk Time Machine:


Visible Image's Scripted Streets:


and the Stamperia stencil Dragonfly & Butterfly:


You can see a full supply list and a short 'how-to' over on my Creative Juice blog
Thanks for stopping by and have a great week!

Monday, July 30, 2018

Seth Apter and Lavinia Stamps | Trapped in Amber Art Panel

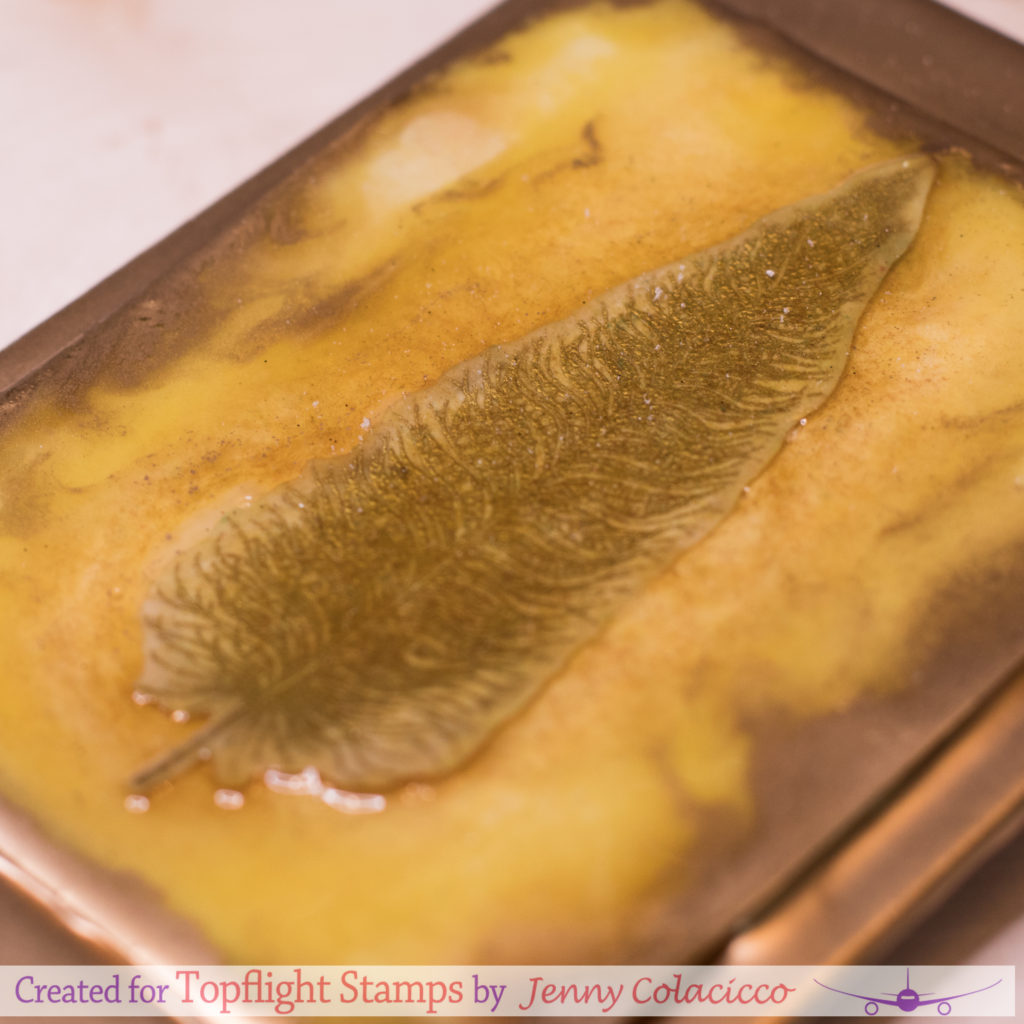
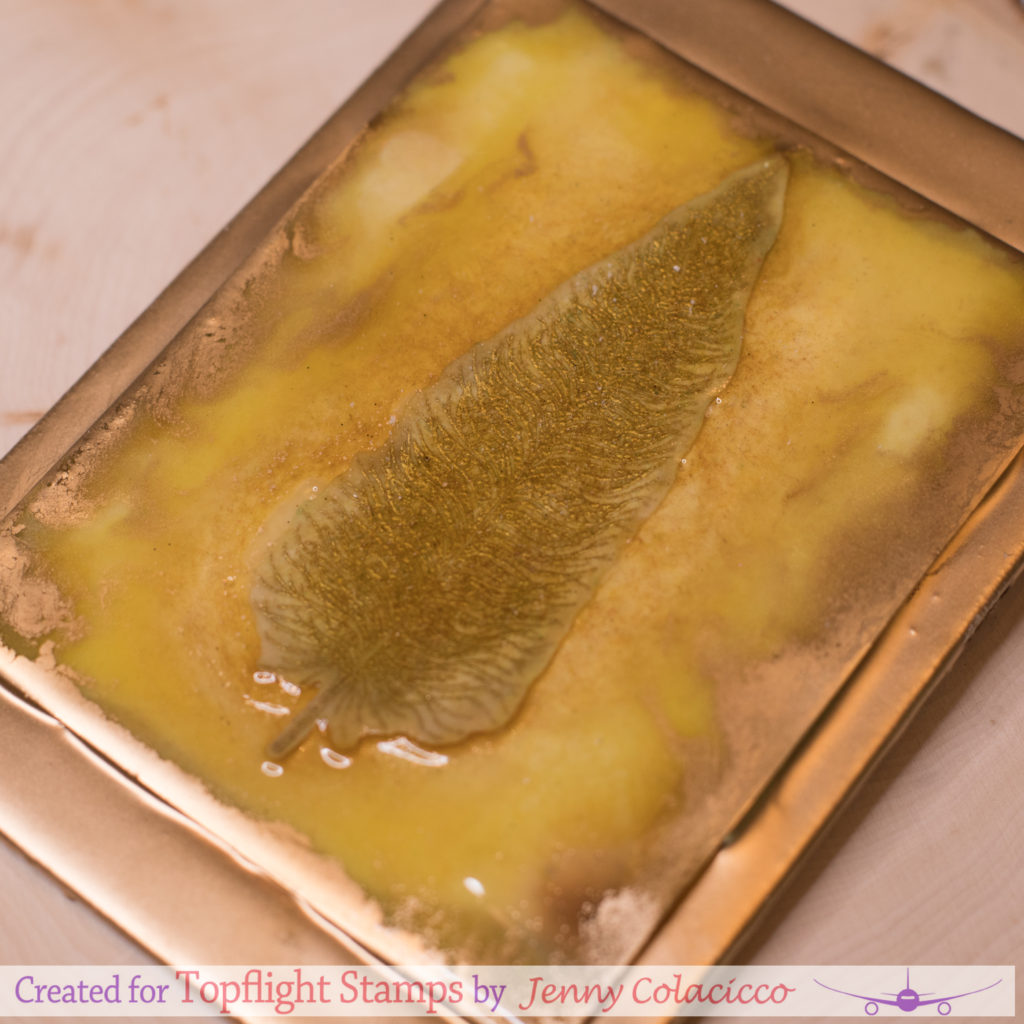
Hi Everyone and Welcome to the Topflight Stamps blog.  It's Jenny here, I have used some of the new range of embossing powder by Seth Apter and a stamp by Lavinia to create another small art panel.


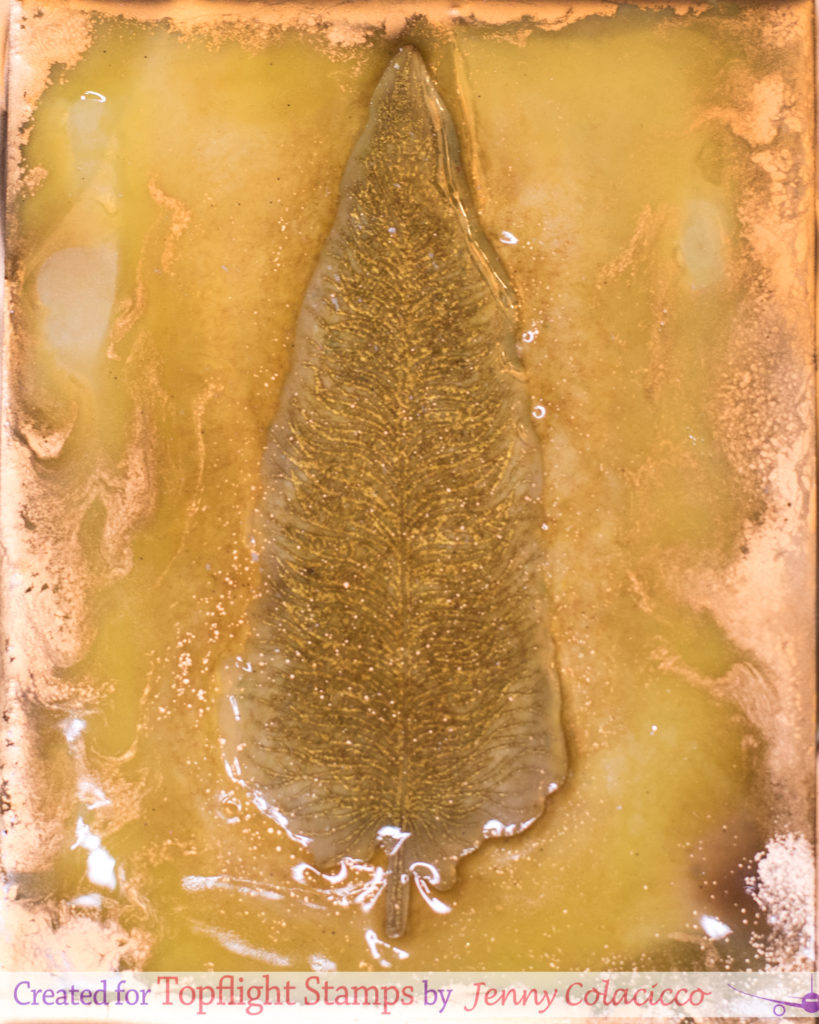
The embossing powder I used is the Ancient Amber powder by Seth Apter.  It gave me the idea to create an art panel with an 'object' trapped in amber.  


I used the Feather stamp by Lavinia which is beautifully delicate and detailed.


I stamped the Feather image in a clear embossing ink (I used Versamark) onto thick white cardstock and heat embossed it in Antique Gold embossing powder.  


When cool, I trimmed it out, and adhered it with a hot glue gun onto a white panel of cardstock.  You could also adhere it directly to the canvas board (I'd recommend that).


I then coated the entire panel with embossing ink and added the Amber embossing powder.  I did many layers to get a very thick coating almost level with the feather itself.  I then adhered the panel to a canvas board and coated the edges with embossing ink again and added the antique gold embossing powder.  After several coats and heatings you'll notice the embossing powder starts to blend with the amber.  It gives a fab look.  As a finishing touch, I added a few layers of clear embossing powder.

I hope you like it!!  This is a fun project and I'm definitely going to be trying something similar again soon!  You can find more details on the supplies I used over on my blog.  Have an awesome day.

Saturday, July 28, 2018

Lean Creatif - From Santa to Gnome!

Welcome to the Topflight Stamps Blog.  It's Clare here with you today.  I haven't been around much and it's so good to be back!  To ease myself in gently I made this card for someone who was has a special birthday and a strong liking for garden gnomes.


I used the Santa stamp from Leanne Creatif, removed his bobble and sack and voila we had a garden gnome!


With some creative colouring in and the addition of some rosy cheeks, the transformation was complete.


To the special age of 80, I added a little foliage to make my gnome feel right at home.


Thank you for stopping by today, I hope you have enjoyed your visit?  Pop over to Topflight Stamps and have a look at the extensive range of branded stamps available.

Happy crafting,

Clare.


Friday, July 27, 2018

You Are The Best

Welcome to the Topflight Stamps blog. Ericka here, and I have a fun card using a dog from Katzelkraft set.

I love the images in this stamp set and they pair so well with the living room furniture set.
https://topflightstamps.com/products/copy-of-katzelkraft-les-jungles-jungle-animals-unmounted-red-rubber-stamp-set

https://topflightstamps.com/products/katzelkraft-in-the-living-room-unmounted-red-rubber-stamp-set

I stamped the dog and then masked it so that I could add the couch and then colored them with Copics. I added some carpet and wallpaper to fill in the scene.
I had this speech bubble in my stash and thought it paired well with the happy dog. For more information on how I created my card feel free to stop by my blog here. Have a wonderful weekend and thanks for stopping by.


Wednesday, July 25, 2018

Just Go for It!


Hi, everyone!  Toni here with you again sharing one of my favorite things in the world:  cake! And by share, I mean you can look but not touch.  That cake is mine!  LOL.

I've combined Katzelkraft Tea Time and Katzelkraft Carpe Diem to create a clean and simple (CAS) card.  It's part of my series about self-love which you'll find more about as I share a journal I'm working on in coming months.  So eat that cake, love yourself, guts and all, but remember the old adage: a moment on the lips, forever on the hips!


Feel free to stop by my blog, Frankie Helps Craft, for a full product listing.  See you next week, lovelies!

Tuesday, July 24, 2018

Happy Birthday with Katzelkraft!

Hello there, Lisa Hoel here with a whimsical birthday card courtesy of Katzelkraft stamps! I love 
the silly Les Chats stamp set and it was perfect for this card for my nephew.


You can see more details about this card in the blogpost on my blog Creative Juice. In the meantime, 
following are the Topflight Stamps products used:


Les Chats Russes

In the Living Room

Hearts & Clouds Stencil

Have a great week!!

Monday, July 23, 2018

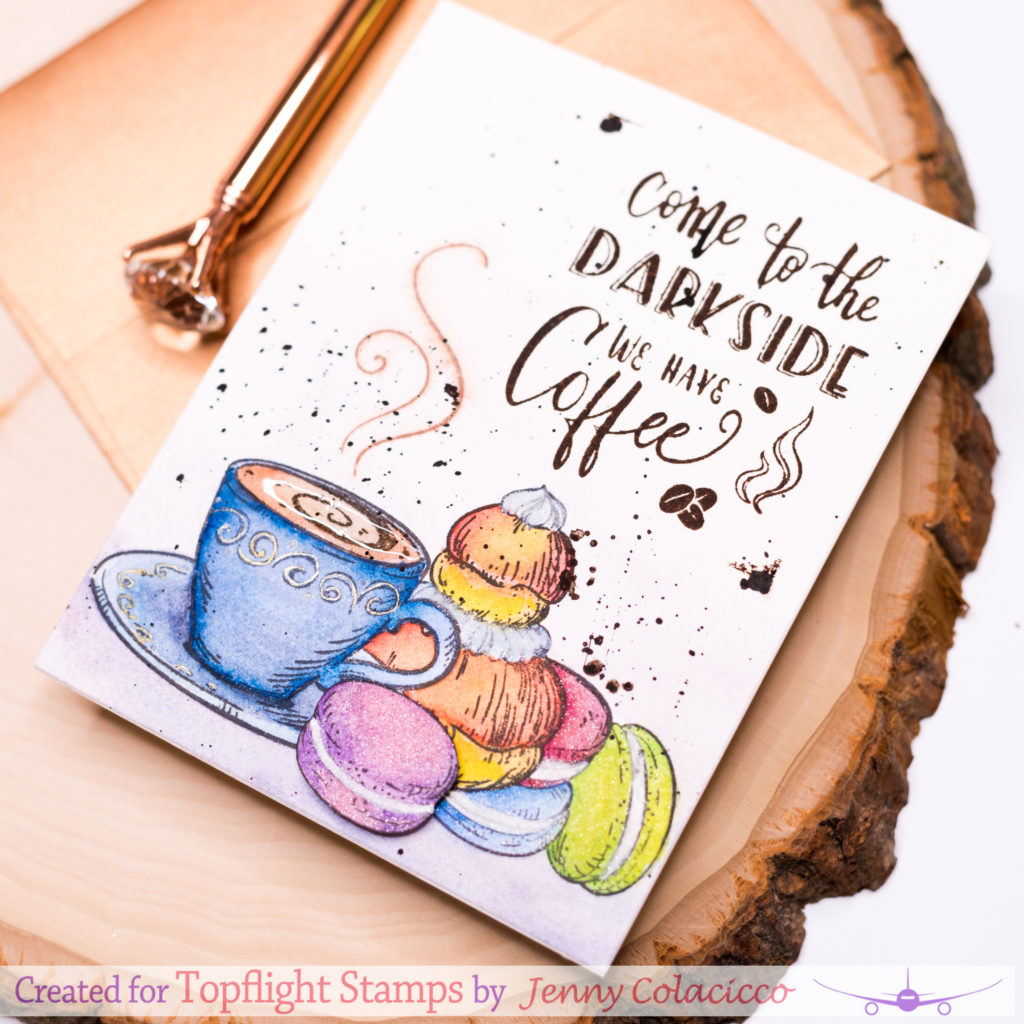
Katzelkraft | Masked Watercolor Coffee Card

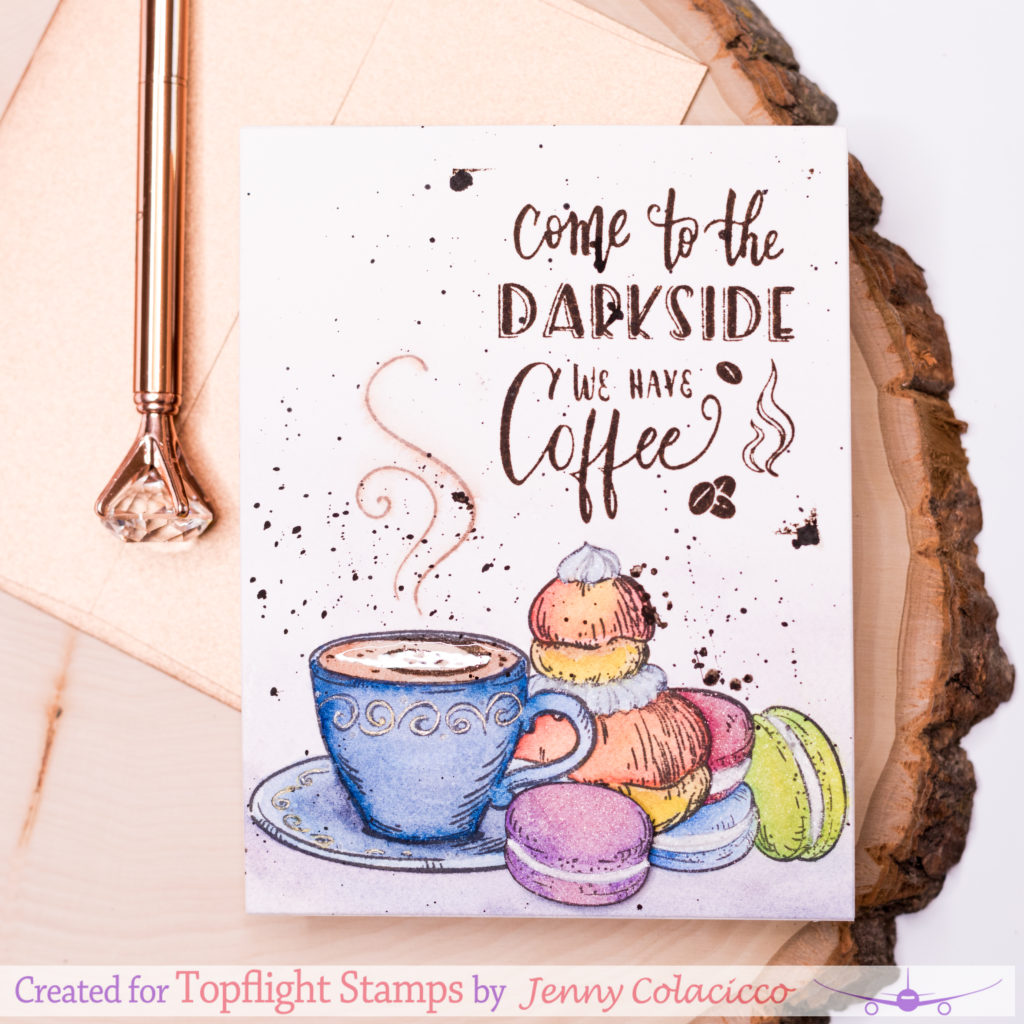
Hi Everyone and Welcome to the Topflight Stamps Blog! It's Jenny here, joining you with this watercolor card that I created using some fun stamps from Katzelkraft.  

I used the 5'O Clock and Darkside sets (I love the quotes in this set).


These stamps are super detailed red rubber.  They come unmounted, and Topflight Stamps carries EZ Mount to adhere to the stamps for use.  It's really easy to do. 


Katzelkraft create some amazing stamps and their whole range is definitely worth checking out, especially if you love coloring!


To create my card, I used a panel of coldpress watercolor cardstock trimmed to 4.25" x 5.5".  I stamped the cup image first in waterproof black ink.  I then masked it off with masking paper.  I stamped the pastry stack, masked that off, and then stamped the macaron trio.  I also stamped a single macaron on a separate piece of card so I could trim it out later.  I added the Darkside sentiment in the corner, and the tea heat lines in a brown ink.

I colored the image with Daniel Smith watercolors, laying down water first then adding the colors, letting them blend out, then layering more color on top for shadow.   I added some pale grey pink around the background, and also some black spatters once it had dried.


I adhered the panel onto a white card base.  I then trimmed out the single macaron and popped it up on foam tape at the front.   I added some Sugar Stickles onto the the macarons and the cake and Clear Wink of Stella onto the macarons for some sparkle.  I also added some gold gel pen to the cup and added a layer of glossy accents to the tea for a little dimension.   I always like to add a few accents like this when I've watercolored a card.

So that's it - hope you like it!  You can find more details on the supplies I used over on my blog.  

Have a great day!

Friday, July 20, 2018

Life is Beautiful

Welcome to the Topflight Blog! I hope you are having a beautiful day!
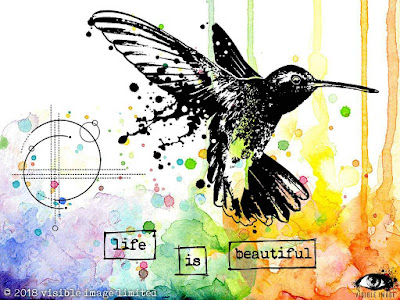
It's Ericka here and I have two cards I made using this beautiful set from Visible Images called Life Is Beautiful. Don't you just love this hummingbird?
https://topflightstamps.com/products/visible-image-life-is-beautiful-hummingbird-clear-polymer-stamp-set

For my first card, I used a background I had created using Distress Oxides on photo paper. This is fun technique so I have plenty of colorful backgrounds to use and this image is perfect match for this one.

In my second card, I used the Visible Image Stencil Count Me In stencil and some Distress Oxides on an old manila folder I had cut to A2 size.

I stamped the image using watercolor markers and a light spritz to the stamp.
To find out more details and product information, check out my blog Strangely Creative. Thanks for stopping by and have a wonderful weekend!

Wednesday, July 18, 2018

The Greatest Adventure


Hi everyone!  Toni here with you today sharing a steampunk card using Carabelle Studio The Birds


Some folks go for lots of layers and elements when they steampunk but I prefer a simpler approach.   I used two different stencils and Distress Oxides to create a steampunk background and a branch for the bird to sit on. No, I should say for the bird to launch from because it's going on an adventure! I love the Visible Image Destination Unknown sentiment, don't you?

Visible Image - Destination Unknown - Clear Polymer Stamp Set

I used Versafine and black embossing powder to make it really show up. I like the embossed texture too, especially given the simplicity of the rest of the card--the shine is lovely.


Do stop by my blog, Frankie Helps Craft, for a full product listing.  See you next week!
Monday, July 16, 2018

Mini Heart Gift Cards - Alexandra Renke

Hi Everyone and welcome to the Topflight Stamps Blog.   


It's Jenny here, and today I have a super easy project creating a little gift set of simple and cute mini note-cards.


The stamp set I'm using for the cards is the Love & Hearts set by Alexandra Renke.   The images in this set are all super pretty, and there are tiny little messages in the set too that you can add to your project.  

For a couple of the cards, I also used sentiments from a set by For the Love of Stamps, The Occasions Inserts set.  This is a really versatile set for your stash. 
To create my cards, I used pre-scored white cardstock notecards.  They are 7.5" x 5", scored at 3.75".  I stamped each of the heart images from the Alexandra Renke set in black ink or pink ink.  


I then stamped the sentiments in white embossing powder onto either black or white cardstock.  For those on white cardstock, I ink blended the same pink ink over the top.  The embossing resists the ink and you have a tiny pink sentiment base!  I then trimmed them out and popped them up on foam tape over the stamped hearts.


On two cards, I used rose gold embossing powder to stamp the sentiment directly over the stamped image.  


As a finishing touch, I added some clear confetti sequins.  I tied all of the cards together with some metallic rustic twine.  It just needs some little envelopes added and you have a nice little gift for  someone!


I hope you like this idea - you can find more about the supplies I used over on my blog. 

Have a wonderful day!

Friday, July 13, 2018

A Vintage Christmas

It's Ericka here and welcome to the Topflight Stamps blog celebrating Christmas in July. It's never too early to start making those Christmas cards and so I started with this one using the Crafty Individuals Santa Sleigh Ride. I love the vintage look and detail of this stamp.


Below is the stamp and stencil I used.

https://topflightstamps.com/products/crafty-individuals-unmounted-rubber-stamp-santas-sleigh-ride
https://topflightstamps.com/products/indigoblu-spirit-of-christmas-stencil-6x6

Here is one more card I made with this stencil and some fun PaperArtsy Infusion Dye


You still have time to stock up on your Christmas stamps with our Christmas in July sale. Don't miss out!! It's never to early to start your Christmas cards. 

For more information on how I created these cards check out my blog Strangely Creative.
01 09 10