Monday, July 31, 2023

Life on the Farm

Hi MEL PILLING  here today with a farm scene I built to insert into my art studio cabinet doors, featuring KATZELKRAFT STAMPS, and a few LAVINIA STAMPS .  I recently bought a camper which my husband  magically turned into a portable art space. Putting my own mark on it fills me with joy. My happy space. 


.


I began by using a Stencil brush  to do the landscape area. I used Elements Ink. The sky was done in Della Blue and Sundance .  Then using torn paper masks, and brushing downwards, I did hills in Sundance , Pine , Lime Punch , Olive and Sahara.   The mountains were done in Mulberry and Merlot.

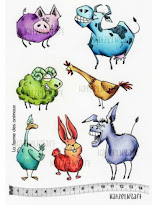
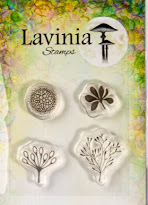
All the farm animals were stamped on clean Bristol card and coloured with watercolour markers, then cut out.  I didn’t cut out any of the fine details just the main bodies.  The characters were also stamped on the background in Versafine Clair Ink in Nocturne (except the one lamb on the left).  That sheep,  I just glued the body on and drew in the legs.  This way I could have him leaping through the air.   The initial stamping on the project provides all the details you didn’t cut out.  I hand drew the barn on Bristol card, as I don’t have a barn stamp yet. Then cut it out and glued onto project. The Lavinia trees were all done in Nocturne.

Then I shadowed all the characters, the barn and the trees with watercolour markers in greens and greys.  I then used liquid pearls to dot in some flower details. 

KATZELKRAFT STAMPS USED.


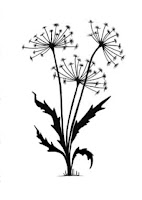
LAVINIA STAMPS USED


Though this farm scene took me all day, I had so much fun sitting in my new art space, creating some art for the cupboards.  I do hope you like it.
 

Thanks so much for joining me today on the Topflight Stamps blog. See you soon.

Friday, July 28, 2023

Visible Image Shining Star


Hello crafty friends! Ericka at Strangely Creative here and today I am playing with the new Visible Image Shining Star stamp set along with the Super Star stencil. I started off by using temporary double sided tape to the inner portion of the Super Star stencil and blending Salvage Patina and Uncharted Mariner distress oxide ink on my background.

I then switched out the stencil and used the outer portion to blend distress oxide inks in Mustard Seed, Wild Honey, and Ripe Persimmon.

I let the ink dry and then I stamped the Visible Image Shining Star and clear sparkle embossed it. I took embossing paste and used the stencil to add the lines onto my star image. While the paste was still wet, I used Vintage Gold WOW! Embossing Golden Vintage Lace. When the paste was dry, I used my heat gun to melt the powder.


I love how the stencil and stamp work together to create a unique card. Thank you for stopping by and I hope you have a wonderful weekend.

Topflight Stamp Supplies Used


Thursday, July 27, 2023

Visible Image Stamps - Don't Be Afraid

   Hi Everyone,

Cornelia here today. This week we are featuring Visible Image stamps on the Topflight blog
I used an old gel print background as a base. I stamped the caterpillar onto scrap paper and colored it with alcohol ink markers. I sponged around the corners of my background. also added the silhouette butterflies to the background. Stamped the caterpillar again onto the background and added the colored cut out. Stamped the sentiment, drew a frame around it and cut it out. Added it. Also added some additional stamped splatters.

I hope you liked this. Thanks for visiting. 
See you next week with more Topflight Stamps inspiration.

Wednesday, July 26, 2023

"Blow Out the Candles"

 Hello Crafty Friends, Mary Key with DT members here and today is about Visible Image. I have a very colorful card using Round in Circles for the background and Blow Out the Candles.

I am using a watercolor panel that I kept and will be using today. I used Visible Image Round in Circles stamp set and used black ink. After that, I wanted it to "pop" just a little more, so I used WOW! Diamond Splash embossing powder. I just love how it sparkles. 


I used watercolor paper, and added Visible Image Blow Out the Candles watercolored and fussy cut the cake and candles. I also used vellum to the spark stamp in WOW! Diamond Splash embossing powder, fussy cut the spark and added a sentiment from Blow Out the Candles stamp set, used black cardstock to complete my card.


"Thank you" for coming by and keep creating!

Topflight Stamps Supplies Used:


Tuesday, July 25, 2023

I've Got That Lovin' Feline

 Greetings! Today you've got Kathi here to share a project with you. This week my teammates and I are showcasing Visible Image's fabulous products. You know that I'm a cat person, so when I saw the "That Lovin' Feline" Clear Polymer Stamp Set, I knew it would be mine! It features four fabulous cats, a bird, a mouse, a heart cluster, a pawprint and several fun punny sentiment stamps. 

Here it is!


The roundest cat stamp from That Lovin' Feline Clear Polymer Stamp Set was stamped twice with black Copic friendly ink -- once onto white cardstock and once onto repositionable sticker paper. The sticker paper was fussy-cut then placed over its counterpart as a mask.

Using a stamping platform, the reclining cat stamp from the same set was positioned to the right of the masked cat. It too was stamped twice -- once onto the image panel and once onto repositionable sticker paper, which was was fussy-cut and placed over its counterpart as a mask.

A piece of repositionable tape was placed horizontally across the base of the image panel. Pink Jellybean Prism Ink by Hunkydory Craft was brushed over the masked cats onto the image panel to create a pink background. A happy accident occurred because I didn't realize that there was yellow ink remaining on the tape, which lent a yellowish glow around the cats, which I quite like.

When the image panel was covered, the Ripples Stencil by Visible Image was placed over the image panel. Pink Jellybean Prism Ink was brushed over the stencil onto the image panel to create a tone on tone design. 

Pink Jellybean Prism Ink was used to stamp the hearts and pawprints from the That Lovin' Feline Clear Polymer Stamp Set and the musical notes from the Music On, World Off Clear Polymer Stamp Set by Visible Image


All the masks were lifted and the cats and floor were colored with Copic markers to match my cats coloration. 

Pawprint patterned paper was cut with the largest scalloped rectangle die from the Card Passe Partout Rectangles Die Set by Studio Light, then cut again with the stitched frame die from the set. Plain grey cardstock was cut with the largest rectangle die from the set.

The scalloped patterned paper die-cut was used to frame the image panel, matted with the plain grey rectangle, and adhered to a dark grey card. 

Please pop over to my blog, Kat's Tales of Stamping, for further instructions and complete supply lists. 

Topflight Stamps Products Used:


Thanks for visiting today!

Monday, July 24, 2023

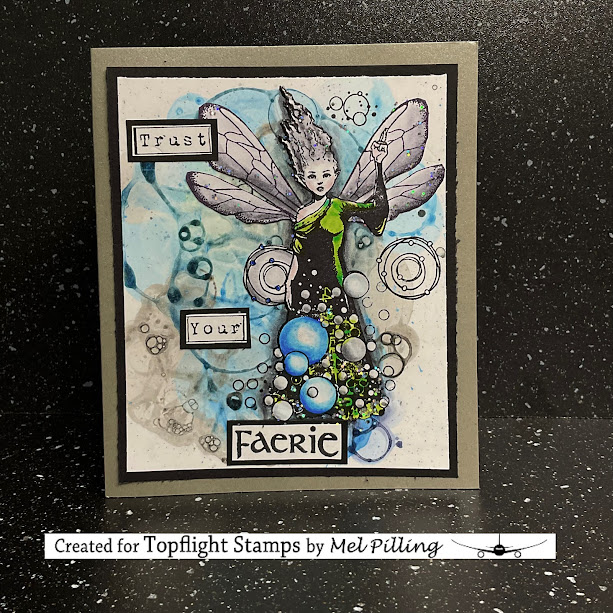
Trust your Faerie. She knows the way.

Hi Mel Pilling here.  This week, the Topflight Stamps design team is spotlighting         VISIBLE IMAGE. wonderful company with many artistic and expressive stamps to choose from.


.


For this day card, I used the new bubble background I showed you last week. (Yup, hooked!!) For this card, I used 1 tablespoon of paint, 1 tablespoon dish soap and 1 tbsp water in a short glass. I made one blue and one black. Stir both.

I blew gently into the black with a straw until the bubbles rose over the top.  I lifted the black bubbles with a spatula and gently placed the bubbles onto bristol card At the bottom section of my card. (You can use any water tolerant card).  After this was completely dry,  I stirred up my blue glass and did the same at the top of the card.  I left this to dry naturally also. It doesn’t take long.

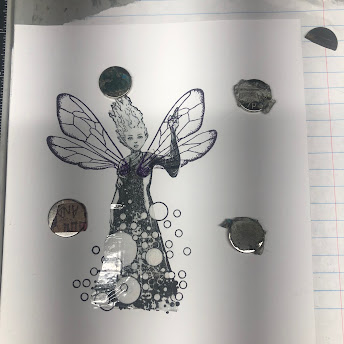
I stamped my fairy onto the dry card background using Versafine Clair Ink  in Nocturne , then stamped her again onto clean bristol card.  I covered the clean card faerie stamp with Masking Paper and then I stamped the wings over the masking sheet.  I also did this with the spotted circle on her right hip.  Then I removed the mask,  coloured the whole faerie with watercolour markers then cut her out and glued her onto the project card.

I added some holographic glitter here and there for a bit of sparkle, and a sentiment to Finish

STAMPS USED


I think this bubble technique is so much fun to do and quite addictive. I hope you to give it a try.

Thank you so much for joining me today on the Topflight Stamps blog.  See you again.

Saturday, July 22, 2023

Fun with Layering Stencils

 Hi friends. Alanna here and I have a quick and easy project for you today using the Floral Butterfly stencil/mask from Studio Light. The main portion of the butterfly comes with 4 different layers and then there is a layer for the body. I love the large size of this and also the price of just $5.99.

I used various inks from my stash to add color to the Floral Butterfly stencil and then used my Scan and Cut to trim it out. I then took a piece of paper from the Sugar Pop paper pad from Studio Light and scored it at every 1/4 inch with my bone folder to add a bit of texture. I then took some gold spray to add splatter to the background. 

Once my panel was dry, I took two of the smaller sentiments from the Basic Wishes sentiment set from Studio Light and stamped them onto the background using my favorite Versafine Claire Nocturne ink. The size of these was perfect to fit in between the scored lines. I finished off the card by adding foam adhesive to my butterfly and added it to the card.


Purchase these products used in my card below in the Topflight Stamps store.

Friday, July 21, 2023

New Visible Image Christmas Release


Hello crafty friends! Ericka from Strangely Creative here and today I have a Christmas card using the new Visible Image Christmas Tree Grunge set. I love this new Visible Image release and the script in the images. For my card today, I used a gel press background I made using the Visible Image Square Route stencil on my gel press plate with some acrylic paints. 


I then stamped the Visible Image Christmas Tree Grunge set in Versafine Clair Nocturn ink and clear heat embossed it. My background was a little busy so I used a white Posca pen to outline the tree and then added some gel drops. I stamped the sentiment and outlined it in black.


I added a gold twine on top for added sparkle. It is a bit busy and grungy but a fun and non-traditional Christmas card. 

Don't forget to check out the Christmas sale still going on so you can get started on your Christmas card making!


Topflight Stamps Used


01 09 10