Showing posts with label stencils. Show all posts

Monday, October 12, 2026

Bursting with Fall Colors with Versafine Clair Inks

Happy Monday, friends!  It's Walter on the blog with you today.  Fall is in full swing where I live in the New England area.  The colors are as beautiful as it gets and full of bright shades of yellows, oranges, reds, and browns.  It's truly spectacular and it was my inspiration for today's design.  Our Design Team theme this week is a very broad one - inks - and it worked in my favor as I used Versafine Clair Inks to create a fabulous autumn colored card.  It took just a few quick and simple steps to create it - let's jump into the process.


I used a cream A2 cardstock panel as my base layer.  I thought that cream would be better than white because any bits of the panel that peek through the ink wouldn't look so stark.  I began by taking my Versafine Clair Carrot Orange ink pad and just randomly swiping it onto the cardstock.  No rhyme or reason as to where I swiped it - just random swipes.


I repeated this with my Versafine Clair Strawberry ink pad.


I repeated it yet again with my Versafine Clair Lemonade ink pad.  This time I went over the entire panel with it to make sure that much of it was covered with ink.  I applied a little pressure in some areas and just lightly swiped in others.


The result was this beautiful tapestry of vibrant autumn colors.  The next step was to take the Aall & Create Autumny Falls stencil and add yellow, orange, and red leaves to the panel.  The yellow and orange leaves are more subtle but you can see indications of them as you tilt the panel.


I added a part of the tree by stenciling the PS450 Stencil from PaperArtsy and Versafine Clair Fallen Leaves ink and went over the edges of the card panel with some of the ink to distress it a bit.


I could now do my stamping onto the panel.  I used Versafine Clair Acorn ink, a lighter shade of brown with a slight red tinge, to stamp various small falling leaves and a sentiment from the All & Create Falling for Fall stamp set, as well as a beautiful sparrow with text elements from the All & Create Sparrow stamp set.  I also stamped a second sparrow onto a scrap of cream cardstock and lightly blended ink remaining on my brown brush over it.  I proceeded to fussy cut the sparrow, put some double-sided foam tape onto the back of it, and adhere it down to the panel.  I purposely placed it a little offset from the stamped sparrow to create a shadow-like effect.  A few randomly placed small Hunkydory Gold Precious Pearls were added to finish the design.

Here's a few closeups of my favorite elements of the design:


As you can see, the Versafine Clair is so pigmented and bright and just swiping the pads onto the cardstock created such a brilliant background.  An added bonus is that there wasn't a need for coloring any images as the background provides all the color that you need.

I hope that you enjoy today's design.  Post a pic of what you create using this technique in the comments - I'd love to see it!  I'll see you here on the blog again next week.  Until then . . . be well!


Topflight Stamps Products Used:


Monday, August 24, 2026

Notes of Love with PaperArtsy

Hi, friends!  Welcome back to the blog.  It's Walter with you today as I kick off a new week's theme, which is . . . anything goes.  I really enjoy the designs of Mags Woodcock.  I first came across her work in Somerset Studio magazine and was so excited to see her products with PaperArtsy on the Top Flight Stamp website.  This week, I used two of her coordinating products, PaperArtsy - Mags Woodcock - EMW004 - Rubber Cling Mounted Stamp Set and PaperArtsy - Stencil - Mags Woodcock - PS517 to create my card.  Let's jump into my process!


I began with an A2 sized piece of watercolor paper that I spritzed with water. Instead of painting with watercolors, I decided to paint with Distress Oxide Ink smooshed on my craft surface and mixed with water.  Using the oxide inks mixed with water gives an opaque, almost paint-like look.  I used a mop brush to first move Tattered Rose around the inside of the paper and then Antique Linen around the edges.


Once dry, I stamped the heart stamp onto the panel using Versafine Fallen Leaves ink.  I also stamped the large heart and small heart onto masking paper and set that aside.  I then stamped the image of the word Love repeated several times using Ground Espresso Distress ink.


I fussy cut each of the heart masks from the masking paper and applied them to the images.  I wanted the brown color of the stenciling to be lighter than the dark shade of Fallen Leaves so I used Ground Espresso Distress Ink to add that contrast.


I removed the masks and added spots of a varying pink color to the hearts and did that with a mixture of Spun Sugar Distress Oxide ink and water.  I then tapped the entire panel with a brush loaded with Tea Dye Distress ink to some vintage grunge.  Some subtle shine was added to the panel using the ovals on the stencil and Delicata Golden Glitz ink.  I also added some splatter using Old Paper Distress Spray Ink.  In order to add further age to the panel, I used a plastic knife to distress the edges and then ran Ground Espresso Distress ink around them.

Some kind of a floral element was needed to truly complete the design.  I stamped three of the small flowers, colored them with alcohol markers, Accented the petals with a gold gel pen, added grunge with Tea Dye Distress ink, and fussy cut them.  They were adhered with double-sided foam tape and embellished with acrylic drops that I colored gold using a Studio Light Gold Metallic Martker.


I'm really happy with this design.  With elements of love, nature, and music . . . it truly strikes the right note!  Thanks for spending some time with me on the blog today.  I'll see you again next week.  Until then . . . be well!

Top Flight Stamps Products Used:


Thursday, February 5, 2026

Enjoy Life with Gossamer Gold

Hello crafters!  I've got a shimmery card to share with you today for Topflight Stamps, using Lindy's Stamp Gang Gossamer Gold spray.  Oh my, this is so gorgeous!  It's got a combination of walnut brown and gold hues in one spray.  First, I took a plain manila tag and spritzed it with this product, then a bit of water and hit it with a heat tool to help speed up drying. Once dry, I used the PaperArtsy Scrapcosy PS317 Stencil and Lavinia Truffle Dye Ink to create borders and a sentiment on the tag.  After mounting it on an old hymnal page and decorative paper, I added a twine bow and it's all set to give to my father in law for his birthday.  Thanks for joining me, and hope you have a great day! ~ Colleen


Supplies From Topflight Stamps:


Wednesday, July 30, 2025

Chou & Flowers Stenciled Cards

Hello, Lisa Hoel here! This week at Topflight Stamps our brand focus is on Chou & Flowers. (Plus there is a sale for the Christmas/Winter category that is still running through the end of the month!) I created a card set using the Flowers stencil from them. I used both regular and crackle texture paste through the stencil, then sprinkled the wet paste with WOW! embossing powder from the Sara Naumann Twinkly Fizz set. When the paste was dry, I heat embossed it. I love the sparkle!


Lisa Hoel for Topflight Stamps #creativejuicefreshsqueezed #topflightstamps


Thanks for stopping by and be sure to check out the Topflight Stamps store for a wide selection of different and hard to find stamps, stencils and other paper crafting supplies from all around the world! Also keep an eye here on the Topflight Stamps blog. There is new inspiration posted often!


Topflight Stamps Supplies Used:

Chou & Flowers Stencil - Flowers

WOW! Embossing Powder Trio - Sara Naumann Twinkly Fizz

Visible Image Stamp Set - Go To Words

Masterpiece Design Die Set - Tag It

Clair Ink Pad - Monarch

texture paste


Wednesday, January 8, 2025

Send Someone a Love-ly Card for Valentine's Day

 Hello, Lisa Hoel here. This week at Topflight Stamps our theme is all about Valentine's Day and I'm back with another card to share! (Check out the large selection of Love themed stamps and stencils in the store.) I had some stencil fun on this card.

Lisa Hoel for Topflight Stamps #creativejuicefreshsqueezed #topflightstamps

I laid the Studio Light Stencil Grungy Hearts onto a sheet of white mixed media card stock and then sprayed it all over with Pinkella Mysticals Mist. I left the stencil in place and sprinkled some tiny bits of Burgandy Dinkles Ink Powder onto it as well. I also spritzed on a bit of extra water to help the powder crystals dissolve. I let the stencil lie on the paper while everything dried and removed it afterwards.

Thanks for stopping by and be sure to check out the Topflight Stamps store for a wide selection of different and hard to find stamps, stencils and other paper crafting supplies from all around the world! Also keep an eye on the Topflight Stamps blog. There is new inspiration posted daily!

Topflight Stamps Supplies Used:

AALL & Create Stamp Set - Heart Hugs #975

Studio Light Stencil - Grungy Hearts

Lavinia Dinkles Ink Powder - Burgandy

Lavinia Mysticals Mist Spray - Pinkella

Versafine Pigment Ink Pad - Onyx Black

Saturday, July 22, 2023

Fun with Layering Stencils

 Hi friends. Alanna here and I have a quick and easy project for you today using the Floral Butterfly stencil/mask from Studio Light. The main portion of the butterfly comes with 4 different layers and then there is a layer for the body. I love the large size of this and also the price of just $5.99.

I used various inks from my stash to add color to the Floral Butterfly stencil and then used my Scan and Cut to trim it out. I then took a piece of paper from the Sugar Pop paper pad from Studio Light and scored it at every 1/4 inch with my bone folder to add a bit of texture. I then took some gold spray to add splatter to the background. 

Once my panel was dry, I took two of the smaller sentiments from the Basic Wishes sentiment set from Studio Light and stamped them onto the background using my favorite Versafine Claire Nocturne ink. The size of these was perfect to fit in between the scored lines. I finished off the card by adding foam adhesive to my butterfly and added it to the card.


Purchase these products used in my card below in the Topflight Stamps store.

Saturday, June 10, 2023

Sunset Silhouettes

 Hello friends. Alanna here and I'm excited to share this card with you today. I love the colors and how the background came out. I started by taking 3 colors of the Lavinia Mystical Mist Sprays in Pinkella, Bumblebee, and Indian Sunset and I sprayed them onto watercolor card stock. I did a few layers, drying in between. I haven't been able to capture it in the photo, but these sprays leave the most gorgeous shimmer and shine and I absolutely love them. 

I've used a couple of the colors before on the blog and recently decided to pick up the rest of the colors because I love the sprays that much. They are very highly pigmented and are just gorgeous.

After my background was dry, I took the Tall Flowers stencil from Darkroom Door and blended on Versafine Claire Nocturne ink through the stencil. I love that the stencil comes with both the positive and negative portions, allowing for greater design flexibility.

Once my ink was dry, I trimmed the panel down to 4x5.25 inches and then added it to a piece of black card stock. I then added all of this onto a piece of coral/orange card stock that I thought matched the background quite nicely. I stamped a sentiment from my stash onto a leftover piece of my sprayed and inked card stock and that finishes off this card.

I hope you've been inspired today. Crafty hugs! ~ Alanna

Find the products I used today below at Topflight Stamps.

Monday, August 1, 2022

Index Cards with Sprays and Paints

 Welcome back, crafters! This is Rachel from rwkrafts.com and I'm sharing some index cards with you all today.


I decided to make 4 index cards, so I started by gesso-ing them all. I've quickly fallen in love with the new Lavinia Mysticals sprays, so I used Amble Green spray and Kingfisher spray over this AALL & Create stencil called Enchanted Garden.


Next, I took some Paper Artsy paint Slimed and Bougainvillea and just did a quick brush of color on each index card.


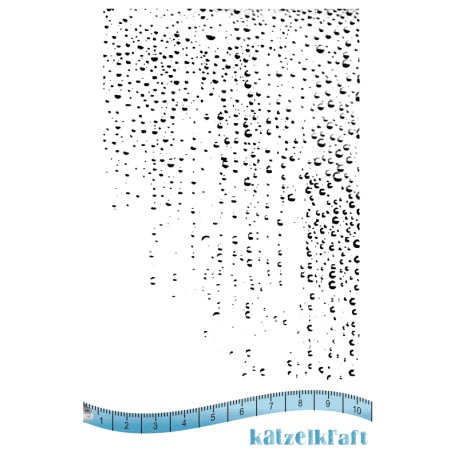
Once the paint dried, I stamped each index card to add some texture. I stamped two cards with the Dragonfly Post stamp from Crafty Individuals with Versafine Clair in Cheerful. I stamped the other two cards with the Waterfall stamp by Katzelkraft in Versafine Clair Chianti.


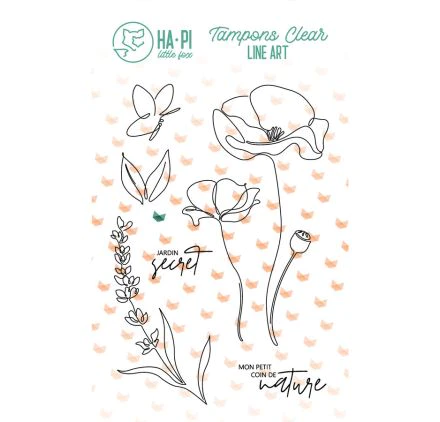
I stamped some floral images by Chou and Flowers Memories and Ha-Pi Secret Garden, then sprayed the cardstock with Lavinia spray in Fruit Sorbet and Bumble Bee. Once the sprays dried, I fussy cut the flowers and stapled them on the index cards.


Here are the final pictures of each of my index cards!


Thanks for joining in! Have a creative week ahead :)

Topflight Stamps Supplies Used:


01 09 10