Tuesday, February 28, 2023

Just for you!

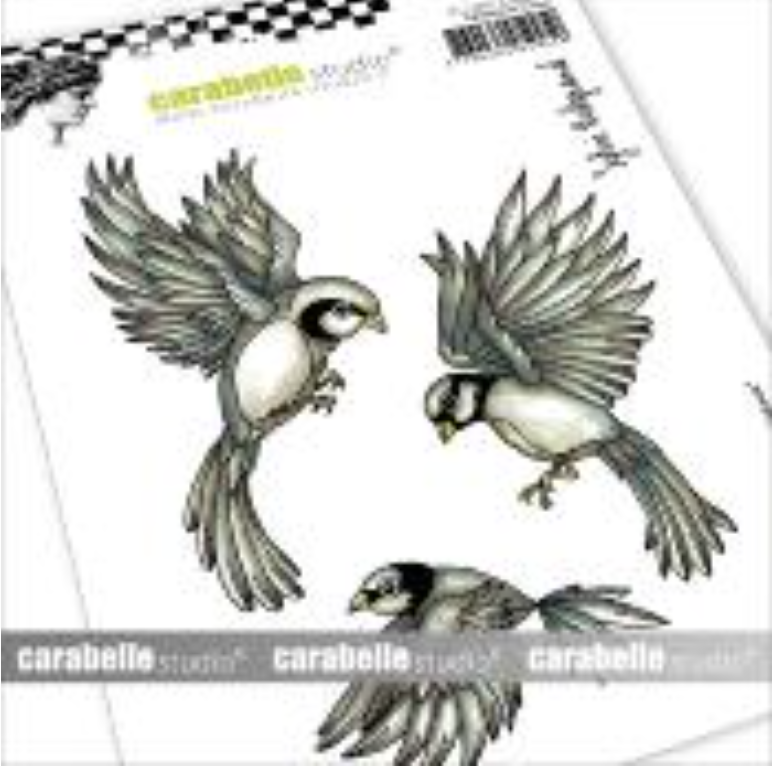
 It's Tuesday so you've got Kathi here to share a project with you. This week's theme over at the Topflight Stamps blog is "Anything Goes". I've made a slimline card using The Birds and The Strings of Day and Night Cling Rubber Stamp Sets by Carabelle Studio. The sentiment is from the More Classic Sentiments Clear Stamp Set by Heffy Doodle. The background was watercolored using Della Blue Elements Ink by Lavinia Stamps.

Here it is!


Using a stamping platform and Nocturne VersaFine Clair Ink by Imagine Crafts, stamp the right facing bird from The Birds Cling Rubber Stamp Set by Carabelle Studio onto a 4" x 9" piece of Bristol Paper. Stamp just the bird's face and beak onto a piece of masking paper, fussy-cut, and place the mask over the bird's face.

Remove the bird stamp from the stamping platform.

Position the sun string stamp from The Strings of Day and Night Cling Rubber Stamp Sets by Carabelle Studio facedown on the image panel so that the top charm is close to the bird's beak. Ink the stamp with Nocturne VersaFine Clair Ink and stamp.

Remove the mask covering the bird's face and heat set the panel. Be sure that it's absolutely dry to avoid contaminating your Copic markers.

Use Copic markers to color the images.

Use a white gel pen to add accents to beads and the bird's eye. Use Gelly Roll Bold Line Stardust Clear Glittering Ink by Sakura to add glittery touches to the charms on the The Strings of Day and Night.

Use a slimline die to cut the image panel.

Smoosh the Della Blue Elements Ink by Lavinia Stamps onto a craft mat. Spritz with water. Using a paint brush, apply the blue ink to the background. When most of the panel is covered, add the paint brush to add drops of water to the inked image panel, then immediately use a paper towel to lift the water. When you're happy with your background, thoroughly heat set the panel.

Use a larger slimline die to cut black glitter paper and adhere to a black slimline card.

Use  Nocturne VersaFine Clair Ink to stamp the sentiment from the More Classic Sentiments Clear Stamp Set by Heffy Doodle onto a scrap of white cardstock. Heat set. Use a small rectangle die to cut the sentiment. Mat the sentiment onto a die-cut cut from the glitter paper. 

Adhere the sentiment to finish the card.

Please pop over to my blog, Kat's Tales of Stamping, for more detailed instructions, notes, and complete supply lists.

Topflight Stamps Products Used:


Thanks for visiting today!

Monday, February 27, 2023

Happiness is a choice

 Hello everyone Mel Pilling  here today with an art journal page using KATZELKRAFT STAMPS and LAVINIA STAMPS . Both great company’s for those of us who love to create scenes.


I started this project by painting the background with a brush using ELEMENTS INK   I stamped my pads onto my crafting surface and added a little water.  I then used the different inks as a pallet to mix together to create various colours..  For the lake, I used combinations of.   Midnight blue  , Blue Atoll , Blue Lagoon , Mermaid and  Bermuda. The water was done by painting with sideways sweeping motions using the edge of a flat brush.   I used Washi tape above the water to keep the horizon straight.  I added the highlights on the water with white acrylic paint later on, once the project was dry.

The sky was done with Della blue and Violet chalk using a wet on wet watercolour technique.  Dampen your paper then just float damp colour into it with elements inks. Allow to dry.

I did the mountains with a hill mask and a Lavinia stencil brush using midnight blue, violet chalk and Mulberry.  I used Washi tape beneath the mountains for a straight horizon.

The grass was stencilled on, and then I went over it with a paintbrush and my green pallet. For this pallet, I used PineLime punchGreensleeves, and Olive.  I used the side of the flat brush again to flick some grass at the top of the hills.

The trees were hand drawn on clean mixed media card, painted with watercolour markers and elements ink Truffle.  They were fussy cut and glued on. I dabbed damp inks on for leaves using the grass palette and a paint brush.

Katzelkraft character, the main star of the page, was stamped on clean card stock painted with the truffle and some watercolour markers, cut out and stuck on. I then drew the swing around him.

 I stamped the rest of the beautiful Lavinia characters directly on the project using Versafine Claire inks in Nocturne.  The owl was done in Versafine Claire ink Fallen Leaves. Then finally, I shadowed all the characters and highlighted the bodies with a white pen.


KATZELKRAFT STAMPS USED 


LAVINIA STAMPS USED 


Thank you for joining me today I hope you give it a try have fun 


Saturday, February 25, 2023

A gift to honour you Fairy Mother

 Hi everyone  Pilling Mel Pilling here with a forest scene using the fabulous Lavinia Stamps  .   I cannot use enough of these stamps in my projects, as you’ve probably noticed. 😉❤️


I began this journal page by stamping all the characters first this time using  Versafine Clair ink  in Nocturne  and Morning Mist  .  I blocked the lower part of the Oracle stamp so that I could freehand her skirt in later.  I coloured all the stamps on the background with watercolour markers. 
  The background was done with hill masks using Elements ink  in  Olive   Lime punch   Sundance  and  Pine,  being careful not to go over my characters.  I stamped the small branch among the trees at the top with Versafine Claire in Golden Meadow   and Morning mist.  I did second generation stamping here to keep it light.  I finished by adding shadows under the characters with watercolour markers.
I find that nothing takes your mind off life‘s little difficulties better than diving into a Lavinia Forest scene.  ❤️❤️🧚‍♀️🧚


LAVINIA STAMPS USED 

The Oracle


      Druid’s Inn

.

Tree Den

.


..
                                         
                                                                 Open Dandelion


.

Friday, February 24, 2023

Katzelkraft Mixed Media Journal Page


Happy Friday friends! Ericka from Strangely Creative here and today I have a mixed media journal layout using some great Katzelkraft stamps along with the Studio Light Acrylic Paint set in Intense. I started my page using the bright colors of paints using a brush and then my finger. I struggle with leaving white space but tried really hard on this page.


After my paint dried, I used the Katzelkraft Contraptions and Things set with Archival Black Ink. 

I then stamped the Butterfly Metamorphosis set on a separate printed paper and clear heat embossed them. 

I cut them out and added and before I added them to my layout, I glued down some tissue paper I had stamped with the Katzelkraft Big Script to my page.

I added some color to the butterfly and then added some texture to my page with the Darkroom Door Stencils in Diamonds and Honeycombs with black acrylic paint. I finished my page with some sentiments from the Butterfly Metamorphosis set and added white gel pen marks.


Thank you for stopping by and I hope you have a great weekend!

Topflight Stamps Supplies


Thursday, February 23, 2023

Katzelkraft - Don't forget to be Awesome!

Hi Everyone,

Cornelia here today. This week we are featuring Katzelkraft stamps at the Topflight blog. I am sure you all know that love their stamps and by now have a large collection of them. 
I started with stamping the frames. I masked teh frames and stamped the animals inside, using a stamp positioner. I colored them with water colors. I doodled the hangers. Added some shadows to the frames to make them more dimensional. Heat embossed the sentiment and added it with foam tape.

I hope you liked this. Thanks for visiting. 
See you next week with more Topflight Stamps inspiration.

And here are the stamp supplies I used: 


Wednesday, February 22, 2023

Colorful Sunflowers with Katzelkraft


Hi friends! Colleen here again sharing a colorful sunflower card, wishing for spring weather and skies that are the same beautiful color as in my card! Sigh... Today I'll be using several products by Katzelkraft. This is an AMAZING company with a wide variety of design elements in which to choose! I hope to share just how versatile these stamps are with my card today! 

I love to color, so I was very excited to see the Katzelkraft Sunflower red rubber stamp! This is a bold image with lots of coloring opportunities! I started by stamping the image in permanent black ink (I use this type of ink when I color with alcohol markers, so the ink doesn't bleed). Then I created a mask for the first flower and stamped a 2nd one behind it. So now it looks like one flower is tucked behind the other! Next, I colored both flowers with my alcohol markers. 

When I finished coloring the sunflowers, I placed the masks back over each flower and ink blended around them using Lavinia inks in Violet Chalk and Della Blue. I started with Della Blue, inking most of the area around the flowers, and then went back in with Violet chalk just around the edges of the flowers. The combination of both colors creates a lovely sky! 

I decided at the last minute to add a bit of stamping around the flowers for a mixed media effect, so with the masks still in place, I stamped a sentiment script from Katzelkraft's Nature & Flowers in 3 places around the flowers. This stamp has so many playful elements that add detail to your card design! Make sure you check out all that's included in the Supply List below!   I decided to add white splatters over the entire card panel after I removed the masks from the flowers! White splatters add an element of detail that just makes the card so interesting and makes my heart happy! 


Once my card panel was fully decorated and colored and splattered (he he), I trimmed the edges with my deckled paper trimmer. Before I adhered it to my 5.5x4.25 card base, I stamped the white card base with Katrzelkraft's Big Script. This stamp makes such an interesting background for your card panel! This is one of those "one stamp does all" types! Finally, I was ready to adhere my card panel to the base. I finished with a sentiment from Katzelkraft's Holiday Quotes. These are large, bold sentiments with a lovely calligraphy! I added glossy accents to the stamin of the flower. I just love to add that extra shine and detail! 

Below is one more image of the final card design! 


I hope you were able to see the huge array of stamps and designs that Katzelkraft has for your crafty stash! You can do everything from coloring to creating mixed media pieces! Thanks for stopping by! 


SUPPLIES USED:


Lavinia Della Blue dye ink


Katzelkraft Holiday Quotes red rubber stamp


Katzelkraft Sunflower red rubber stamp


01 09 10