Showing posts with label Lavinia Elements Premium Dye Ink Pads. Show all posts

Tuesday, September 8, 2026

Spooky!

Greetings!  It's Tuesday so you've got Kathi here to share a project with you. BUT, before we get to that I wanted to remind you that you have a little less than 24 hours to take advantage of the Labor Day Sale! Treat yourself, treat a friend, buy your holiday gifts early! Just pop on over to the Topflight Stamps to fill your basket with goodies!


This week's theme is Halloween, which is my favorite holiday! I love everything about the holiday including creating projects for it, 


Ink the Dreaded Damask Cling Rubber Stamp by Indigo Blu with Nocturne VersaFine Clair Ink by Imagine Crafts/Tsukineko and stamp it onto a panel of Mixed Media paper to create the image panel. Heat set.

Brush Lemon Drop Elements Premium Dye Ink by Lavinia Stamps onto the center of the stamped panel. Brush Sundance Elements Ink slightly overlapping both sides. Brush Russet Orange Elements Ink on both sides of the darker yellow inked area. Continue this pattern using Mulberry, Merlot, and Flying Fig Elements Inks. Heat set the panel, trim, edge with a black pen, and set it aside.

Use Tuxedo Black Memento Ink by Imagine Crafts/Tsukineko to ink the Skull n Roses Unmounted Rubber Stamp by Crafty Individuals and stamp onto white cardstock. Fussy-cut the image, color with alcohol markers, and edge with a black marker.

Brush a strip of Mixed Media paper with Lemon Drop Elements Premium Dye Ink. Heat set. 

Pounce an anti-static pad onto the inked strip. Use Russet Orange Elements Ink to stamp the "Spooky" sentiment from the Halloween Collection Clear Stamp Set 1 by Melina Dahl for That's Crafty onto the strip. 
Add Clear Gloss Embossing Powder by Wow! to the wet ink. Pour the excess powder back into the container. Heat set the embossing powder. Let the heated powder cool, then use a Sentiment Frame Die Set to cut the sentiment. Edge the interior part of the die-cut with Flying Fig Elements Premium Dye Ink. Heat set. Use the same die to cut textured black cardstock.

Adhere the Dreaded Damask to a black textured A2 card. Adhere the colored, fussy-cut Skull n Roses as shown. Adhere the framed sentiment to finish the card.

Please pop over to my blog, Kat's Tales of Stamping, for step-by-step intructions and complete supply lists.

Topflight Stamps Products Used:


Thanks for visiting today!

Tuesday, September 1, 2026

Sunflower Best Wishes Card

It's Tuesday which means you've got Kathi here to share a project with you. It's another "Anything Goes" week and the beginning of September so sunflowers are in bloom! 


Here it is!


I wanted to use the "no-lines" coloring technique to color the beautiful large sunflower from the Sunflowers Clear Stamp Set TE33 by Tracy Evans Boutique. Use yellow and orange/yellow Memento Ink to stamp the sunflower onto white Copic-friendly cardstock then color it with Copic markers. 

Use the largest die from the Polaroid Pop Die Set DI-89 by AALL and Create to cut the image panel, then fill in the area around the sunflower with overlapping blue dots to create a pointillistic background. 

Position the beetle and the bee stamps from the Sunflowers Clear Stamp Set TE33 facedown on the image panel die-cut. Ink both stamps with Nocturne VersaFine Clair Ink by Imagine Crafts/Tsukineko and stamp. Remove the beetle stamp, then clean and dry the bee stamp thoroughly. Reposition the bee stamp facedown in another place on the image panel die-cut. Ink the stamp with Nocturne VersaFine Clair Ink and stamp. Heat set the image panel die-cut.

Use a Fine-tip marker to add red dots and lines to the beetle. Use a white gel pen to add white to his eyes. When dry, add green pupils. Use a clear glaze pen to add dimension and shine to the beetle's body. Let the glaze gel ink dry, then add another layer to build up the dimension to its body.

Use a yellow marker to add yellow to the bees' bodies. Use a Sparkle Clear Overlay Brush Pen by Spectrum Noir to add glitter to the bees' wings. Set the image panel die-cut aside.

Cut a piece of patterned paper to 4" x 6" to create the background panel.. I used patterned paper that is no longer available, but thought that the primarily orange paper from the Ink Drops - Sunset 6x6 Patterned Paper Pad by Craft Consortium would be a good substitute for what I used.

Use Russet Orange Elements Premium Dye Ink by Lavinia Stamps to stamp the small sunflower onto the background panel. Position the "Best Wishes" sentiment stamp from the Flower Power Clear Stamp Set TE37 by Tracy Evans Boutique facedown towards the bottom of the background panel. Ink the sentiment stamp with Nocturne VersaFine Clair Ink and stamp.

Edge the background panel with  Russet Orange Elements Premium Dye Ink and Nocturne VersaFine Clair Ink. Heat set the background panel. 

Adhere the image panel die-cut to the background panel, then adhere the background panel to a 4" x 6" black card.

Please pop over to my blog, Kat's Tales of Stamping, for step-by-step instructions and complete supply lists.

Topflight Stamps Products Used:


Thank you for visiting today!

Tuesday, August 25, 2026

A Scenic Card with Lavinia Stamps

Greetings! It's Tuesday and you've got Kathi here with a project created for an "Anything Goes" week. I missed last week's "Outdoors" theme so I decided to create a scenic card with products by Lavinia Stamps. I've used the Acorn Abode Clear Polymer Stamp, the Hanging Lanterns Clear Clear Polymer Stamp, Dana Clear Polymer Stamp, and the Texture 2 Clear Polymer Stamp with six colors of Elements Premium Dye Ink and the ever-so-useful Hills Acetate Mask.


Use Tuxedo Black Memento Ink by Imagine Crafts/Tsukineko to stamp the Acorn Abode Clear Polymer Stamp by Lavinia Stamps twice - once on panel of Bristol paper and once onto repositionable sticker paper.

Heat set the image stamped onto the Bristol paper, which will become the image panel. Fussy-cut the sticker-paper version and adhere it atop its counterpart on the image panel.

Place the flatttest mask from the Hills Acetate Mask by Lavinia Stamps just above the rocks so that it's covering the bottom of the image panel. Brush Soft Cygnet Elements Premium Dye Ink by Lavinia Stamps over the top of the Hills Acetate mask and around the masked Acorn Abode. Next brush Lemon Drop Elements Premium Dye Ink onto the image panel blending the ink colors as you go. Continue this process with the Lime Punch, Pine, and Olive Elements Premium Dye Inks working from the center of the image panel outwards. 

Use a water-filled Fine Spray Misters by Spectrum Noir to mist the ink to add some white speckles and splatter. Remove the Hills Acetate Mask and heat set the panel.

Trace the Hills Acetate Mask onto scrap cardstock or thin acetate, cut along the traced line, and place the upper part of the temporary mask to cover the top part of the image panel.

Brush Bermuda Elements Premium Dye Ink over the temporary mask to ground the 
 masked Acorn Abode. Press the Texture 2 Clear Polymer Stamp by Lavinia Stamps onto the Bermuda Elements Premium Dye Inkpad and randomly stamp over the temporary mask and the masked Acorn Abode to add texture and interest.

Remove the temporary mask and the mask from the Acorn Abode. Color the image with Copic markers. Trim the image panel to 4.25" x 6".

Place the image panel onto a stamping platform so that it's against the bottom, but centered horizontally. Place the Hanging Lanterns Clear Clear Polymer Stamp by Lavinia Stamps facedown onto the right side of the panel so that it's a bit over the right edge. Ink the stamp with Nocturne VersaFine Clair Ink by Imagine Crafts/Tsukineko and stamp. Remember that you can always re-ink and stamp again if needed to attain a good impression

Clean and dry the stamp. Position the Hanging Lanterns Clear Clear Polymer Stamp facedown in the center of the image panel, but with the end of the stamp slightly above the stamped Hanging Lanterns. Ink the stamp with Nocturne VersaFine Clair Ink and stamp. Make sure that the image panel didn't move before inking and stamping again. Unlike me. Oops.

Repeat the above with the Hanging Lanterns Clear Clear Polymer Stamp on the left.

Position the Dana Fairy Clear Polymer Stamp by Lavinia Stamps facedown on the image panel so that her feet and hand are on the stem of the Acorn Abode. Ink the stamp with  Nocturne VersaFine Clair Ink and stamp.

Remove the image panel from the stamping platform and thoroughly heat set it. Use watercolor pens to color the Hanging Lanterns and Dana's wings and lantern. Use glitter markers to add yellow glitter to the circles and black glitter to the dots in the Hanging Lanterns.

Edge the image panel with Bermuda and Pine Elements Premium Dye Inks, then edge again with Nocturne VersaFine Clair Ink.

Finish by adhering the image panel to an A6 black textured card.

Please pop over to my blog, Kat's Tales of Stamping, for step-by-step instructions and complete supply lists.

Topflight Stamps Products Used:


Thank you for visiting today!

Friday, August 21, 2026

Under the Lantern Light


Hello crafty friends! Ericka from Strangely Creative here, and today I’m sharing a card that was especially fun to make because it was created for my mom’s birthday!

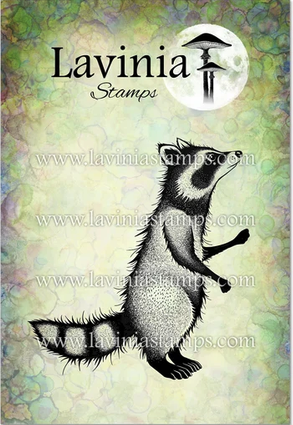
My mom loves raccoons, so when I pulled out the adorable Tumble from Lavinia Stamps, I knew exactly who needed to be the star of her card. I decided to create a magical nighttime scene around him, complete with a glowing lantern, colorful sky, woodland foliage, and just a little sparkle.

Starting with Tumble

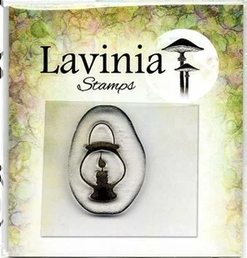
I started with Bristol Smooth cardstock and stamped the sweet little Tumble raccoon. I then added the Mini Lamp and Seed stamps to begin building the scene around him.

I wanted it to look as though Tumble was walking with a glowing lantern in the middle of an enchanted forest, so before adding my background colors, I masked him off to keep the image protected.

✨ Creating the Lantern Glow

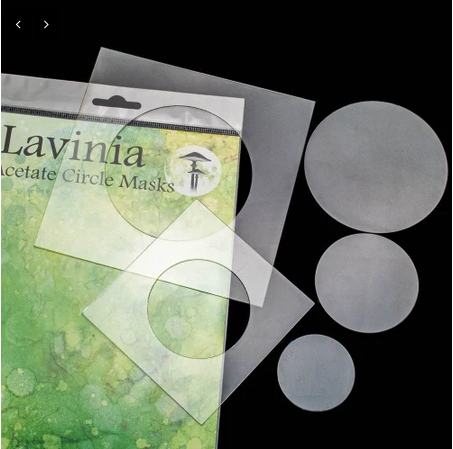
To create the light around the lantern, I used the Lavinia Circle Masks and began blending Sundance ink closest to the lamp. From there, I gradually expanded the glow with larger circles of Russet Orange and Merlot. I love how layering the colors this way creates the illusion of warm light radiating from the lantern. It's such a simple technique, but it can completely change the atmosphere of a card.

Building the Night Sky

Once my lantern was glowing, it was time to create the night around it.

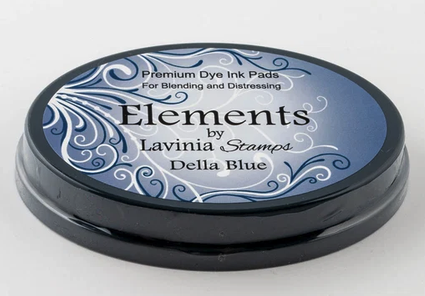
I blended Della Blue and Blue Atoll across the rest of the background, allowing those deep blues to contrast against the warm yellows and oranges around the lantern. Along the bottom of the card, I added Pine and Pixie Green inks to create the grassy woodland floor.


A few spritzes of water over the ink-blended background lifted some of the color and created beautiful little variations that reminded me of stars and texture in the night sky.

Creating the Enchanted Forest

To give Tumble a cozy place to walk through, I stamped several Lavinia foliage and forest images along the ground and around the edges of the card. Layering the silhouettes helped frame the scene and made it feel as though we were getting a tiny peek into Tumble’s secret woodland world.

I then used a little watercolor to add color and shading to Tumble himself, keeping it soft so he still worked with the dreamy background.

Finishing Touches

Of course, an enchanted forest needs a little sparkle! I used a sparkly gold pen to add small highlights throughout the background, giving the scene just a hint of magical light.

To finish the card, I added:

  • A simple sentiment strip
  • Gold details for a little extra shine
  • My signature hand-drawn frame


And with that, Tumble was ready to wish my mom a very happy birthday!

Thank you so much for stopping by today! I hope Tumble’s magical evening inspires you to pull out your stamps, experiment with light and color, and create a little story of your own.
Have a wonderful weekend and happy creating!


 Topflight Stamp Supplies

Lavinia - Foliage
Lavinia - Foliage
Shop at:
TP
Lavinia - Forest Moss
Shop at:
TP
Lavinia - Tumble
Lavinia - Tumble
Shop at:
TP
Lavinia Stamps - Mini Lamp
Shop at:
TP
Lavinia Stamps - Mini Seed Head
Shop at:
TP
Lavinia - Circle Masks
Shop at:
TP
Lavinia - Elements Dye Ink - Blue Atoll
Shop at:
TP
Lavinia - Elements Dye Ink - Della Blue
Shop at:
TP
Lavinia - Elements Dye Ink - Merlot
Shop at:
TP
Lavinia - Elements Dye Ink - Pine
Shop at:
TP
Lavinia - Elements Dye Ink - Pixie Green
Shop at:
TP
Lavinia - Elements Dye Ink - Russet Orange
Shop at:
TP
Lavinia - Elements Dye Ink - Sundance
Shop at:
TP
Tsukineko - VersaFine Clair - Nocturn
Shop at:
AZ | TP
Lavinia 5/8 Stencil Brush
Shop at:
TP
01 09 10