Showing posts with label That's Crafty. Show all posts

Tuesday, November 26, 2024

So Grateful and Happy Together - A Thanksgiving Card

Greetings! It's Tuesday so you've got Kathi here to share a project with you. This week is "Anything Goes" for the TFS team. Since Thanksgiving is Thursday, I made a card which can be used for Thanksgiving or other special occasions.

But before I get to my card, I wanted to remind you that Topflight Stamps' Black Friday Sale Week is going on right now! There are so many wonderful products (both new and old) that make wonderful holiday gifts for family, friends, and yourself!


***Back to today's project***
So back when I saw the truck filled with critters in the Warm Hugs Clear Stamp Set by Jane's Doodles for Creative Expressions, I immediately thought of the holiday song "Over the River and Through the Woods" and knew that I wanted to use it on a holiday card. So here it is!


Tuxedo Black Memento Ink by Imagine Crafts/Tsukineko was used to stamp the critter-filled truck stamp from the Warm Hugs Clear Stamp Set by Jane's Doodles for Creative Expressions twice — once onto a 5" x 7" panel of white cardstock and once onto repositionable sticker paper. The sticker paper version was fussy-cut and placed over its counterpart on the image panel as a mask. 

The acetate rolling hills mask from the Acetate Hills Mask Set by Lavinia Stamps was placed towards the top of the image panel and the flattish mask was placed over the truck covering the bottom of the image panel. Two colors of Copic-friendly blue ink were brushed over the top of the mask to create a night sky. While the rest of the image panel was still covered. White paint was splattered to add some stars.

I previously had traced the rolling hills mask onto cardstock and cut it out. I placed the top part of the traced cardstock over the sky portion, then brushed  dark green Copic-friendly ink over the top of cardstock mask to create the top part of the hilly area.  The same dark ink was brushed over acetate rolling hills mask to add the tops of additional hills. When done, I brushed lighter Copic-friendly green ink between the cardstock mask and the flattish acetate mask to complete the hilly background behind the masked truck.

A second previously traced and fussy-cut piece of cardstock was used to cover the hilly area of the image panel. Grey and black Copic-friendly ink was brushed over the paper mask and the masked truck.

The masks were lifted and the truck and critters were colored with Copic markers. I intentionally left the truck somewhat streaky to make it look old and worn. 

Blue Belle VersaFine Clair Ink by Imagine Crafts was used to stamp the words "happy" and "together" from the Artist Trading Coin Stamp Set 11 by That's CraftyAdditionally the sentiment "So Grateful" from the More Classic Sentiments by Heffy Doodle was stamped with the same ink onto wood-patterned paper from the Wood Textures 6x6 Paper Pad by Craft ConsortiumThe ink was heat set and both sentiments were die-cut, then edged with Blue Belle VersaFine Clair Ink.

A piece of plaid paper from the Distress Plaid Paper Pad by Creative Expressions was selected and cut with a large A7 rectangle frame die. The die-cut was edged with Morning Mist VersaFine Clair Ink by Imagine Crafts, heat set, then adhered over the image panel. The framed image panel was adhered to a grey 5" x 7" card, then edged with Morning Mist VersaFine Clair Ink

The sentiments were adhered to finish the card.

Please pop over to my blog, Kat's Tales of Stamping, for step-by-step instructions and complete supply lists.

Topflight Stamps Products Used:


Tuesday, April 2, 2024

Belated Birthday Card

Greetings! It's Tuesday so you have Kathi here to share a project with you. I don't know if it's my age or my absentmindedness, but I never seem to get birthday cards mailed on time. Since Easter just passed and there are lots of rabbits in my backyard, I decided to use this shocked/worried looking rabbit from Katzelkraft'All Mad Here Unmounted Red Rubber Stamp Set with the Background Clocks Solo Unmounted Red Rubber Stamp to create a belated birthday card.

Here's my card!


Tuxedo Black Memento Ink by Imagine Crafts/Tsukineko was used to stamp the rabbit from the All Mad Here Unmounted Red Rubber Stamp Set by Katzelkraft twice — once onto white cardstock and once onto repositionable sticker paper. The sticker paper version was fussy-cut and placed over the rabbit on the image panel as a mask. 

Low tack tape was placed across the image panel under the rabbit's paw. A cloud stencil was placed over the image panel and Della Blue Elements Ink by Lavinia Stamps was brushed over the stencil, masked rabbit, and the tape to create a cloudy sky. 

When that was done, Della Blue Elements Inks by Lavinia Stamps was used to stamp the Background Clocks Solo Unmounted Red Rubber Stamp over the masked rabbit onto the sky area of the image panel.

The mask and tape were removed. Copic markers were used to color the rabbit and create a grassy area to ground the rabbit. 

The image panel was trimmed, edged with Della Blue Elements Ink, and matted onto blue cardstock cut .25" larger than the image panel.

The tag die from the Taggletastic Die Set 30 by AALL and Create was used to cut a scrap of white cardstock. The back of the tag die-cut was taped onto negative space on the white cardstock scrap, which was secured to the base of a stamping platform.

Della Blue Elements Ink was used to stamp the "OOPS!" from the Everyday Sentiments Clear Stamp Set 666 by Janet Klein for AALL and Create and "I'm Late" from the Alice Collection Clear Stamp Set 2 by That's Crafty (no longer in stock) onto the speech bubble die-cut. 

Della Blue Elements Ink was also used to stamp "Happy Birthday" from the Classic Sentiments Clear Stamp Set by Hefty Doodle. A rectangle die was used to cut the sentiment.

The sentiment die-cuts were edged with Della Blue Elements Ink.

The image panel and sentiment die-cuts were adhered to an A2 card created from patterned cardstock.

Please pop over to my blog, Kat's Tales of Stamping, for detailed instructions and complete supply lists.

Topflight Stamps Products Used:


Thanks for visiting today!

Tuesday, October 3, 2023

Happy Halloween

It's Tuesday so you've got Kathi here to share a project with you. This week is an "Anything Goes" theme and it's October! Hence, I created a Halloween card that my daughter called "weird". I'll let you judge for yourself.


My first step was to stamp the witch hat from Funny Accessories Unmounted Red Rubber Stamp Set by Katzelkraft twice with Copic-friendly black ink onto white cardstock — once onto the image panel and again onto repositionable sticker paper. The sticker paper version was fussy-cut and placed over the one on the image panel as a mask. The elephant from the Van Gogh Elephant Unmounted Red Rubber Stamp Set by Katzelkraft was positioned so that it would appear he were wearing the hat. He was stamped twice — once onto the image panel and again onto repositionable sticker paper. The sticker paper version was fussy-cut and placed over the one on the image panel as a mask. The easel was also stamped twice. This time, I stamped the skull from the Small Elements Clear Stamp Set 2 by That's Crafty onto the canvas on the easel, then I covered the easel with the fussy-cut sticker version as a mask.

The flattish hills from the Acetate Hills Mask Stencil Set by Lavinia Stamps was placed horizontally across the image panel, covering the bottom part. Grey and lavender inks Copic-friendly inks were brushed over a cloud stencil to create a brooding sky, fit for Halloween.

When the sky was done, the acetate hills mask was removed. Two colors of Copic-green ink were brushed over the masked image to create a grassy lawn.

The masks were all lifted and the elephant, the witch hat, the easel, and the skull painting were colored with Copic markers. Copics were also used to add details and shading to the lawn.

Post-It Notes were placed around the the painting on the easel the Tulip Red VersaFine Clair Ink was used to stamp Small Elements Clear Stamp Set 2  the drippy element from the Small Elements Clear Stamp Set 2

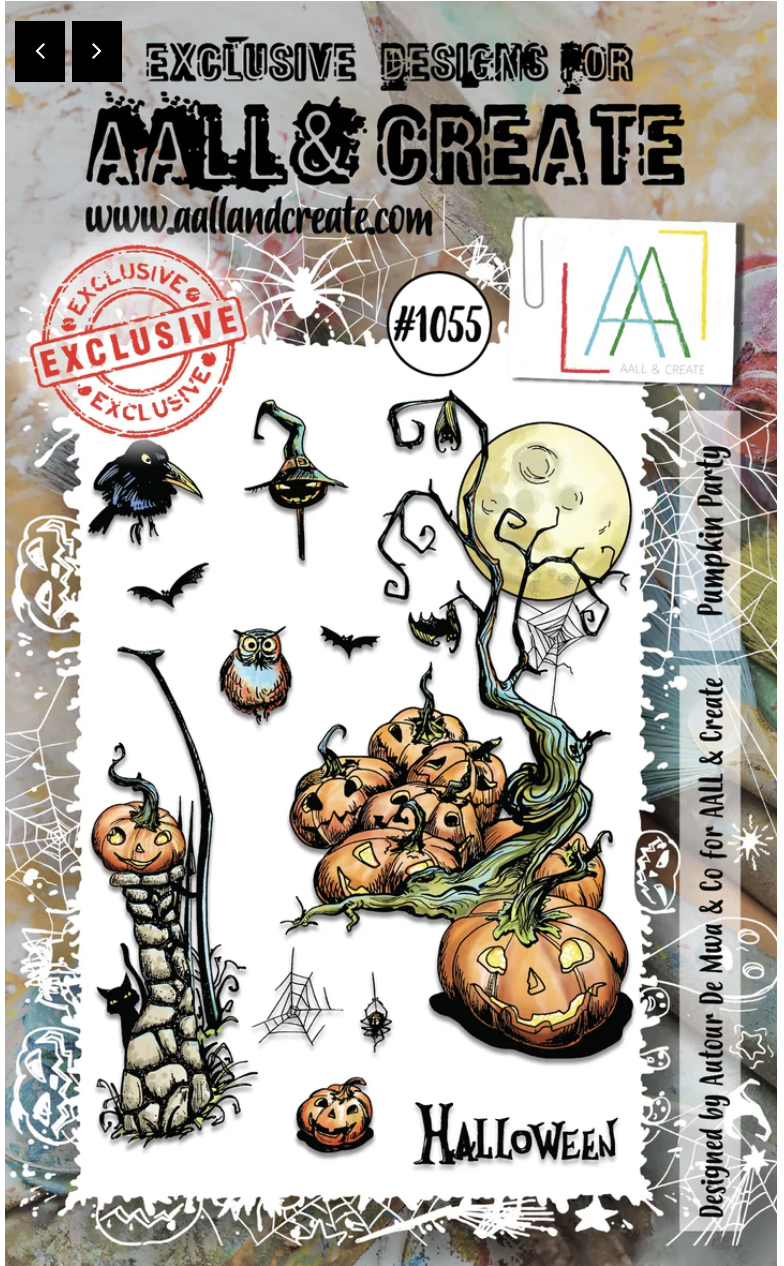
Nocturne VersaFine Clair Ink was used to stamp the spider from the Pumpkin Party Clear Stamp Set 1055 dangling from the witch hat and one of the birds from the Bird Collection Clear Polymer Stamp Set by Lavinia Stamps atop the easel.


The drips on the painting weren't looking drippy enough so I used a red paint pen to enhance the drips and to add a red hourglass to the spider's back.

The image panel was matted with red cardstock and adhered to a grey 6" square card. 

Please pop over to my blog, Kat's Tales of Stamping,  to read my insanely verbose instructions and the complete supply lists.

Topflight Stamps Products Used:


Thanks for visiting today!

Tuesday, August 1, 2023

Be Amazing

 It's Tuesday, so you've got Kathi here to share a project with you. This week is an "Anything Goes" week, so I decided to make a summery encouragement card with the Zen Bumblebee Clear Stamp Set by Melina Dahl for That's Crafty and a sentiment combining words from the Lots of Words Clear Stamp Set, also by That's Crafty 

Here's the card:


The first step was to cut, score, and fold textured white cardstock to create an A2 card. Summertime VersaFine Clair Ink was sponged around the outside .5" of the card, then heat set. 

Copic-friendly black ink was used to stamp the large floral butterfly from the Zen Bumblebee Clear Stamp Set by Melina Dahl for That's Crafty. I fussy-cut the butterfly, colored it with Copic markers, edged it with a black marker, then added a coat of shimmer to the wings with Sparkle Glitter Brush Pen Clear Overlay by Spectrum Noir.

SundanceRusset Orange, and Paprika Elements Inks by Lavinia Stamps were brushed onto a white cardstock then sprayed with 91% Isopropyl Alcohol until the paper was saturated. A heat gun was turned onto the wet paper which moved the blended-ish ink a bit whilst drying the cardstock. The panel was  lightly misted with water to add some splotches and splatter. The panel was then trimmed to 5.25" x 4".

The honeycomb stamp from the Zen Bumblebee Clear Stamp Set, a a stamping platform,  and Summertime VersaFine Clair Ink by Imagine Crafts/Tsukineko were used to create borders on both sides of the background panel. Summertime VersaFine Clair Ink was used to edge the panel. 

Nocturne VersaFine Clair Ink by Imagine Crafts/Tsukineko was used to stamp  the word "Be" from the Lots of Words Clear Stamp Set by That's CraftySummertime VersaFine Clair Ink was used to stamp the word "Amazing" from Lots of Words Clear Stamp Set.

Antenna were drawn onto the background panel, then the colored, fussy-cut bee was adhered to the background panel as shown.

The final step was to adhere the background panel to the reserved card.

Please pop over to my blog, Kat's Tales of Stamping, for step by step instructions, notes, and complete supply lists. 

Topflight Stamps Products Used:


Thanks for visiting today!

Tuesday, May 30, 2023

Adventure

 It's Tuesday which is my day to share a project with you. This week is an "Anything Goes" week and I decided to go quasi-Steampunk with a slimline card featuring the "I Saw a Ship" Clear Photopolymer Stamp Set by Pink Ink Designs. This is a really cool stamp set with a gorgeous hot air balloon and a basket, sailing ship, house, and cake that you can suspend beneath it. The set also includes two sentiments and three banners. 

Here's my card.


The ship from the "I Saw a Ship" Clear Photopolymer Stamp Set by Pink Ink Designs with Copic-friendly ink towards the bottom of a 4" x 9" panel of white cardstock and onto repositionable label paper. The label paper version was fussy-cut then placed over its counterpart on the image panel as a mask.

The hot air balloon from the set was positioned (a bit off center because perfection is overrated) and stamped onto the image panel and onto repositionable label paper.

Light blue ink was brushed horizontally over the masked images to create a cloudy sky.

The masks were lifted and the images were colored with Copic markers. The image panel was trimmed to 3.75" wide and edged with light blue ink. 

Using a stamping platform, the Cityscape Reflections Rubber Cling Stamp by Andy Skinner for Creative Expressions was positioned against the edge of the platform. The image panel was positioned so that it was a bit more than .5" from the edge of the platform so that the city's reflection would be omitted. The stamp was inked with Grey Copic-friendly ink, then stamped.

A banner die was used to cut white cardstock. The die-cut was brushed with the same blue ink used previously. The "Adventure" sentiment was stamped with grey ink onto the die-cut.

The image panel was adhered to a slimline card created from grey cardstock. The banner was adhered at the top as shown.

Please pop over to my blog, Kat's Tales of Stamping, for in depth instructions and complete supply lists.

Topflight Stamps Products Used:


Thanks for visiting today!


Tuesday, April 11, 2023

Three Spring Cards

 Greetings! You've got Kathi here today! This week my Topflight Stamps teammates and I are celebrating Spring or Mother's Day! I decided to make a trio of 5" x 3.5" Spring cards with the one of the floral stamps from the ATC Backgrounds Clear Stamp Set by Melina Dahl for That's Crafty. While the cards feature the same design, each card has a different color scheme with background layers created with stencils and ink. 

Here are the cards together.


The beautiful floral spray stamp from the ATC Backgrounds Clear Stamp Set by Melina Dahl for That's Crafty was stamped three times with Copic-friendly black ink onto white cardstock. 

Each image was colored with Copic markers and  trimmed to the same size.

Cardstock was selected to match each image, then trimmed to form 5" x 3.5" cards, 4.75" x 3.25" card panels, and mats.

All three image panels were matted with the corresponding colored mats. 

For the blue card, Medieval Blue VersaFine Clair Ink by Imagine Crafts was sponged over the Checkered Stencil by Darkroom Door onto the blue panel then heat set.

Sundance Elements Inks by Lavinia Stamps was sponged over the Divine Stencil by Lavinia Stamps onto the yellow panel.

Glamorous VersaFine Clair Inks by Imagine Crafts was sponged over two of the windows on the Inner Peace Swirl Windows Stencil by Studio Light onto the pink panel then heat set.

The stenciled panels were adhered to the matching cards and the matted image panels were adhered to finish all three cards.

Please pop over to my blog, Kat's Tales of Stamping, for more photos, instructions, and complete supply lists. 

Topflight Stamps Products Used:


Thank you for visiting today!
01 09 10