Tuesday, May 30, 2023
Adventure
Monday, May 29, 2023
The morning commute
Hello there lovely crafting people. MEL PILLING here today, with this bright bookmark featuring the beautifully detailed ocean themed stamps by Crafty Individuals. I feel bookmarks are a wonderful gift for those of your friends who still like to read real books. To me, there is nothing like the feeling of getting a new book and having a beautiful new fresh bookmark to slip inside.
This bookmark measures 11 x 3 1/2“. I used a 12 x 12” Gelli Plate with ELEMENTS INK in BLUE LAGOON . I splashed this with water lightly using a FAN BRUSH and took a print. Once dry, I used a STENCIL BRUSH to strengthen the colour at the bottom in Blue Lagoon, BLUE ATOLL and some Distressed Ink in Prize Ribbon.
I ‘smooshed’ Elements Ink in CONFETTI , LIME PUNCH and RUSSET ORANGE on to clean card. Smooshing is when you stamp your ink pads directly onto your craft surface. Spray with water move the edges just slightly with your finger so you don’t have straight lines. Then dip your card stock in to the pools of colour. Make sure you dry your card each time between smooshing so you don’t muddy the colors.
When this was dry, I stamped the fish on top using VERSAFINE CLAIR NOCTURNE then I fussy cut the fish out. I also stamped the hats on clean card stock and fuzzy cut. I stuck the hats on the fish then the fish on the bookmark.
I stamped the seagull onto the bookmark first, then onto clean card. I water coloured him with watercolour markers then fussy cut just the bird and stuck it on the bookmark. I extended the Piling underneath the water and coloured it with a lighter tone underneath the surface of the water to give the impression it was underwater. I then drew some grasses. I backed all this with black card stock and added ribbons in similar shades.
CRAFTY INDIVIDUALS STAMPS USED
Saturday, May 27, 2023
One layer Sympathy Cards
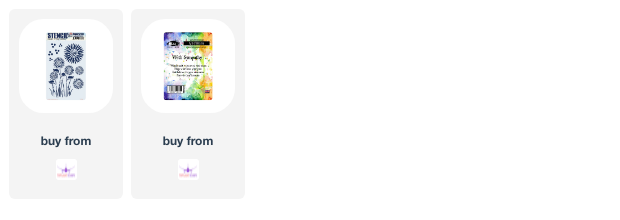
Alanna here sharing a pair of very clean and simple one-layer cards with you today. They feature the this beautiful stencil from PaperArtsy. I blended on some inks through the stencil onto white A2 notecards. After my ink blending was done, I stamped the sentiment which is from the With Sympathy set from Visible Image. It has the larger sentiment along with a beautiful verse that would be perfect for the inside of cards.
If you're like me, you often find yourself needing a sympathy card but don't want to have to make one when you actually need it. These cards fit the bill to create and have ahead of time so that when you need one, your stash is stocked.
I hope you've been inspired. Crafty hugs! ~ Alanna
Find these products I used on my cards at Topflight Stamps.

Friday, May 26, 2023
Craft Emotions Gel Press Flowers
Happy Friday crafty friends! Ericka with Strangely Creative here and today I am playing with a gel press print and these beautiful flowers from Crafty Emotions called Kate 4 Background.
I saved a gel press print that I made and wasn't too sure I liked. I decided to stamp and heat emboss the Kate 4 Background with WOW! Embossing in Pea Coat.
I then took out my colored pencils and colored up a couple of the flowers to make them pop on my busy background.
I finished my by adding this funny/snarky sentiment from AALL & Create's Bite Me Ephemera Die Cuts. There are so many great sentiments in this package. Thank you for stopping by and I hope you have a wonderful weekend!Thursday, May 25, 2023
Craft Emotions Stamps - Have a Jawsome Day
Hi Everyone,
Tuesday, May 23, 2023
Happy Bird Day!
Monday, May 22, 2023
Finding spring joy - Craft Emotions Stamps
Hi MEL PILLING here. This week our team is highlighting the beautiful stamps by CRAFT EMOTIONS.
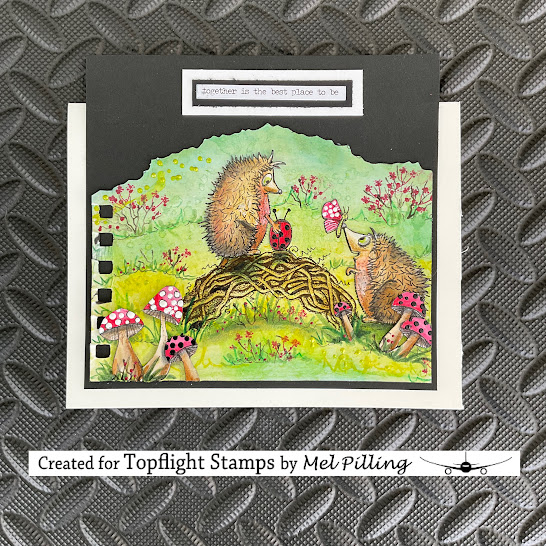
The card dimension is 5 1/2” x 7”. The picture dimension is 6” x 6”. I did the bottom part of the picture using mix media card and left the coil holes on for dimension. I used a 6” x 6” square GEL PRESS with ELEMENTS INK in PINE. I splashed lightly with a FAN BRUSH and water and took a print. Once dry, I used a STENCIL BRUSH, and a hill mask and using Pine, and SUNDANCE shaped some hills.
All stamping was done with VERSAFINE CLAIR INK in FALLEN LEAVES directly onto the card.
I stamped the hedgehogs, butterfly, ladybug and mushrooms, on clean card stock also. I coloured and fussy cut them a then adhered them to the card. The flowers I stamped with Versafine Clair in GLAMEROUS.
I rough cut over the Hills with scissors and glued the art onto plain black card stock. I then used a fine black non bleed pen to add extra spikes to the hedgehogs.
STAMPS USED
Thank you for dropping by the Topflight Stamps blog today. See you soon.
Saturday, May 20, 2023
Choose to shine
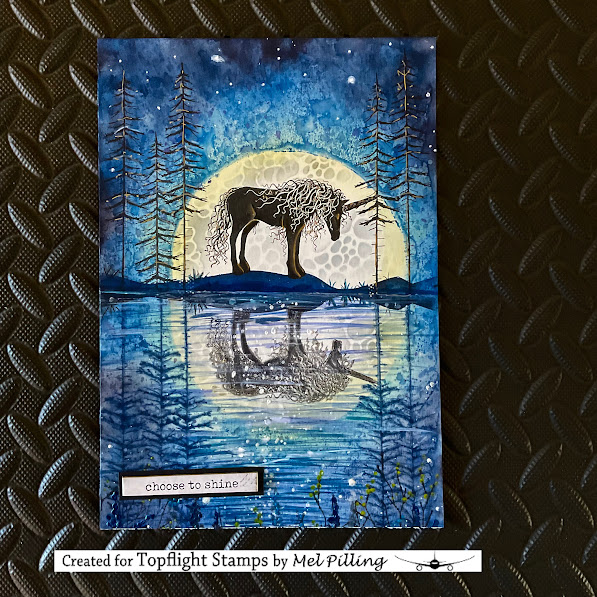
Hi MEL PILLING here today with an art journal page, using a 12x12 GEL PRESS to do a reflection.
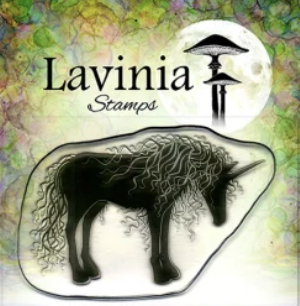
I begin by stamping my unicorn in VERSAFINE CLAIR-NOCTURNE onto a GEL PRESS, and then took a print. Then I turned my page around, so the first unicorn was upside down. Then I stamped using a Stamping platform, leaving a space in between the two images where I would place the ground. I made an elongated oval mask with copy paper to mask off the moon. Then I used a BRAYER to ink up the 12 x 12 Gelli plate with ELEMENTS INK in BLUE LAGOON . I splattered this with small droplets of water using a FAN BRUSH . I then placed the moon mask onto the centre of the plate. Leaving the mask there, I took a print using my stamped unicorn card. Once dry, using a stencil brush, I brushed the edges of the moon with ELEMENTS INK SUNDANCE. Then using the Lavinia stencil (Stone) and ,ELEMENTS INK GRAPHITE. I faintly textured the moon only. (Including the reflection).
I did the land using a paper hill mask the real one first. For this I ran Washi tape at a point between the unicorns to mark the line between land and water. Then I flipped the mask over, re-applied the Washi tape and did a fainter version for the reflection. I used Elements ink for this in MIDNIGHT BLUE and DARK DENIM.
For the trees, I did the reflection side first. The same way as the unicorn, directly onto the Gelli plate. Then the usual style of stamping for the real trees.
I edged the picture with the darker blues, and some dark purple distressing to highlight the centre of the picture
For the water I put streaks of all the blues, using a flat paint brush and added light with white paint in the same manner. The stars were done with the white gel pen. Then I highlighted the unicorn mane with white gel pen, and glitter pen.
LAVINIA STAMPS USED
The Gelli plates make reflections very easy, and because they turn out a little bit fuzzy and a little bit paler than regular stamping it lends accuracy to the reflection. There are quite a few methods out there for creating reflections, but I find the Gelli plate to be the easiest and most convincing. Just my humble opinion.
Thanks for joining me on the blog today. See you soon.
Friday, May 19, 2023
Darkroom Door Mixed Media Journal Page
Hello friends! Ericka from Strangely Creative here and I have a mixed media journal page I made with a variety of Darkroom Door supplies. I started with a gel press background I made using PaperArtsy Fresco Paints in Beach Hut, Baltic Blue and Aquamarine. Before I pulled my print I used some bubble wrap packaging for a unique design.
I used the Darkroom Door Handwritten Ledgers and stamped the images with Versafine Clair inks in Nocturn, Warm Breeze, and Twilight. I then used some WOW! Embossing powders ti add some sparkle and shine to my ledgers. I added additional texture on my background using the Darkroom Door Diamonds and Grunge Border stencils.
I added the Darkroom Door Flower from the Sunflowers set that I heat embossed with yellow embossing powder on vellum and fussy cut out. I finished my page with a white heat embossed sentiment from the Darkroom Door Dream Big sentiment strip.
Thank you for stopping by and I hope you have a wonderful weekend.
Topflight Stamp Supplies Used


