Wednesday, October 31, 2018

Dreamer


Hi there!  Toni with a bonus project for you today.  I'm using Jane Davenport Hairlines for the main image.  Isn't it fantastic?!  I had quite a few ideas for this one, including adding a witch's hat!

I colored her up with watercolors then added additional strands of hair using Jane Davenport Warm Seas Glitz-Sea Sparkle Markers.  Check out that sparkle!


Lastly I diecut the panel then added one of the Katzelkraft Dreamer sentiments.

Katzelkraft - Dreamer - Sentiments - Unmounted Red Rubber Stamp Set

Check out my blog, Frankie Helps Craft, for a full list of ingredients.  See you next week!

Tuesday, October 30, 2018

Jane Davenport Mini Art Journal

Good morning, Lisa Hoel here with a project to share with you! I combined Eileen Hull's Wrapped Journal with Jane Davenport stamps to create this mini art journal. Inside are pages made from sketch and watercolor paper so you can use it for little works of art.

LOVE the Relaxed Narwhal stamp!

…and the back

Inside I used mermaid fabric to cover the journal and of course more Jane Davenport stamps to decorate the signatures.


You can see some more info for this card on my blog post

Topflight products used are:


Thanks for stopping by and have a great week! 

Monday, October 29, 2018

Jane Davenport Sparkle Feathers

Hi Everyone, and welcome to the Topflight Stamps blog!  It's Jenny here, and I have a pretty card for you today that uses some of the new Jane Davenport goodies that Topflight Stamps now carries.   Today I'm using the Fair Feathers dies and the new Sparkle Markers


Here's a look at the die set I used.  I also used the Jane Davenport sparkle markers and Rina Barakat embossing powders which are also carried by Topflight Stamps.

To create my project, I first die cut each of the feathers from grey cardstock.  I heat embossed three of them by dunking them in Versamark embossing ink and then scattering embossing powder over them.  I used gold embossing powder, and Rita Barakat powder in Kiss of the Fairy and Mermaid Fin.   On the last (and largest feather) I colored it in with the sparkle markers in three different colors. 


I die cut a panel of white card stock with a stitched rectangle die, and then flicked water onto it, which I heat embossed with gold and Mermaid Fin embossing powder.  I adhered the largest feather directly to the stitched rectangle, and then bundled the other three by wrapping gold twine around the stamps, and then adhering them directly over the main large feather. 

The sentiment is by Creative Expressions - Showered with Love (One of my faves!) and was stamped in black ink.  I adhered the entire panel to a white cardbase with fun foam to finish the card.

Have a wonderful day everyone!


Friday, October 26, 2018

Jane Davenport Build a Bouquet

Happy Friday and I hope you had an awesome week. Ericka here and today I'm playing with this beautiful flower set from Jane Davenport.


I felt like this stamp set would be perfect for some loose watercoloring. Here is the set I used as well as the watercolor markers.


https://topflightstamps.com/collections/jane-davenport-australia/products/jane-davenport-spellbinders-build-a-bouquet-clear-stamp-sethttps://topflightstamps.com/collections/jane-davenport-australia/products/jane-davenport-mermaid-markers-watercolor


I love this set as well as the bright colors of these markers. I used several of the shades of the colors.


I hope you have a wonderful weekend as well as a happy Halloween. If you would like more details on how I created the card feel free to stop by my blog at Strangely Creative.


Wednesday, October 24, 2018

Meerkat Christmas


Hi!  Toni with you today having a fine old time watching these Katzelkraft Meerkats catch a glimpse of Santa. They are too too cute!


I started the card by stamping the sleigh from 
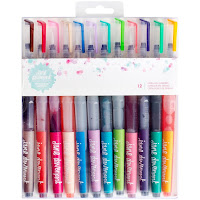
Katzelkraft Christmas Holiday Accessories then diecutting the stars.  Next I used Zig watercolor markers in broad strokes to create the ground and sky. I used my heat gun a lot as I didn't want the watercolors to bleed but no worries when they did; I just added another few strokes of the pen. After the watercoloring had completely dried, I spattered the card to create snow. I set that aside and began on the meerkats.


I think Copic coloring the meerkats was my favorite part of the whole card. I find them to be so cute and expressive. When I saw them a BUNCH of ideas came into my head for using them.

Birthday:  Is that for me?
Birthday/Celebration:  Happy dancing
Christmas/other:  Do you hear what I hear?

Do you have other ideas?  How about the below meerkat picture (courtesy of the San Diego Zoo)? Look at him!  He's like people!

https://animals.sandiegozoo.org/animals/meerkat
 
Do stop by my blog, Frankie Helps Craft, for a full list of ingredients and to check out my other work.  See you next time!

Monday, October 22, 2018

Paper Piecing For The Love of Stamps

HI everyone and welcome to the Topflight Stamps blog! It's Jenny here, and today I have a card project that uses Studio Light patterned paper and For the Love of Stamps images together using a paper piecing technique. 


The stamp set I'm using is Just My Cup of Tea which as a Brit living in the US, I LOVE.   I still import my tea when coffee just doesn't cut it :) It has some beautiful sentiments, and while I didn't use them today, some super pretty florals and foliage.

I stamped the tea cup and teapot onto co-ordinating paper using Versafine Onyx Black ink.  The paper I'm using is by Studio Light - Orange, Red, Brown, Ivory, Gold - really gorgeous autumnal / fall colors. 


I trimmed out the images and shaded them with coordinating Distress inks (Fired Brick on the teapot and Fossilized Amber / Vintage Photo on the teapot) to add some dimension.   

I selected another paper which I die-cut with a stitched rectangle die and spattered it with brown Lindy's Starburst spray and adhered to a kraft card base.  I then outlined the images with a black marker, and adhered the teapot to the panel with liquid adhesive. 


Before adhering the teacup, I stamped the sentiment with Rose Gold embossing powder directly onto the teapot.  I then popped the tea cup in front with foam tape and that finished the card!

Check out the whole range of Studio Light papers - they're super pretty!!

Jenny

Saturday, October 20, 2018

Paperartsy/Jofy Blooms

Hello and Welcome to the Topflight Stamps blog.  It's Clare here with you today and I just stopped by to share with you a little card made with the wonderful Paperartsy/Jofy stamps.


For this card I used the flower stamps from Paperartsy-Jofy set #61.  I stamped, cut out and water coloured them first before adding another layer of colour with coloured pencils.


I tore up some craft card into my desired size, distressed with Spun Sugar distress oxides and applied them to the card.  I added some accents with a white pen and some liquid pearl.

Thank you for stopping by today I hope you have enjoyed your visit?  Remember to stop by the Topflight Stamps online store and check out the amazing selection of online stamps.

Happy Crafting,

Clare.

Friday, October 19, 2018

Fall Shrooms

Happy fall Friday. It's Ericka here and today I'm sharing a fun mushroom card from That's Crafty - Melina Dahl.
https://topflightstamps.com/collections/thats-crafty/products/thats-crafty-magda-polakow-clear-stamp-set-scribbled-shrooms


This is such a cute set and there are so many different sentiments you can pair with these.
I decided to make this more of a cozy sunset scene and love how the watercolors turned out on these fanciful mushrooms!

 I love all the fun details this stamp set had and all the cute house embellishments.

Thanks for stopping by today and I hope your weekend is wonderful. If you want to know more about how I created my card feel free to stop by my blog Strangely Creative.


Wednesday, October 17, 2018

Home Sweet Home


Hi everyone!  Toni with you today sharing lots and lots of fanciful mushrooms!

My stepdaughter just moved into her first apartment so I wanted a fun and happy card to help her celebrate this momentous occasion.  I have to say the That's Crafty Melina Dahl Scribbled Shrooms were absolutely perfect for this.  Look at those happy homes!

I could have built an entire town with the other stamps in this set--notice the top left stamp is a map?  Cool!


My card is primarily watercolored with Zigs and a bit of sponged clouds. I put the finishing touches on using Jane Davenport Warm Seas Glitz-Sea Sparkle Markers. These have a fat bullet tip but I had no problems using them in small areas which was really surprising.  And exciting--I'll be able to use them for all sorts of things!


Feel free to visit my blog, Frankie Helps Craft, to get the full ingredient list and to look at my other designs.  See you next week!

Monday, October 15, 2018

Cute Little Houses Two Ways - That's Crafty!

Hi Everyone and welcome to the Topflight Stamps blog! It's Jenny here, and today I'm here with a couple of card projects that use the exact same stamp set, but which have a very different look. 


The set I'm using today is this whimsical Sketchy Houses by That's Crafty - Melina Dahl.  They're clear stamps and it's an extra large set, so the images are a great size for cards.   I just love the little heart touches and the style. 


I'm also using the Squiggles stencil by That's Crafty which is small but perfect for repeat stenciling or centre focal points like I'm doing here. 


For my first card, I used the stencil with some Shimmerz Barely Blue embossing paste, to create a focal point for my house.  I then heat embossed the smallest house and plant in white embossing powder.  


I scribbled over the images with Tombow markers in pink, purple and aqua, spritzed them with shimmer spray, then fussy cut them out.  I adhered them both with foam tape to the dried embossing paste, and popped the panel onto a white card base.  As a finishing touch I added Nuvo Glitter drops around the edge of the panel, and glossy accents to the windows for shine.


For my second card, I used a panel of grey cardstock and heat embossed the row of houses in WOW! Opaque Red embossing powder. I then ink blended Faded Jeans and Fired Brick Distress Oxides around the edges up to the outline of the houses. I flicked some water to create a mottled sky, and then die cut out the entire piece with a stitched rectangle die.  I also added Clear Wink of Stella to the houses for some shimmer.


I adhered the panel to a white card base, then added glossy accents to the windows again.  For the sentiment I used this fab Hello die by Studio Light which i die cut several times in red cardstock and layered together.  I backed with a panel of blue cardstock and then dropped Nuvo Crystal Glaze into the wells created by the die cuts.  When dry, I added another red die cut over the top and then adhered to my card!

I think you'll see you can get very different looks with the exact same stamp set by changing up your media and colors!  Hope you like it!! 

Jenny

Friday, October 12, 2018

Winter Coffee Break

Happy Friday! Ericka here with a fun winter coffee card. Not like its getting cold here in Texas but I'm hoping it will soon.


I used the following Katelkraft stamps for my winter theme.

https://topflightstamps.com/products/katzelkraft-coffee-tea-to-go-unmounted-red-rubber-stamp-set

I love how these accessories can go with just about anything.


To find out how I created my card feel free to stop by Strangely Creative. Thanks for stopping by and I hope there is some coffee in your Friday!


01 09 10