Thursday, June 30, 2022

Paper Artsy - Don't Bug Me!


    Hi Everyone,

Cornelia here today. This week it's anything goes on the Topflight blog. Time to show those cute bugs some love!
I first stamped the bugs. Colored the bugs with Copic markers. Added white gel pen highlights and Stickles to the wings. Trimmed the card and addded a strip of patterned paper at the bottom. Heat embossed the sentiment, cut it apart and added it to my card.


I hope you liked this. Thanks for visiting. 
See you next week with more Topflight Stamps inspiration.

And here are the stamps I used: 

Wednesday, June 29, 2022

Let your dreams be your wings


Good morning!
Charmaine here with a card made with a gel press, PaperArtsy paint, and a gorgeous stencil. 


Here are the products I used available at TopFlight Stamps:

Gel Press - Reusable Gel Printing Plate - 5 x 7 Rectangle Gel Plate


Start by applying paint directly onto the gel plate using a brayer. Place the stencil over the plate and use copy paper to remove the excess paint through the stencil. You can do this with a baby wipe as well.

With the stencil still on the plate, apply a contrasting color over the stencil. Remove stencil and let dry.


Pull the print by applying another solid layer over the impression.


Match the stencil to the impression/pulled print and add dimension by applying paste or modeling paste over it through the stencil.


White heat emboss one set of the wings on vellum, then another silver wings on white cardstock. 


Adhere the wings by offsetting them a bit to create the illusion of movement. 


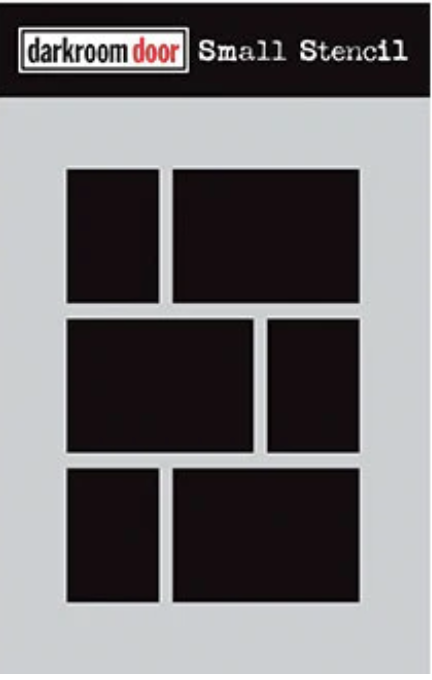
White heat emboss the sentiment on black card stock and mount these to the print. I added a framed die-cut to the center to draw the viewer's eye to the center. 


Isn't this so cool?

I hope you liked today's card using a stencil and gel
 plate and will give it a try.

Charmaine


Tuesday, June 28, 2022

It's Your Purrday!

Greetings! It's Tuesday so you've got Kathi here to share a project with you. I'm a crazy cat lady and show my feline love by collecting all the cat themed crafting supplies in the world. To that end, I recently purchased Time for Tea's Purrfect Day and Kitty Capers Clear Stamp Sets, which I've used in this Purrday card. 

Here it is!


The Mixed Boxes Small Stencil by Darkroom Door was taped onto white cardstock and placed onto the base of my stamping platform. The hanging cat, the reclining cat (from the Purrfect Day Clear Stamp Set) and the sitting cat (from the Kitty Capers Clear Stamp Set) were positioned facedown onto the boxes of the stencil. The lid of the platform was pressed onto the back of the stamps and lifted. The stamps were inked then stamped onto the image panel and onto repositionable label paper.

The label paper versions of the kitties were fussy-cut and adhered over their counterparts as masks.

With the stencil still taped to the image panel, Violet Chalk Elements Ink was brushed onto the small rectangles. A Post-It Note was torn and placed over the bottom part of the the sitting and reclining cat rectangles. Della Blue Elements Ink was brushed over the sky areas on all three large rectangles. The top part of the torn rectangle was placed over the sky area on first the sitting cat and Pine Elements Ink was brushed onto the area below the cat to ground him. This step was repeated with the reclining cat.

With all the rectangles colored, the stencil was removed and cleaned. The masks were removed and retained for another use.

The cats, tree, leaves, and grassy areas were colored with Copic markers, then the image panel was set aside.

The Checkered Stencil by Darkroom Door was placed over the top part of a 4.75" x 6.75" piece of white cardstock. Violet Chalk Elements Ink was brushed over the stencil to create a background panel. The cardstock panel was flipped 180° and the process was repeated. The stencil was removed and the center area was brushed with Violet Chalk Elements Ink, which was also used to edge the background panel. The background panel was adhered to a 5" x 7" grey card.

Sentiments from the Time for Tea's Purrfect Day and Kitty Capers Clear Stamp Sets were stamped with Violet Chalk Elements Ink onto grey cardstock then die-cut.

The image panel was adhered to the cardfront, then the sentiment die-cuts were adhered to finish the card. 

Please visit my blog, Kat's Tales of Stamping, for detailed instructions and complete supply lists.

Topflight Stamps Products Used:


Thanks for visiting today!

Monday, June 27, 2022

You're a Reel Star - slider card

 Welcome back everyone! This is Rachel from rwkrafts.com and today I'm sharing a fun slider card using stamps from Time for Tea Designs.


This "Movie Night" stamp set is so so cute. I stamped and colored every single image because I couldn't pick a favorite. The images were all fussy cut with my detail scissors.


Next it's time to start creating my slider card pieces. I die cut each piece from white cardstock, and then cut some pink paper from the Missees paper pad to create movie theater carpet. I also ink blended the pink paper with Prism Ink "Pink Jellybean".


Now it's time to design the movie theater ceiling. I inked the card panels with Prism Ink Thundercloud, then inked again with French Navy over the Lotza Stars stencil by AALL & Create.


Finally, it was just a matter of gluing the images down and putting the slider mechanism together. I love how this fun scene of all the animal friends came together!


The little raccoon with his 3D glasses is my favorite :)

Thanks for joining me! Have a great week ahead!

Topflight Stamps Supplies Used:


Sunday, June 26, 2022

Tracy Scott PaperArtsy Neon Floral Birthday Card


Hi friends!  It's Autumn Clark from SewPaperPaint with you today to share a zingy summertime birthday card featuring stamps by Tracy Scott for PaperArtsy.  I had a blast making this card using some bright colors of PaperArtsy Fresco Chalk Acrylics.  I did a gel printed background using Tracy's stencil PS126.  I used Sargasso, Dirty Lime, Tango, Bubble Gum and Captain Peacock. 

I stamped the flower onto one of my prints, which primarily had Bubble Gum Frescos on it.  I stamped the flower leaves with Sargasso onto a book page and fussy cut them.  Then I used Tracy's stamp set TS025 to add some black and Peacock Distress Oxide stamping onto my gel printed background.  The little black dots come from both black gesso splatters and washi tape.  I added a label tape sentiment to finish it off.  I hope this bright card made you smile today and want to get out your gel prints and do some stamping!  Hugs, Autumn

Fun mixed media supplies at Topflight Stamps!


01 09 10