Monday, May 31, 2021

AALL & Create Steampunk Card!

Hello, Lisa Hoel here and happy Mixed Media Monday to you! This week on the Topflight Stamps blog we are taking a closer look at the AALL & Create brand. (One of my favorite brands, so many cool stamps and stencils!) I went steampunk and created a fun mixed media card.

Lisa Hoel for Topflight Stamps - this week our brand focus is AALL & Create! Check out my fun steampunk card. #creativejuicefreshsqueezed #topflightstamps

The background started out as a Gel Press print and I added stamping, embossing and stencil mono-printing over it. It's a pretty busy background so I stamped my focal image onto an oval die cut and mounted it on a Wobble spring to pop it off the background and provide a fun interactive element. (I love the Dashing Crow stamp!)

Lisa Hoel for Topflight Stamps - this week our brand focus is AALL & Create! Check out my fun steampunk card. #creativejuicefreshsqueezed #topflightstamps

I stamped and fussy cut the lightbulbs. I also used Hunkydory foam squares to make them stand off of the background too.

There is a Memorial Day Sale going on over in the store through Monday at Midnight EST! Check it out! ;-)

Thanks for stopping by and be sure to check out all the wonderful products from around the world you can find all in one place, Topflight Stamps.


Topflight Stamps Products:

AALL & Create washi - #16 Burlap Black

Additional Topflight Stamps Products:

Prism Ink - Thundercloud
Boho Blends embossing powder - Antique Yellow


Sunday, May 30, 2021

Tracy Scott Mandala Love


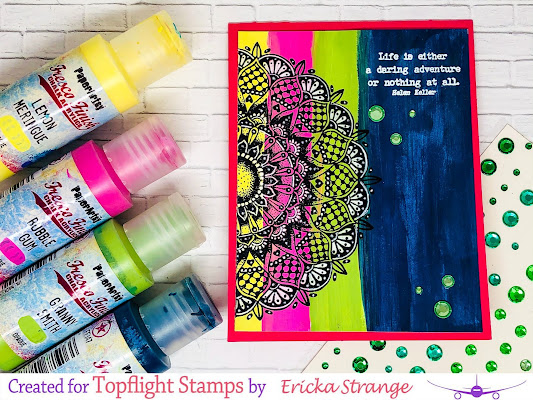
Hello friends! Ericka from Strangely Creative here with a fun post using the PaperArtsy Tracy Scott 51 mandala set. There is something about a mandala, I can't get enough and spent all day playing with them and using my white gel pen.

For my first card, I created a background using a brayer with the PaperArtsy Fresco Paints in Lemon Meringue, Peachy Keen, and Peach Nectar. I stamped the Mandalas a couple of times using my MISTI and Ranger Archival Ink. 


I then took out my white gep pen and black pen and started playing around, filling in spaces and adding dots. There really are so many ways to use these great stamps. I used the PaperArtsy Alison Bomber Life & Living set for all of my sentiments.

For my second card, I used the PaperArtsy Fresco Paints in Cerise and Lemon Meringue. I then added Raspberry Infusions to the page and set it aside to dry. I took the smaller mandala stamp in my MISTI and stamped it around the card and colored it up the same way with my white gel pen.


 For my next card, I changed up some of my PaperArtsy Fresco Paint colors and added them with a paint brush. 

 On my last card, I painted the background with Twilight Fresco Paint. Once it was dry I used WOW! Embossing Powder in gold to heat emboss the mandala.

I was still able to use my white gel pen to color sections of the mandala to make it pop on my card.


 Thanks for stopping by and I hope you have a great Memorial Day weekend. Here are the Topflight Stamps supplies I used to create my card. Also go check out the SALE this weekend for more great goodies!


Friday, May 28, 2021

IndigoBlu with Gel Press Background


Hello everyone! Ericka from Strangely Creative here with a card using the IndigoBlu Coulor Me Cone-head Daisy. I love this pretty stamp and decided to use it with a gel press background I made with PaperArtsy Fresco Paints in Bubble Gum, Cerise, and Electric Violet.


I stamped the image and heat embossed it in Glassy Dream embossing powder which is included in the WOW! Embossing Trio Dockside set. I then used my colored pencils to color up the image. I wanted to add some more definition to the image so pulled out my white gel pen and traced around the embossing.


I used white embossing powder and the included sentiment to finish of my card. Thanks for stopping by and have a great weekend. Here are the Topflight Stamps supplies I used to create my card. Use my coupon code "StrangelyCreative" to receive 12% off your purchase.


Thursday, May 27, 2021

Indigo Blu - Prehistoric

       Hi Everyone,

Cornelia here today! 
this week we are featuring Indigo Blu Stamps


I sponged the background with distress oxide inks. I dabbed a fresh foam pad on my blending tool into bleach and squeezed out the excess and lightly dabbed it onto the fossilized ammonite stamp and stamped it. Perhaps plain water would work as well, but I didn't want to take a chance. I stamped the fish onto a piece of scrap paper and cut it out. Added it onto my card base with foam tape. (I had actually heat embossed the fish first on the card base and had colored it, but didn't like the way it looked.....so the extra added fish, LOL!). I also heat embossed the sentiment. Trimmed the card and added some Washi tape (Funky Fossil Designs). Lastly I added the dew drops and a googly eye for more interest.


I hope you liked this. Thanks for visiting. 
See you next week with more Topflight Stamps inspiration.


Here are the stamp supplies I used:
Use code FUNSTAMPING to get 12% discount at Topflight Stamps


Wednesday, May 26, 2021

Creating cards that "Shine Bright" with IndigoBlu

Hi, Connie here with a card set using "Shine Bright" by IndigoBlu.
This is a great stamp set to create with.  It has images for the focal of a 
card and images that make great backgrounds.  You will see that in the
card examples that I created.


I created these cards together.  So the first step is getting a good
 background that shines bright.  I used Infusions ( Lemoncello and Orange County) 
 by PaperArtsy to create the yellow / orange mixed media background.  In using
Infusions remember, a little goes a long ways. 


Card #1 ~
Several of the "Shine Bright" stamps were stamped on the mixed
media background.  I'm going for a messy distressed look:):)
The large light bulb stamp was used to create the focal for the card.
I used dimensional adhesive to adhere the focal image to the 
card. Infusions were used to color in the light bulb and add color to
the area around the focal image.  Twine and a sentiment were added to complete
the card front.


Card #2 ~
The focal images are stamped out, colored with Infusions and adhered
 to card front. Stamps were added to the background to give 
the mixed media distressed look (that I love). The sentiment was embossed
 and adhered to the card front.  Both cards were speckled with
white acrylic paint and twine was added .  Versafine/Onyx Black was
 the ink used to stamp out the images for both cards.
Products used:


Versafine Ink/ Onyx Black

Thanks for stopping by!
Connie Mercer

Tuesday, May 25, 2021

Fairy Flowers!

Greetings! It's Tuesday so it's Kathi here to share a project with you. This week my TFS team mates and I are showcasing products by Indigo Blu! I created a card with the wonderful new Faerie Flora Cling Mounted Stamp Set.

Here's the card.


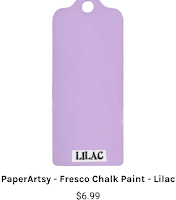
I started the card by adding randomly applied drops of  CloudyPool, Globe Thistle, and Lilac Fresco Finish Chalk Acrylic Paints by PaperArtsy onto my 5 x 7 Gel Press. I used my wide brayer to spread the paint, pressed heavyweight mixed media paper onto the Gel Press, and pulled a print. I repeated this process until I had the coverage and color blend that I wanted. 

An oval window card die was used to cut the painted mixed media paper and black cardstock to create the card front, oval, and a mat layer. The center oval and the black oval frame were set aside.

White hybrid ink was brushed over the Dote on Diamonds Stencil #119 by AALL and Create onto the painted cardfront and heat set.

The flowers were stamped with black ink onto Copic friendly cardstock, fussy-cut, colored in jewel tones, and edged with dark markers. 

The flowers were stamped onto the reserved oval die-cut with Onyx Black VersaFine Ink and heat set. The colored flowers were adhered over their counterparts as shown. Black sparkly glitter pen was added to the tendrils and pink sparkly glitter pen was added to the ends of the tendrils of the center flower.

The stenciled card front was adhered to a black A2 card. The black mat oval was adhered in place, then the flower bedecked oval die-cut was adhered in place to finish the card. 

If you'd like to learn more about the card, please visit my blog Kat's Tales of Stamping.

 Topflight Stamps Products Used:


Thanks for visiting!
01 09 10