Wednesday, January 31, 2018

Smack!


Today I come back with Katzelkraft stamps for Valentine's Day.

They fit snugly with "torn paper" and I created the heart with my

Cameo Silhouette.


Here are my stamps which can be purchased at Topflight


"City rats"


"Torn paper"


The colorization was done with Copic markers 

Nathalie Fournier/Topflightstamps


Tuesday, January 30, 2018

Looking Sharp - Simple Coloring with For the Love of Stamps

Hi Everyone and welcome to the Topflight Stamps blog! 

It's Jenny here, with a clean and simple card using a super cute stamp set from For The Love of Stamps.  


For those of you who aren't familiar with this stamp company, they're made in the UK (where I'm from!) and are clear photopolymer.  Topflight carries a large selection of them and I highly recommend you check them out!  I used the Prickly Plants Cactus set for my card today.  

To create my card, I stamped the heart pot and the tall cactus using Versafine Onyx Black ink onto Bristol Smooth paper and coloured them using my Zig Clean Color Real Brush makers (I used three shades of green on the cactus itself).   I also added some prickles with a black fine liner.  I then trimmed it out. 


The background was created by dry embossing a stencil onto dark red cardstock, and then flicking a green shimmer spray over the top.  I then popped the cactus up on foam tape in the centre.    The sentiment was stamped in the same Onyx Black ink onto Bristol Smooth which was colored with co-ordinating green Zig markers, and popped up on foam tape. 

This card was so quick and simple to create - I love this stamp set and will be using it again in the near future - stay tuned!

Have a wonderful day, thanks for joining us!

Monday, January 29, 2018

Paperartsy/Jofy Blooms

Welcome to the Topflight Stamps Blog.  Clare here with you today and I'm playing with some yummy new stamps from Paperartsy, designed by Jo-Firth Young.


For this Project I used Jofy set #64 #59, Stencil PS081 along with Paperartsy Fresco paints Prawn, Butternut, Coral & Cheesecake.


I brayered a piece of card with the Prawn & butternut paint and stencilled on the leaves with the Cheesecake paint.


On another piece of card, painted with prawn & cheesecake, I stamped the bloom from set #64 and added some doodles and dots with white pen. I fussy cut out and set aside.  On a piece of textured cardstock I stamped the daisy doodle from set #59 to one side.  I mat and layered my card and assembled along with some dies, and added a little bit of string.


Thank you for stopping by today, remember to stop by the online shop and check out all of the new arrivals that have been listed.

Happy Crafting,

Clare.


Friday, January 26, 2018

Carabelle Studio at Topflight Stamps

Hi everyone, welcome back to the blog..... Barbara here again, with not one, but two cards using fabulous stamps from Carabelle Studio.
I must say here that I'd never used Carabelle products until I was introduced to them by Topflight Stamps.....now I absolutely love them, and they've quickly become a firm favourite.
So, this week I thought I'd make one 'inky' card, and one 'clean & simple', using the same set of stamps.
The set is called LEAVES
 I stamped the image direct onto white card, to start.....
 Because the beautiful sentiment mentioned 'rainbow',  I then stamped onto a piece of previously inked card, to incorporate rainbow colours.
Once the leaves had been cut-out, I adhered them to the 'flat' image.
The sentiment was stamped, then the whole piece was layered onto an inky background.
I added a few sequins to finish.
Although I adore getting messy & inky, I still love Clean & Simple cards, and I enjoyed making this one....hope you like it 😀
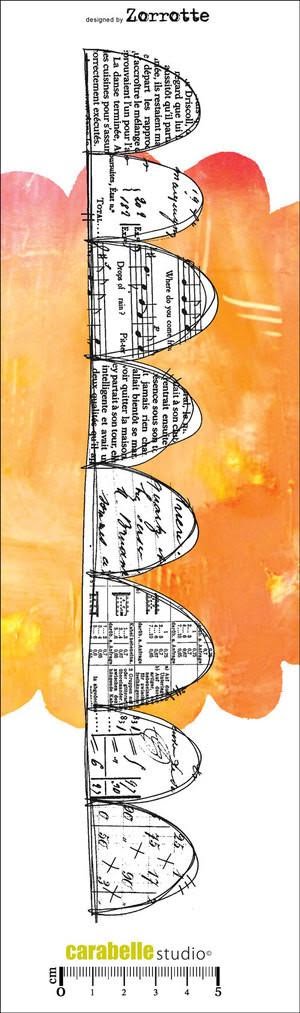
Whilst I had the stamps out, I made another totally different card, using an inky background, (made with Distress Oxides) and adding another set of stamps called CIRCLES & STITCHES 
 I'm not too keen on my doodling, but it was too late to change it....(I need a new white pen)
 If you have time to leave a comment, please let me know which one you prefer.... 
Here are the stamp sets I used,

Back soon, 
Barbara x


Thursday, January 25, 2018

Alice in Wonderland Artist Trading Cards

Hi Topflight fans! CraftyPaws here today to share how I created an Artist Trading Card series ("ATCs") with an Alice in Wonderland theme. ATCs are always 2.5" x 3.5", just like baseball cards, and they are collected and traded by crafters and artists.


I used stamps from Carabelle Studio's Alice's Adventures in Wonderland as my focal images. I Copic colored the Alice and the White Rabbit and I fussy cut them out to pop up and layer on top of two of the ATCs.


For the backgrounds I started with some Strathmore watercolor paper that I cut down in long strips of 3.5" and 11". Then for a fun faux wood grain look, I used PaperArtsy Infusions powders in The Sage and Lemoncello along with some Ken Oliver Color Burst powder in Ultramarine Blue with Liquitex Matte Medium (I've seen folks use glaze medium for this, but I didn't have that and this matte medium seemed to be a good substitute).


I stamped out some of the hearts or heart sections from the Carabelle Studio Follow Your Heart stamp set onto remaining scraps of the background stained papers and fussy cut them out for layering pieces. I also used the sentiment from this set on the Alice ATCs. To create visual texture and interest, I also used a DecoArt Any Skinner Tornado stencil with some Brilliance pigment ink behind the White Rabbit, doodled in some line details and squiggly framing lines and some smaller hearts with Sharpie markers on two of the ATCs, and added highlights with a Uniball Signo white gel pen on all three ATCs.


Thanks for joining me today for this ATC series share featuring Carabelle Studio. If you'd like more product details or to see a process video of me creating these ATCs please check out my CraftyPaws blog HERE.

Wednesday, January 24, 2018

Topflight, Carabelle and "Tour Eiffel"


Carabelle Studio and its Eiffel Tower are under the spotlight this week at Topflight


I gave my personal touch with my Distress inks

Iced Spruce
Weathered Wood
Faded Jeans
Worn Lipstick
Peel Paint 
Forest Moss

I also used TCW's  stencil
 "Mini love post"

Nathalie Fournier/Topflight Stamps

Tuesday, January 23, 2018

Dream Your Life in Color - Carabelle Studio

Hi Everyone, 

Welcome to the Topflight Stamps blog, it's Jenny here.  Today I'm bringing you a floral no-line watercolor technique  card created with Carabelle Studio's The Exotiks stamp.   I love the no-line technique (stamping in a light colour and then going over the line with your media so that the line can no longer be seen) as it makes it look like I drew the image myself (and I can't draw for toffee!!)

To create my card, I multi-stamped the main image three times on a panel of cold press watercolor paper using my MISTI and Antique Linen Distress Ink which is great for no line coloring. 


I love this set and it's so fun to colour so I had to break it out again!  It comes with some nice sentiments too!


I watercolored the image using Daniel Smith watercolors.  The leaves were coloured using Sap Green (and Burnt Sienna for the veins), the flowers in Quinacridone Violet and the background in Payne's Blue Grey.  I also added some black ink spatters. 

I trimmed down the image to fit on an A2 size card and adhered it to a card base using double sided tape.  For the sentiment, I stamped on a scrap of grey cardstock in Versafine Onyx black, die cut it out with a stitched rectangle and popped it up on foam tape.


As a finishing touch, I added clear Nuvo Drops scattered around the florals and golden glitter drops to the centres of the florals for some subtle shimmer. 

Hope you liked it!!

Jenny 

Monday, January 22, 2018

Longing for Spring!

Welcome to the Topflight Stamps blog.  Clare with you today.  I'm sure a lot of you have been revelling in all of the glorious new products we have been glimpsing at Creativation? I'm compiling a mental list of the new products I'd like to try.

This week at Topflight we are using Carabelle Studio Stamps and I have chosen to work with two of their yummy sets!


I Stamped the images onto white card, heat embossed and coloured them in using Jane Davenport Mermaid Markers.  (I adore the rich, vibrant colours)


I cut the images out, attaching the scalloped border to some bakers twine to give the appearance of bunting.  Attaching Birdie to a twig from my wood basket, I assembled it all onto a mini decorative pallet.


What have you added to your shopping list from Creativation?  Keep your eyes peeled as I am sure that some of those gorgeous new stamps will be landing soon at Topflight Stamps!

Happy Crafting,

Clare.


Friday, January 19, 2018

Lavinia Stamps at Topflight Stamps......

Hi Bloggers, Barbara back again with a little woodland scene, using Lavinia Stamps.
For the background I've used a selection of Distress Oxides in Twisted Citron, Picked Raspberry, Wilted Violet, Fossilized Amber & Peacock Feathers on watercolour card.
After making my distressed background, I stamped some of my all-time favourite images of Lavinia Stamps using Versafine Inks.......
 The clear stamps are amazing quality, and all are hand-drawn by the creator of Lavinia, Tracey Dutton
 The main images are :-
Tree Root - HERE
Whimsical Hares 
Tree Goddess Luna - HERE
 Once I had matted and layered my top design, I used some Stickles & Liquid Pearls to finish.
 Hope you like it.....
Back soon, happy crafting,
Barbara.

Thursday, January 18, 2018

How to Make a Scene Card with Joy Crafts

Welcome to the Topflight blog! It's CraftyPaws here, and I'm sharing a custom scene card that I created for a friend who loves her two Pugs and Chihuahua. I used the Joy Crafts Love Dogs and Home Sweet Home (retired) stamp sets.


To create this single layer scene card, I first stamped the adorable pug couple from the Joy Crafts Love Dogs and then created masks for them with post-it note paper to stamp out the sofa and the arm chair behind them. Then I created masks for the sofa and arm chair so I could stamp out the fireplace, sofa table (it's actually a bistro table but I only used the top and placed it behind the sofa) and the floor lamps. Lastly, I created a mask for the lamp and stamped out the bookshelf behind it. Because the bookshelf was narrower than the width that I needed, I doodled in some extensions to the shelves, a plant, some books, and a frame around the whole unit. I also added a napping dog from an Art Impressions stamp set to represent my friend's 3rd dog. :) 


To color up the whole scene, I used Zig Clean Color Real Brush Markers with a water brush and then added in finer coloring details with some Prismacolor color pencils.


If you'd like more details on the products I used or a video tutorial on creating a scene card, please check out my blog HERE. Thanks for stopping by and joining me today! 

Wednesday, January 17, 2018

Topflight, Katzelkraft , Infusions and "Love"


Back this week for Topflight, Katzelkraft's "City Rats".


I take the opportunity to try my new color Infusions "Raspberry"


I used it this time with Liquitex medium mat.

What a surprise to see the color appears with the medium. I just love it!


The paper is from Studio Calico "Atlantic"

and the stencil "Grunge Film" by Kaisercraft.

The letters were made with Silhouette Studio.


Nathalie Fournier/Topflight stamps


Tuesday, January 16, 2018

And Hippos Might Fly...

Hi Everyone and welcome to the Topflight Stamps blog!  It's Jenny here and today I have a card that uses three different stamp sets to create a scene. 


I used some cold press watercolor paper and stamped the Hippo from the Katzelkraft Jungle Animals set in Versafine Sepia.  Katzelkraft have some amazing stamps, I think they're all my favorite!   I then stamped the floral bouquet from Carabelle Studio's The Exotiks in the same ink along the bottom. 


I colored the image using Derwent Inktense pencils.  These are fantastic because you can colour directly onto the paper and then use an aqua brush to pull the colour out.  Once it dries it is set, and you can't move it again.  As a result I was able to overlay a wash of Distress Ink in Mermaid Lagoon over the top for the sky without any colour bleeding. 

The stamp sets I used are below.  The sentiment was from the Indigo Blu set heat embossed in white embossing powder. I added it in after all the colouring was completed. 


To create the splatters, I used the same colours of inktense I'd used to colour in the images, and used a water brush to flick the pencil 'lead' resulting in the spatters. 

For a finishing touch I added some clear wink of stella on to the hippo's wings and flowers, and glossy accents to his eyes, teeth and the sun, as well as a few drops on the petals and leaves to look like dew drops. 


And that's it !  Hop you enjoyed, let me know if you have any questions - you can see a detailed list of supplies over on my blog here.
Have a great week!
Jenny 

Monday, January 15, 2018

Paperarsty Flower Burst

Welcome to Topflight Stamps Blog!  It's Clare here today.  Creativation is nearly upon us and I'm sure there are a lot of excited crafters anticipating all of the wonderful new products that we will be able to use in our projects.  Whilst we are waiting for the new reveals I thought I would revisit one of my favourite stamp sets from last year.


This is a bit of a mash up of Paperartsy Stamps designed by Tracy Scott, along with some of their stencils and some from my stash.


I started off by making a masterboard with Distress Oxides, Peacock Feathers, Picked Raspberry & Twisted Citron.  I stamped the flower from Paperatsy set #ETS07 twice so that I could layer it.  After some fussy cutting it was time to make my background.


After mopping up some of the Distress Ink colours I started to add in stamping and and stencilling in the corresponding colours and also with some smokey grey ink.  More stencilling this time with black acrylic paint.


Remember to take advantage of our Pre-Creativation sale where you can save 15% of your entire order!  Just think of all the new products that will soon be arriving at Topflight Stamps!


That's all from me this week.  Remember there is something new on the blog every day so pop back for some inspiration.  We have our own Topflight Gallery where you can share your creations if you have used a stamp stocked by Topflight.

Happy Crafting,

Clare
01 09 10