Sunday, October 4, 2026

Lavinia Halloween Card

Greetings! You've got Kathi here to share a project with you. 

PSA: There's a National Card Making Days Sale over at Topflight Stamps. If I were you, I'd pop on over right now as it ends tomorrow night!


Now to my project! Here's a Halloween card created for this week's Topflight Stamps "Anything Goes" Challenge with products by Lavinia Stamps.


Place a panel of Mixed Media paper onto a magnetic craft mat. Place low-tack tape horizontally along the bottom edge of the panel. Place the smallest acetate circle mask from the  Acetate Circles Mask Set by Lavinia Stamps on the upper right as shown. Secure it with a magnet. 

Brush Dark Denim Elements Premium Dye Ink by Lavinia Stamps over the Circles Mask and the tape around the outer edges of the panel. Brush Della Blue Elements Premium Dye Ink over inked sides, blending as you go. Brush Violet Chalk Elements Premium Dye Ink over top to add some purple tones to the panel. 

Remove the tape and the Acetate Circles Mask. Cover the top portion of the image panel with a piece of acetate. Brush Pine Elements Premium Dye Ink over the acetate onto the bottom part of the image panel. Remove the acetate covering the top of the image panel.

When using clear stamps, I often use the acetate stamp index to work out placement. Using a stamping platform helps immeasurbly. That's what I did with this card. I knew that I wanted to use the Zemira Clear Polymer Stamp by Lavinia Stamp with the Whimsy Hats Clear Polymer Stamp Set by Lavinia Stamps.

Place the image panel onto the base of a stamping platform. Position the acetate stamp index from the Zemira Clear Polymer Stamp over the image panel. Position the acetate stamp index from the witch hat from the Whimsy Hats Clear Polymer Stamp Set so that it's sitting on  Zemira's head. Place the witch hat stamp onto the witch hat index sheet. Remove both index sheets.

Ink the witch hat stamp with Twilight VersaFine Clair Ink by Imagine Crafts/Tsukineko and stamp. Ink the hat again with  Nocturne VersaFine Clair Inks by Imagine Crafts/Tsukineko and stamp. 

Stamp the witch hat from the Whimsy Hats Clear Polymer Stamp Set onto the top part of a Post-It Note (with the sticky part on the back. Fussy-cut the bottom of the witch hat and position the acetate index from the Zemira Clear Polymer Stamp so that her head is on the Post-It Note and the her dress is on the "grassy" area. Place the Zemira Clear Polymer Stamp  onto the acetate index sheet. Ink the stamp with Nocturne VersaFine Clair Ink and stamp.

Position the flying owl from the Brodwin and Maylin Clear Polymer Stamp Set by Lavinia Stamps so that it's slightly above Zemira's hand. Ink the stamp with Nocturne VersaFine Clair Ink and stamp.

Position the left facing cat from the Hocus and Pocus Clear Polymer Stamp Set by Lavinia Stamps so that he's standing on the "grass". Ink the stamp with Nocturne VersaFine Clair Ink and stamp. Heat set the image panel.

Position the Sacred Spells Clear Polymer Stamp by Lavinia Stamps at the upper right. Ink the stamp with Violet Chalk Elements Premium Dye Ink and stamp. Clean and dry the stamp. Reposition the Sacred Spells Clear Polymer Stamp so that it's along the right hand edge, ink the stamp with Violet Chalk Elements Premium Dye Ink and stamp. Clean and dry the stamp. Reposition the Sacred Spells Clear Polymer Stamp so that it's along the left edge above the "grassy" area. ink the stamp with Violet Chalk Elements Premium Dye Ink. Heat set the panel again to prevent smearing.

Brush the "moon" with yellow, then white Pearlescent chalk. Use Nocturne VersaFine Clair Ink to ink the Raventhorn Clear Polymer Stamp by Lavinia Stamps and stamp it along the outside edges of the panel, rotating the stamp as you go. Use Nocturne VersaFine Clair Ink to stamp the Mini Silver Leaves Polymer Stamp by Lavinia Stamps in open areas. Trim the image panel and edge with  Nocturne VersaFine Clair Ink. Heat set the image panel.

Ground the images with Merlot Elements Premium Dye Ink, which also adds a nice shadowed look.

Use watercolor pens to color Zemira's hair and the details on her dress.

Adhere the image panel onto violet cardstock cut 1/8" larger than the image panel. Adhere the matted image panel onto blue cardstock cut to 4.75" x 6.75". Adhere the double-matted image panel onto a black 5" x 7" card.

Please pop over to my blog, Kat's Tales of Stamping, for step-by-step instructions and complete supply lists.

Topflight Products Used:


Thanks for visiting today! 

Wednesday, September 30, 2026

Spooky Halloween Card with Lavinia Stamps

This week at Topflight Stamps our theme is "Anything Goes". I decided to create another Halloween card! For the background I used Lindy's Stamp Gang Magicals Pigment Powders – Enchanted Forest, and the purple from Under the Sea #2. I love the shimmer and the way the colors flowed and blended together. The stamps are from Lavinia; they are always a favorite brand.


Lisa Hoel for Topflight Stamps #creativejuicefreshsqueezed #topflightstamps


Thanks for stopping by and be sure to check out the Topflight Stamps store for a wide selection of different and hard to find stamps, stencils and other paper crafting supplies from all around the world! Also keep an eye here on the Topflight Stamps blog. There is new inspiration posted often!

Topflight Stamps Supplies Used:

Lavinia stamps - Sybella

Lavinia stamps - Moon

Lavinia stamps - Seasonal Tree

Lavinia stamps - Raventhorn

Lavinia stamps - Gravestones

Lavinia stamps - Murk & Mist

Lindy's Magicals Pigment Powders - Enchanted Forest

Lindy's Magicals Pigment Powders - Under the Sea #2

Lavinia Elements Ink - Pixie Green, Pine, Graphite, Violet Chalk, Merlot
Versafine Clair ink - Nocturne


Tuesday, September 29, 2026

2026 National Coffee Day


 UPDATED - WINNER ANNOUNCEMENT

Thank you for all the wonderful comments and for hopping with us!

Congratulations to Karen Letchworth!! Please email strangelycreativecards@gmail.com with the title 2026 NCD Winner to claim your $25 gift card from Topflight!

Monday, September 28, 2026

A Little Mixed Media Halloween Creepiness

Hey there, friends!  It's Walter on the blog with you today.  The theme for our team this week is anything goes and I decided to have a little mixed media fun.  We're just a month away from Halloween and I thought it would fun to create a Halloween card that is both creepy and dramatic.  I think I achieved it - let me know what you think!

I began by die cutting all of my pieces from the Aall & Create Film Drips Die Set: the photo frame, the deckled insert and three of the splatters.  I decided that I would use the splatters as embellishments in this design instead of gems.  Once cut, I took the deckled insert and started to apply color to it.  I wanted a sense of heaviness to come through on it and used a blending of Black Soot and Hickory Smoke Distress Oxide Inks to achieve it.  I used the Black Soot around the edges and Hickory Smoke in the center.  I then put the Aall & Create Vector Spin Stencil over it and added it to the design with Lost Shadow to provide a little lightness.


This is the exact mix of background colors that I wanted!  I blended some Vintage Photo Distress Ink around the edges to add some grunge, and then lightly spritzed the panel with water to create additional texture from water spots.  Once dry, I sprinkled just a little Lavinia Dinkles Paynes Grey around the panel and then spritzed again with water.  The result is this cool explosion of this darker color that looks like splatters.  I love it!

I wanted a darker gray/green color for the splatter ephemera pieces.  I decided to sprinkle and spritz them with the Dinkles as well to get the gray aspect.  Once dry, I colored on top with an Olive Green Alcohol Marker to get a spooky green shade!


It was now time to add some stamping to the design to add the creepy factor.  I used the small text and eye stamp from the Aall & Create Time Heals All set and stamped the text in several places using Lost Shadow Distress Oxide Ink.  I stamped the eye with Hickory Smoke Distress Oxide Ink.  I then stamped Paper Artsy EM37, the hand from Seth Apter, in white pigment ink on each side of the panel and then the word Creepy in black ink on one of the hands.


I assembled it all together with glue and the card was finished.  It's such a fun and different kind of style for a Halloween card than you'd normally find.  Nothing cute about this one - it's all about the creepiness!  Thanks for spending this time on the blog with me today.  I'll see you again next Monday.  Until then . . . be well!

Topflight Products Used


Sunday, September 27, 2026

Autumn Magic: Creating a Mixed Media Fall Tag


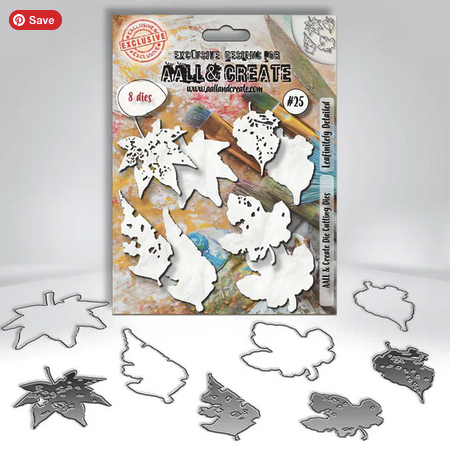
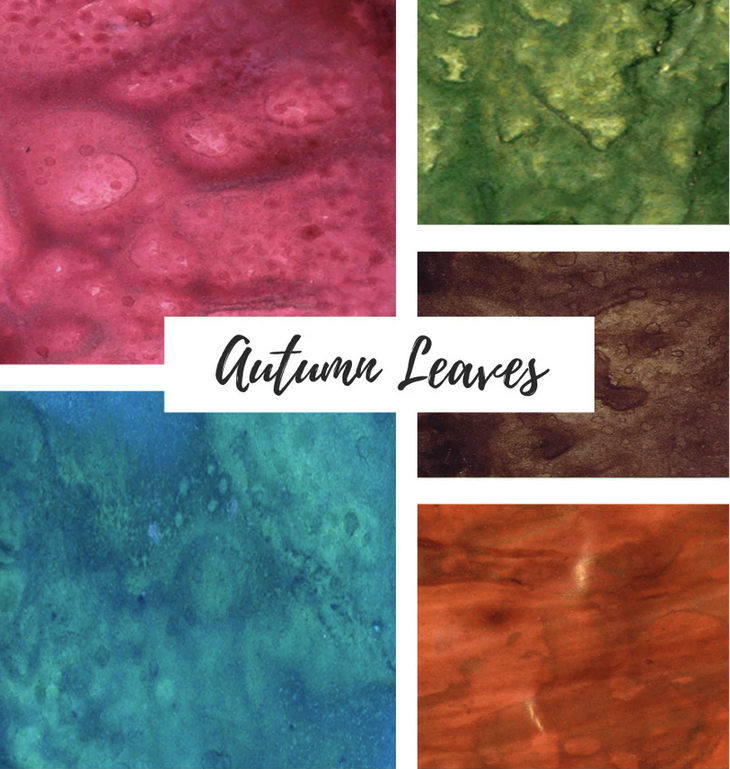
Hello crafty friends! Ericka from Strangely Creative here, and today I'm getting into the fall spirit with a colorful mixed media tag featuring the beautiful AALL & Create Leafinitely Detailed die and Lindy’s Gang Autumn Leaves Shimmer Magicals.

There’s something about fall that makes me want to pull out all those warm, rich colors and add a little golden sparkle to everything! For this project, I decided to let the beautiful colors of the Magicals create my own autumn-inspired paper before turning it into dimensional leaves. I love projects like this because you get to enjoy the process of creating the background and then watch it transform into something completely different.

Creating Autumn-Inspired Watercolor Paper

I started with a piece of watercolor paper and reached for the Lindy’s Gang Autumn Leaves Shimmer Magicals. This collection is perfect for fall projects, with beautiful autumn-inspired colors and just the right amount of shimmer. I applied the colors to my watercolor paper, sprayed them with water, and let the pigments move and blend naturally.

One of my favorite things about working with Magicals is watching the colors come to life when they meet water. The pigments create beautiful variations, and the shimmer adds another layer of interest as the paper catches the light. Once I was happy with the colors, I set everything aside to dry.

Turning Color into Leaves

After my watercolor paper was completely dry, it was time to transform those beautiful colors into something a little more recognizable.


I reached for my Big Shot die-cutting machine and the AALL & Create Leafinitely Detailed die.I cut out the detailed leaves along with their coordinating backing pieces, giving me everything I needed to create layered autumn foliage. I love how the different colors and patterns in the watercolor paper make each leaf unique. Even though they're cut from the same sheet, no two look exactly alike! And those delicate details in the die add so much interest without needing lots of extra embellishments.

Building the Fall Tag

For the base of my project, I used the AALL & Create Tag It Yourself die. Once all my pieces were ready, I began arranging the leaves on the tag, playing with their placement until I found a composition I loved.


Layering the detailed leaves over their backing pieces helped create depth and allowed those beautiful autumn colors to shine. I love how quickly a project can come together when you've already created a colorful background. Sometimes the hardest part is deciding which pieces to use!

Adding a Little Golden Sparkle

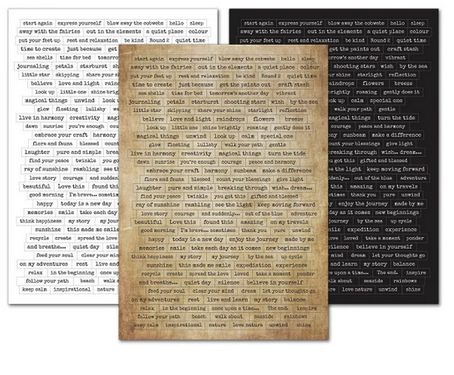
Of course, I couldn't resist adding a few gold details! The metallic touches complement the warm fall colors and bring out the shimmer in the Magicals. To finish the tag, I added a sentiment from the Lavinia Uplifting Collection. I love using these sentiments because they work beautifully with so many different projects, from handmade cards to tags and art journal pages. With the sentiment in place, my little piece of autumn was complete!


Thank you so much for stopping by today! I hope this little autumn tag inspires you to pull out your favorite fall colors, play with your supplies, and create something beautifully unique.

Have a wonderful week and happy creating! 🍂✨


Topflight Stamp Supplies

AALL & Create - 25 - Leafinitely Detailed
Shop at:
TP
AALL & Create - 27 - Tag It Yourself
Shop at:
TP
Lavinia - Sentiment Stickers - Uplifting Collection
Shop at:
TP
Lindy's Gang - Autumn Leaves Shimmer Magicals
Shop at:
TP


Wednesday, September 23, 2026

Fall Leaves Card with AALL & Create

Hello, Lisa Hoel here! This week at Topflight Stamps our theme is "Leaves". I used a Gel Press print for the background and the AALL & Create Die Set Leafinitely Detailed to cut out all the leaves from backgrounds colored with Lindy's Stamp Gang Starburst Sprays.

Lisa Hoel for Topflight Stamps #creativejuicefreshsqueezed #topflightstamps


Thanks for stopping by and be sure to check out the Topflight Stamps store for a wide selection of different and hard to find stamps, stencils and other paper crafting supplies from all around the world! Also keep an eye here on the Topflight Stamps blog. There is new inspiration posted often!

Topflight Stamps Supplies Used:

AALL & Create Die Set - Leafinitely Detailed

Lindy's Starburst Sprays - Haunted Halloween

Lindy's Starburst Sprays - Autumn Leaves

Lavinia Elements Ink Pad - Paprika

Gel Press print


01 09 10