Showing posts with label creative expressions. Show all posts

Tuesday, July 7, 2026

Ho Ho Ho!

 It's Tuesday which means you've got Kathi here to share a project with you!! Our theme this week is Christmas in July! 


Use Tuxedo Black Memento Ink by Imagine Crafts/Tsukineko to stamp Santa from the Kate Crane 007 Cling Mounted Stamp Set by Kate Crane for PaperArtsy twice — once onto a piece of Mixed Media paper and once onto repositionable sticker paper. Fussy-cut the sticker paper version and place it over its counterpart on the image panel.

Place the reindeer stamp from the Kate Crane 007 Cling Mounted Stamp Set facedown on the right of Santa. Ink the stamp with  Tuxedo Black Memento Ink and stamp it twice — once onto the image panel and once onto repositionable sticker paper. Fussy-cut the sticker paper version and place it over its counterpart on the image panel.

Clean and dry the reindeer stamp. Reposition it facedown on Santa's left. Ink the stamp with  Tuxedo Black Memento Ink and stamp it twice — once onto the image panel and once onto repositionable sticker paper. Fussy-cut the sticker paper version and place it over its counterpart on the image panel.

Place the flattest of the masks from the Hills Acetate Stencil/Mask Set by Lavinia Stamps horizontally across the image panel and secure with low-tack tape and/or magnets.

Brush or sponge grey-blue dye ink over the Hills Acetate Mask and the masked images onto the image panel to create a background sky.

Use a C1 Copic marker to trace the top of the Hills Acetate Mask, Flip the mask over and move it downwards. Use the C1 marker to trace it again.  Repeat this step to create more lines of snow on the background. 

Remove the masks from the images and use Copic markers to color them. Use a N6 marker to increase the size of the reindeers' pupils then use a white gel pen to add highlights to them and to the reindeers' hooves. Use a black Glaze pen to color the buttons on Santa's outfit and make them shiny and dimensional.

Position the "ho, ho, ho!" sentiment stamp facedown on the image panel as shown. Ink the sentiment stamp with Nocturne VersaFine Clair Ink by Imagine Crafts/Tsukineko and stamp. Heat set the ink.

Add dots of Bold Stardust Clear Glittering Gelly Roll Gel Ink Pens by Sakura along the traced snow lines. Let the gel ink dry, trim the image panel, and mat with a slightly larger panel of red textured cardstock.

Cut a piece of patterned paper from the A Gingham Christmas 8x8 Patterned Paper Pad by Creative Expressions to 4" x 5.25" to create the background panel. Edge it with a R35 Copic marker and adhere it to a red A2 card. 

Adhere the matted image panel to finish the card.

Please pop over to my blog, Kat's Tales of Stamping, for step-by-step instructions and complete supply lists.

Topflight Stamps Products Used:


Thank you for visiting today!

Tuesday, April 21, 2026

Cheers!

It's Tuesday which means you've got Kathi here to share a card with you. It's an "Anything Goes" week so I created a card celebrating a favorite pasttime with the Village Pub Clear Stamp Set from the Architectural Collection by Jamie Rodgers for Creative Expressions. I also used the Spring Sprouts Die Set 49 by AALL and Create and the Grunge Midtones 6x6 Patterned Paper Pad by Craft Consortium.

Here it is!


Use Tuxedo Black Memento Ink by Imagine Crafts/Tsukineko to stamp the pub scene from the Village Pub Clear Stamp Set from the Architectural Collection by Jamie Rodgers for Creative Expressions twice — once onto white Copic friendly cardstock and once onto repositionable sticker paper. 

Use Copic markers to color the pub, trees, and foliage. 

Fussy-cut the sticker paper version and place it over its counterpart on the image panel as a mask. Use the largest die from the Spring Sprouts Die Set 49 by AALL and Create to cut the image panel. Trim the bottom off of the die-cut.

Brush or sponge Della Blue Elements Ink by Lavinia Stamps over the masked image to create a blue sky. Use an Isopropyl-filled  Fine Spray Mister by Spectrum Noir to mist the image panel die-cut. This step evens out the ink blending and mottles the inked background.

Remove the mask from the image panel die-cut. Finish coloring the patio with toner grey Copic markers. 

Cut a piece of patterned paper from the Grunge Midtones 6x6 Patterned Paper Pad by Craft Consortium to 6" x 4.25". 

Use Tuxedo Black Memento Ink to stamp the wine glass from the Village Pub Clear Stamp Set on the bottom right corner. Thoroughly clean and dry the wine glass stamp, then stamp it again next to the other wine glass. Use Copic markers to cut color the wine in the glasses. Use a white colored pencil to add highlights to the wine glasses.

Use Tuxedo Black Memento Ink to stamp the "Cheers!" sentiment from the Village Pub Clear Stamp Set on the upper left corner as shown.

Use a black marker to edge the image panel, then adhere it to a white A6 card. Use glue to add irridescent white sequins above the wine glasses to finish the card.

Please pop over to my blog, Kat's Tales of Stamping, for step-by-step instructions and complete supply lists.

Topflight Stamps Products Used:


Thanks for visiting today!

Thursday, April 2, 2026

Mixed Media - Lavender Plumed Bird

Hello!  We're focusing on Mixed Media creations this week at Topflight Stamps.  I made a card using paints, ink and embossing powder.  On a piece of white cardstock, I painted an ombre effect with two PaperArtsy Fresco Finish Chalk Paints:  Blah Mange and Sugar Plum.  When it was dry, I stamped the Creative Expressions Vintage Plume stamp with Versafine Clair Nocturne (black) ink.  While the ink was wet, I sprinkled on WOW! embossing powder in Platinum and hit it with a heat tool.  The effect is so cool!  Hopefully you can see it in the second card photo below.  On a separate piece of scrap cardstock, I stamped the Woodware Viola stamp with the same Nocturne ink.  Using a circle punch, I punched out two postmarks that were part of the Viola image, inked the edges, and attached to the card front.  A seam binding bow tied around the painted ombre panel was topped with one other piece of stamped ephemera I had on my desk.  Hope you have a terrific day! ~ Colleen


Supplies From Topflight Stamps:


Wow Embossing Powder - Pure Platinum


Thursday, March 5, 2026

Christmas Holly

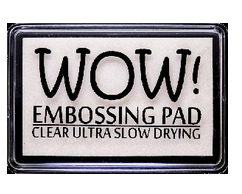
Hello!  We've got "Anything Goes" this week at Topflight Stamps, and I'm sharing a Christmas card to put away for later this year!  I started with a pretty marble-ish piece of paper from Craft Consortium Ink Drops Ocean Paper pad, because it reminds me of a frozen pond.  I splattered it with Lavinia Snow White Chalk Paint and set aside to dry.  With a Crealies Rectangle die, I cut a piece of white paper and stamped a sentiment from Creative Expressions "Tis The Season" stamp set with Versafine Clair Nocturne Black ink.  I dragged the edges of the rectangle with WOW! Clear Ultra Slow Drying embossing ink pad, then sprinkled on WOW! Pure Platinum embossing powder and hit it with a heat tool.  I also used some of the platinum embossing powder in random spots on the sentiment panel, and used the heat tool from underneath the paper so it wouldn't blow around.  On a scrap piece of cardstock, I stamped two holly clusters from Visible Image "Christmas Robin" with Memento Tuxedo ink.  Then I colored, fussy cut, and glued them to the sentiment panel.  Thanks for joining me, hope you have a terrific day! ~ Colleen


Supplies from Topflight Stamps:


Wow! Pure Platinum Embossing Powder


Friday, December 12, 2025

Loose Watercolor Florals with Jane’s Doodles and Lindy’s Magicals

Hello crafting friends!
Ericka here from Strangely Creative, and today I’m sharing a soft, loose watercolor piece featuring the Just for You stamp set from Jane’s Doodles at Creative Expressions. This set is full of beautiful blooms, and it pairs perfectly with the rich, vibrant tones in the Lindy’s Gang Magicals – Steampunk Soirée collection.


To start, I stamped the floral image onto watercolor paper and heat-embossed it in gold. I added a small pinch of each Magical to my palette, mixed in a drop of water, and let the colors bloom. After lightly spritzing the watercolor panel, I dropped in the pigment with a brush and let it flow. The combination of gold embossing and loose watercoloring gives the florals a soft glow, and the Magicals bring that unmistakable bright, shimmery finish.


Once the panel was completely dry, I heat-embossed the sentiment and added a simple hand-drawn gold border to frame the piece. It’s an easy technique, but it delivers a clean, elegant look with plenty of color and shine.


Thanks for stopping by today. I hope you get a moment to sit down, make something beautiful, and enjoy a little creative time this weekend.


 Topflight Stamp Supplies

Creative Expressions - Just for You
Shop at:
TP

WOW! Embossing - Clear Embossing Pad
Shop at:
TP
WOW! Embossing - Embossing Pen
Shop at:
TP
Lindy's Gang - Magicals Steampunk Soiree
Shop at:
TP


Thursday, December 11, 2025

Creative Expressions Christmas Cards

Hello, Lisa Hoel here. This week at Topflight Stamps our brand focus is on Creative Expressions. They have so many great stamp designs! I'm taking the opportunity to make some more Christmas cards to send.

Lisa Hoel for Topflight Stamps #creativejuicefreshsqueezed #topflightstamps

I really like the Jane's Doodles whimsical Christmas Tree stamp set. I first stamped the trees onto white cardstock and then embossed with clear detail embossing powder. After heat setting, I spayed the backgrounds is with the Lindy's Stamp Gang Autumn Leaves Starburst Spray set (Ponderosa Pines Olive and Autumn Maple Crimson). When that was dry, I laid a piece of absorbent plain newsprint paper over the embossed paper and ironed it with my craft iron. It causes the embossing powder to re-melt and absorb into the newsprint. (Don't let it cool and stick the newsprint to your background!) This gives you a faux batik look.

Thanks for stopping by and be sure to check out the Topflight Stamps store for a wide selection of different and hard to find stamps, stencils and other paper crafting supplies from all around the world! Also keep an eye here on the Topflight Stamps blog. There is new inspiration posted often!

Topflight Stamps Supplies Used:

Creative Expressions Jane's Doodles stamp set - Christmas Tree

AALL & Create die set - Season's Cheer #63


Lindy's Stamp Gang Starburst Spray set - Autumn Leaves

Clear detail embossing powder


Tuesday, December 9, 2025

Season's Greetings!

It's Tuesday so you've got Kathi here to share a project with you! This week's product focus is Creative Expressions and I've created a card with the fabulous Holiday Cheers Clear Stamp Set and their Distress Plaids 8x8 Patterned Paper Pad.


Here it is!


Use Tuxedo Black Memento Ink by Imagine Crafts/Tsukineko to stamp one of the mugs from the Holiday Cheers Clear Stamp Set by Creative Expressions twice — once onto the left side of a white cardstock panel and once onto repositionable sticker paper.

Fussy-cut the sticker paper version and place it over its counterpart on the image panel as a mask. Position the cocktail to the right of the mug and use Tuxedo Black Memento Ink to stamp it twice — once onto the cardstock panel and once onto repositionable sticker paper.

Fussy-cut the sticker paper version and position it over its counterpart on the image panel as a mask. Place a piece of repositionable Scotch Tape horizontally across the base of the mug and cocktail, covering the bottom part of the image panel. Sponge or brush beige/tan dye ink over the tape and the masked images to add a background color to the white panel.

Place the Grunge Clocks and Grid Mask/Stencil by Studio Light over the masked images on the image panel and secure with magnets and/or low-tack tape. Sponge the same beige/tan dye ink over the stencil onto the image panel to create the "time" theme. 

Remove the tape over the bottom part of the image panel. Place a piece of acetate on the dividing line so that it's covering the top part of the image panel and secure with tape and/or magnets. Heavily brush or sponge the same ink over the tape to cover the bottom of the image panel. 

Remove the acetate and the masks. Use alcohol markers to color the festive beverages. Use a white gel pen to add highlights to the mug, cocktail glass, and candy canes.

Use a square die to cut the image panel. Retain the scraps to use later. Use the next largest die to cut green cardstock and use to mat the image panel. Use a "Season's Greetings" die and a holly die to cut green cardstock.

Use Post-It Notes to cover "Not a" and "Person" on the Morning sentimet from the Morning Clear Stamp Set 253 by AALL and Create. Ink the word "Morning" with red pigment ink, remove the Post-It Note, and stamp it onto the reserved inked and stenciled cardstock. Use a Post-It Note to cover the word "Break" on the Coffee Break Clear Stamp Set 817 by AALL and Create. Ink the word "Coffee" with red pigment ink, remove the Post-It Note, and stamp it to the right of the "Morning".

Use red pigment ink to stamp "Happy Hour" from the retired Happy Hour Clear Stamp Set 476 by AALL and Create onto the reserved cardstock. 

Use a sentiment die strip to cut both sentiments. Edge the die-cuts with the red pigment ink.

Trim a piece of plaid paper from the Distress Plaids 8x8 Patterned Paper Pad by Creative Expressions to 6" square and adhere to a 6" square kraft card. Use red ink to edge the card.

Adhere the sentiment die-cuts and the matted image panel die-cut to the card as shown. Adhere the sentiment die-cuts to the image panel die-cut as shown. Adhere four holly leaves to the upper corners of the image panel die-cut. Add red enamel dots to finish the card.

Please pop over to my blog, Kat's Tales of Stamping, for step-by-step instructions and complete(ish) supply lists.

Topflight Stamps Products Used:


Thank you for visiting today!
01 09 10