Showing posts with label studio light. Show all posts

Thursday, June 11, 2026

Seashell by the Seashore

Hello friends!  You've got Colleen here today - this week at Topflight Stamps our theme is  Beach / Ocean!  I used several items to create a moody ocean themed card.  On a couple of pieces of watercolor paper scraps, I sprinkled PaperArtsy Infusions Dye Sleight Blue powder then spritzed with water liberally.  Once dry, I used Studio Light Scenery Borders Waves die set to cut out some waves. I set those aside and used the PaperArtsy Sara Naumann Mini 118 seashell stamp to create a focal point on ivory cardstock, stamped with VersaFine Onyx Black Ink.  On the card base, I used a PaperArtsy Alison Bomber Summer Edition sentiment stamp and Lavinia Dye Ink Soft Cygnet, stamped repeatedly across the background.  Final touches were some enamel dots from my stash, and Hunkydory Classic Pearls.

Hope you have a wonderful week! ~ Colleen

Below are the watercolor paper scraps I created with the PaperArtsy Infusions Dye in Sleight Blue.  Aren't they beautiful as-is?


Supplies Used From Topflight Stamps:


Sunday, April 19, 2026

A Spring Card with Scripted Florals


Hello friends! Ericka from Strangely Creative here, and today I’m sharing a soft, layered spring card built from a gel press background, delicate florals, and just the right touch of shimmer. Even though the Studio Light Grungy Flowers set I used is currently out of stock, don’t skip this one, this technique works beautifully with any floral stamps you have on hand.

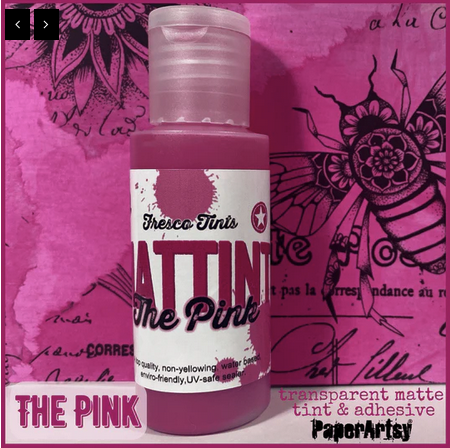
I began with a gel press print using Mattints The Pink from PaperArtsy. This gave me a soft, almost watercolor-like pink base, perfect for a spring palette.

Once dry, I stamped the floral images repeatedly across the background and clear heat embossed them. This adds a subtle raised texture that catches the light without adding more color.

After trimming the panel down to an A2 size, I brought in the shine.

  • A light spray of Cactus Gold Spray for an overall shimmer
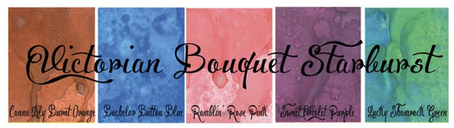
  • Splatters using the Victorian Bouquet collection for extra color variation

These small details add movement and keep the soft background from feeling flat.

To create a focal point, I stamped one of the flowers again onto white cardstock and colored it using colored pencils in soft yellow tones. This gives a gentle contrast against the pink background without overpowering it. I layered the flower directly over one of the embossed images to create dimension and continuity.


To complete the card, I added:

  • A sentiment from the Scrapcosy 29
  • Light blue ink blending behind the sentiment for contrast 
  • Handdrawn frame; and 
  • Adhesive layering to bring everything together

The result is soft, layered, and full of subtle detail.

Thank you so much for stopping by today. I hope this inspires you to create something soft and spring-inspired this week. 


Topflight Stamp Supplies 


PaperArtsy - Scrapcosy 29
Shop at:
TP
WOW! Embossing - Clear
Shop at:
TP
Tsukineko - Versafine Clair - Twilight
Shop at:
TP
PaperArtsy - Mattint The Pink
Shop at:
TP
Lindy's Gang - Glitz Spritz Set
Shop at:
 TP
Lindy's Gang - Victorian Bouquet Shimmer
Shop at:
TP

Wednesday, March 25, 2026

Eclipse Card Tutorial

Greetings! You've got Kathi here today! My blog post this week was pre-empted by Topflight Stamps 9th Birthday Blog Hop so I decided to share a tutorial showing how I created my Birthday Hop eclipse card! 

I hope that you've had the chance to hop, been inspired at each hop stop, and left lots of comments to improve your chance of winning a fabulous prize! However, not to worry, you have until midnight on March 31st to participate!


Instructions:


Step 1: 
Use blending tool and foam to apply Arctic VersaFine Clair Ink by Imagine Crafts/Tsukineko to a piece of Mixed Media Paper to begin your background panel. It's okay if it's a bit streaky. Heat set.


Step 2: 
Use low-tack tape to secure the PS322 Stencil by Tracy Scott for PaperArtsy onto the background panel. Use a sponge dauber to apply Baby Pink VersaFine Clair Ink diagonally over the stencil onto the background panel. 


Step 3:
Use another dauber to sponge Arctic VersaFine Clair Ink over the stencil onto the background panel. This time you'll be adding blue areas to either side of the pink inked "x", slightly overlapping the inks. VersaFine Clair Inks blend beautifully with one another.


Step 4:
Using yet another dauber, sponge Lilac Bloom VersaFine Clair Ink over the stencil onto the background panel, adding lilac/purple ink as shown above.


Step 5:
Use another dauber to apply Veri Peri VersaFine Clair Ink over the stencil to fill in the the remaining open areas of the background panel.


Step 6:
Remove the low-tack tape and the stencil from the background panel and heat set it. As VersaFine Clair Ink is pigment-based, the stencil should be cleaned immediately. I use a paper towel to apply Purell and then use another paper towel to dry the stencil.


Step 7:
Trim the background panel to 8.5" x 5.5". Place the Shadow Die from the Happy Birthday Essentials Cutting Die Set by Studio Light facedown on the background panel and secure with low-tack tape which should overlap to the back of the panel.

Run the die/background panel sandwich through a die-cutting machine. 

When done, remove the cutting die and low-tack tape from the background panel. Set the background panel and the sentiment shadow die-cut aside.


Step 8:
Use the same die to cut another piece of white Mixed Media Paper and edge the die-cut using Arctic VersaFine Clair Ink. Heat set the ink.


Step 9:
Sponge Blue Belle VersaFine Clair Ink onto a piece of Mixed Media Paper. Heat set the ink. Place the "Happy Birthday" sentiment from the Happy Birthday Essentials Cutting Die Set facedown onto the inked and heat-set cardstock. Run the sandwich through the die-cut machine, then use the same ink to edge the letters in the sentiment. Set the sentiment die-cut aside.


Step 10:
Use Tuxedo Black Memento Ink by Imagine Crafts/Tsukineko to stamp the Queen from the Kate Crane 006 Cling Mounted Stamp Set, the bird from the Kate Crane Mini 004 Cling Mounted Stamp, and the other bird from the Kate Crane Mini 005 Cling Mounted Stamp onto Copic-friendly white cardstock. Fussy-cut all the images. 


Step 11:
Use Copic markers to color the queen. Use a black pen to edge the image. Use a white gel pen to add catchlights to the pupils of her eyes and a purple glitter pen to add glitter to the gems in her crown.


Step 12:
Use Copic markers to color the birds. Use a black pen to edge the images. Use a white gel pen to add catchlights to their eyes and a purple glitter pen to add glitter to the gems in the crown.


Step 13:
Create an 8.5" x 5.5" card from white heavyweight cardstock. Adhere the background panel to the card then edge the card with Blue Belle VersaFine Clair Ink. Heat set. 

Adhere the die-cut created in Step 8 into the opening in the card. 


Step 14:
Adhere the colored and fussy-cut queen in the center of the card as shown above. 


Step 15:
Adhere the sentiment shadow die-cut created in Step 7 atop the queen and the white die-cut. This will raise the sentiment shadow die-cut slightly. 

Adhere the two colored and fussy-cut birds as shown above. Adhere the "Happy Birthday" sentiment die-cut to finish the card. 

As always, pop over to my blog, Kat's Tales of Stamping, for complete supply lists (Copic markers used, etc.).

Topflight Stamps Products Used:


(I love these tools. The velcro that holds the foam is firmly glued to the handle, which makes it easy to add and remove the foam pads.)


Thanks for visiting today!

I'd be remiss if I didn't remind you to complete the hop and/or participate to our Insta-hop!

And don't forget the 9th Birthday Sale!

Thursday, January 29, 2026

Pink Hearts Valentine

Hello!  This week at Topflight Stamps we are using red and pink as our theme.  I created a Valentine, focusing heavily on pink.  On a pink cardstock base, I stamped the script from Studio Light Victorian Dreams stamp set to cover the background, using Lavinia Spun Candy dye ink.  A manila tag is full of hearts, thanks to the same Spun Candy ink and a PaperArtsy Sara Naumann Hearts Stencil (PS121).  I used a strip of the Studio Light Victorian Dreams packaging to decorate the bottom of that tag, along with some rosette ribbon from my stash.  The butterflies are from that same stamp set, stamped in Morning Mist by Versafine Clair, trimmed and glued down in the centers of their bodies only so that the wings can stand up.  The sentiment was selectively stamped / trimmed from a PaperArtsy Alison Bomber Love Edition quote.  Wishing you a wonderful day! ~ Colleen


Supplies From Topflight Stamps:


Studio Light Victorian Dreams Stamp Set


01 09 10