Showing posts with label spring card. Show all posts

Sunday, April 19, 2026

A Spring Card with Scripted Florals


Hello friends! Ericka from Strangely Creative here, and today I’m sharing a soft, layered spring card built from a gel press background, delicate florals, and just the right touch of shimmer. Even though the Studio Light Grungy Flowers set I used is currently out of stock, don’t skip this one, this technique works beautifully with any floral stamps you have on hand.

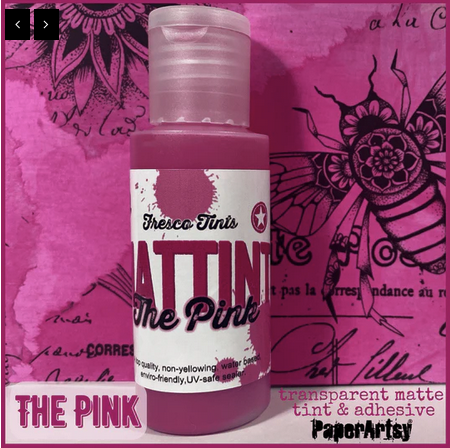
I began with a gel press print using Mattints The Pink from PaperArtsy. This gave me a soft, almost watercolor-like pink base, perfect for a spring palette.

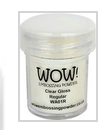
Once dry, I stamped the floral images repeatedly across the background and clear heat embossed them. This adds a subtle raised texture that catches the light without adding more color.

After trimming the panel down to an A2 size, I brought in the shine.

  • A light spray of Cactus Gold Spray for an overall shimmer
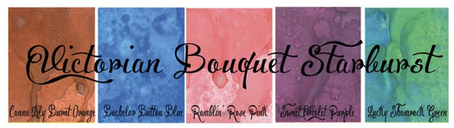
  • Splatters using the Victorian Bouquet collection for extra color variation

These small details add movement and keep the soft background from feeling flat.

To create a focal point, I stamped one of the flowers again onto white cardstock and colored it using colored pencils in soft yellow tones. This gives a gentle contrast against the pink background without overpowering it. I layered the flower directly over one of the embossed images to create dimension and continuity.


To complete the card, I added:

  • A sentiment from the Scrapcosy 29
  • Light blue ink blending behind the sentiment for contrast 
  • Handdrawn frame; and 
  • Adhesive layering to bring everything together

The result is soft, layered, and full of subtle detail.

Thank you so much for stopping by today. I hope this inspires you to create something soft and spring-inspired this week. 


Topflight Stamp Supplies 


PaperArtsy - Scrapcosy 29
Shop at:
TP
WOW! Embossing - Clear
Shop at:
TP
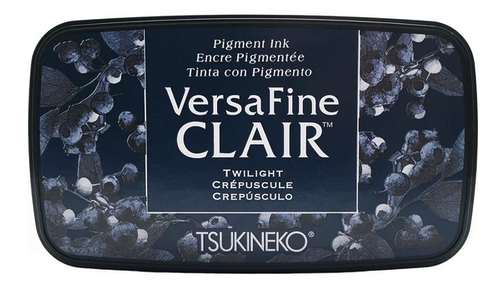
Tsukineko - Versafine Clair - Twilight
Shop at:
TP
PaperArtsy - Mattint The Pink
Shop at:
TP
Lindy's Gang - Glitz Spritz Set
Shop at:
 TP
Lindy's Gang - Victorian Bouquet Shimmer
Shop at:
TP

Thursday, April 16, 2026

Rosehips for Spring

Hello all!  Colleen here with you on this lovely Thursday.  For our Mother / Springtime themes this week at Topflight Stamps, I've got a pop of color for spring to share with you.  I got to play with the main image from PaperArtsy / Alison Bomber's Rosehip stamp set by using a watercoloring technique.  On watercolor paper I stamped the rosehips image with Versafine Onyx Black ink.  On a clear acrylic stamping block, I smeared some Lavinia Soft Cygnet dye ink and spritzed it with water.  I painted this on the whole panel (except the image) in several stages, to get deepening color in some areas.  Then I painted the image using a few hues of Distress dye inks, plus Lavinia Pixie Green and Truffle dye inks.  I used a couple other stamps from the Rosehips set:  a postage stamp (top right corner) and the sentiments (springtime / rise and put on your foliage), all of these stamped on a scrap piece of white cardstock and properly distressed to look aged.  On the top right and bottom left corners of the watercolor panel, I used the Versafine Onyx Black ink to stamp Chou & Flowers Brittany Text.  

Hope you have a wonderful day! ~ Colleen


Supplies Used From Topflight Stamps:


Thursday, June 5, 2025

Woodware Thistles

Hello!  It's "Anything Goes" this week at Topflight Stamps. This Woodware stamp set called Flying Birds made me think of spring, so that was my inspiration.  With a piece of green lace as my grass, I created a scene with thistles, a flying bird, some postmark images, and a sentiment.  All of these stamps are from the same set.  I stamped the thistle twice with VersaFine Onyx Black ink, to create more of a cluster.  They were colored and fussy cut and arranged in a staggered fashion.  The bird was also colored and fussy cut and added to the "sky".  Several clear sequins were the final touch.

I'll be taking a break from design team work due to my husband's surgery.

Have a beautiful week! ~ Colleen


Friday, April 11, 2025

Spring Sparkle


Hello crafty friends!

It’s Ericka from Strangely Creative here, and today I’m bringing a little sparkle and springtime joy to your screen! I’m sharing a fun project where I dove into my gel press stash to create a cheerful, shimmery spring card — perfect for getting your creative energy flowing this weekend.


The Beauty of Leftover Prints
Raise your hand if you’ve ever gotten way too carried away with a gel press session 🙋‍♀️.
I have a whole drawer (okay, maybe two) full of prints, and I love finding ways to give them new life.
For today’s card, I grabbed a purple-toned print I made while playing with the DIY & Cie Spring Break Texture Plate — the colors felt just right for a fresh spring vibe.


Layering Up the Texture
I paired my background with the gorgeous PaperArtsy JOFY PS081 stencil and Byzantium Fresco Paint. Pro tip: If you misplace your paint sponge (like I did), your fingers work just fine for applying paint through a stencil — and it makes the project feel even more hands-on and artsy!


Adding That Magical Sparkle
Once the background was dry, it was time for some shine. ✨
I stamped the PaperArtsy Seth Apter 44 script stamp across the background using WOW! Embossing powder for a rich, golden shimmer. I loved the effect so much that I grabbed my WOW! Embossing Pen and added some extra sparkle onto the leaves. Heat embossing little touches of sparkle made the whole card glow like a spring morning!

For the sentiment, I used the PaperArtsy Alison Bomber 41 Pressed Umbels set.
I stamped it in Versafine Clair Twilight ink and heat embossed it to keep the theme of shimmer going strong — the Twilight ink helped the sentiment stand out beautifully against the colorful background.

To bring everything together, I added a hand-drawn frame for a personal, whimsical finish.


Your Turn!
I hope this project inspires you to dust off your gel prints, grab some stencils, and get a little messy this weekend! There’s something so satisfying about layering texture, color, and sparkle to create a card that feels like a little piece of spring. 🌷

Thanks for stopping by!
Wishing you a creative and wonderful spring weekend!


Topflight Stamp Supplies


DIY & Cie - Texture Plate - Spring Break
Shop at:
TP
PaperArtsy - Alison Bomber 41 Pressed Umbells
PaperArtsy - Alison Bomber 41 Pressed Umbels
Shop at:
TP
PaperArtsy - Seth Apter 44
Shop at:
TP
PaperArtsy - JOFY PS081 Leaves
Shop at:
TP
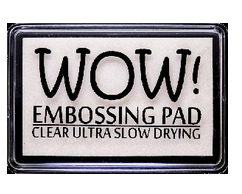
WOW! Embossing - Clear Embossing Pad
Shop at:
 TP
WOW! Embossing - Embossing Pen
Shop at:
TP
Tsukineko - Versafine Clair - Twilight
Shop at:
TP
PaperArtsy - Fresco Chalk Paint - Byzantium
Shop at:
TP

Monday, April 4, 2022

Spring Has Sprung!

 It is finally spring! The sun is shining, the birds are chirping, and the cute little bugs are coming out to play! This is Rachel Kleinman from rwkrafts.com and I'm here today to share a sweet insect inspired card.


The day I created this card I actually had a ladybug fly in through my office window. It was meant to be! I used the adorable Bugs 1 set by Craft Emotions and colored the images with Copic markers. There are so many sweet insect-themed stamp sets by Craft Emotions, it was hard for me to pick just one!


I die cut the sentiment Spring has Sprung and I just love the little worm crawling through the letters. I also popped the ladybug on foam adhesive to make him stand out more.

Thanks for joining me and I hope you're enjoying some warm sunshine where you live!


Sunday, March 7, 2021

The Little Things with Darkroom Door~

Hi, Connie here with a card that will remind us of Spring. I'm
creating with the Patchwork Butterfly by Darkroom Door.  It
 fills almost the front of a A2 size card and I might add
looks amazing!

 
The background is the Spanish Tiles Background Stamp by Darkroom
Door.  It is colored with Distress Oxide inks and then sprinkled with
water to give the background a distressed look.  The Butterfly is colored
 with the inks that are in the background.  Design your own by picking 
coordinating inks.


The card front is double matted and then splatted with white 
acrylic paint.  The sentiment sticker was added to complete
 the card.

Products used:

Pronty/Stickers/ Quotes

Thanks for stopping by
 and 
just for you
get 12% off by using the code
conniemercer at the Topflight Stamps Store.
Connie

Thursday, April 12, 2018

Popping Up to Say Hello Spring!

Hello Topflight fans! It's spring here in Atlanta, GA and I've got spring fever! I've been taking full advantage of the fantastic weather, going for long walks with my sweet pup, Bandito (a Havanese), so I thought I'd make a card to illustrate how excited he gets when we set out for our daily excursions.


To create this interactive scene card, I used the beautiful IndigoBlu Country House Stamp and colored it up with Arteza fineliner pens. I softened the loose sketchy coloring with a water brush. For the interactive feature, I used an X-Acto blade to cut open the right door from the double doors in the image. I inked the edges with a Momento tuxedo black marker so that the white edge of the paper disappeared. I also colored the inside of the door to match the outside of the door.


To represent my Bandito, I colored up one of the pups from the Jessica Lynn Original Shih Tzu stamp set. I fussy cut it out and, again, inked the edges to hide the white edge of the paper. Then I positioned this pup so that it looked like it was coming out of the house, securing the bottom and right sides behind the right door and popping up the head with foam dots on top of the left door. 


To add a springy look, I glued some fun nail art flowers onto the topiaries. For a bit of shine, I also added Ranger glossy accents to the glass in the transom above the doors, the glass in the side lamps, and the eyes and nose of the pup. Lastly the whole card front was popped up on fun foam before being attached to a black card base. The doorway was backed by a bit of vellum to soften the interior of the house.

Thanks for joining me today! If you'd like more details about the products I used or to watch the process of making this card, please visit me at my blog HERE.
01 09 10