Showing posts with label watercolor markers. Show all posts

Friday, February 23, 2024

Party Giraffe


Hello crafty friends! Ericka from Strangely Creative here and today I have a fun birthday card using the Carabelle Studio Party Giraffe. I love this cute image from Kate Crane and its perfect for a child's or an adult's birthday.


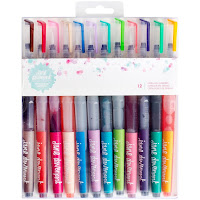
I stamped and clear embossed the image and colored it up with the Spectrum Noir Colorista Watercolor Markers in Botanical.  


Once my background was dry, I used a little Lavinia Acrylic Spray in Chartreuse and added a some AALL & Create Beachrock Washi tape for fun.


Thank you for stopping by and I hope you have a wonderful weekend!

Topflight Supplies Used


Friday, January 5, 2024

PaerArtsy Flowers with Colorista Watercolor Markers


 Hello friends and Happy New Year! Ericka from Strangely Creative here and today I have a colorful card using the Spectrum Noir Colorista Watercolor Markers with the PaperArtsy Tracy Scott 082 set. 


I first stamped and clear heat embossed a pattern on Bristol Smooth paper. I love these fun images and you can make a variety of patterns and designs with them. I then used the Spectrum Noir Colorista Watercolor Markers in Vibrant and watercolored up the images. Once my paper was dry, I added some white, black, and gold pen accents to my card.


I finished my card with a sentiment from the PaperArtsy Alison Bomber Dreaming and Doing set and heat embossed it with WOW! Embossing Gold.


Thank you for stopping by and I hope you have a wonderful and crafty 2024!


Topflight Stamp Supplies


Friday, December 15, 2023

Hobby Art Dudley Christmas


Hello friends! Ericka from Strangely Creative here and today I have a small Christmas card made using the Hobby Art Dudley Does Christmas set. I love this cute donkey and watercolored him up with some watercolor markers. There are so any cute scenes you can make with this stamp set. 

After watercoloring up the image, I added a little handwritten sentiment and some glitter glue to the star. I can't wait to give it to my friend. Thank you for stopping by and I hope you have a wonderful week!

Topflight Stamp Supplies Used


Friday, October 28, 2022

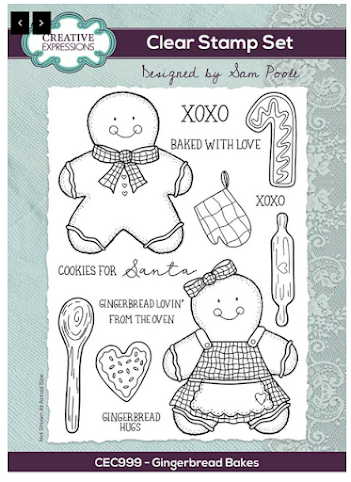
Creative Expressions Gingerbread


Hello friends! Ericka with Strangely Creative here and today I have a fun winter/Christmas cards using the adorable Creative Expressions Gingerbread Makes set. These large gingerbread cookies are so fun to stamp and color up and are perfect for a cute card.

I stamped the gingerbread in Versafine Clair Nocturne ink and then used my watercolor brushes to color them up. These are very large cookies but you could even use a fun wobble to make them an interactive card (which was my original plan but I had ran out ;-()

Once I was done watercoloring these up, I stamped the sentiment in the same ink and then added some glossy accents to the red icing for some shine.

Super fun and an easy image to color up and mass produce if you want for your Christmas cards.


Thank you for stopping by and I hope you have a wonderful weekend!

Topflight Stamps Supplies Used


Friday, September 6, 2019

Polkadoodles Little Kingdom

Hello Topflight Stamp fans! Ericka here with a cute build your own house set from Polkadoodles called Little Kingdom.


This set was so fun to play with and each piece of the house is separate so you can build anything that meets your fancy. I also love the variety of sentiments in this Sentimental set.

https://topflightstamps.com/products/polkadoodles-clear-polymer-stamp-set-a6-little-kingdom?_pos=1&_sid=b1947acad&_ss=r&ref=xuzipf8pid


I love that you can customize your house and sentiment based on the type of card you need.


I added my own little doodles to the house and trees using some Dr. Ph Martins ink in my stash. I love the fun little interest it adds to an already happy little house.


For more information on how I created my card, feel free to stop by my blog Strangely Creative. Have a wonderful day and I hope you stay safe this weekend especially if you are in the wake of Dorian.


Friday, October 26, 2018

Jane Davenport Build a Bouquet

Happy Friday and I hope you had an awesome week. Ericka here and today I'm playing with this beautiful flower set from Jane Davenport.


I felt like this stamp set would be perfect for some loose watercoloring. Here is the set I used as well as the watercolor markers.


https://topflightstamps.com/collections/jane-davenport-australia/products/jane-davenport-spellbinders-build-a-bouquet-clear-stamp-sethttps://topflightstamps.com/collections/jane-davenport-australia/products/jane-davenport-mermaid-markers-watercolor


I love this set as well as the bright colors of these markers. I used several of the shades of the colors.


I hope you have a wonderful weekend as well as a happy Halloween. If you would like more details on how I created the card feel free to stop by my blog at Strangely Creative.


Thursday, April 12, 2018

Popping Up to Say Hello Spring!

Hello Topflight fans! It's spring here in Atlanta, GA and I've got spring fever! I've been taking full advantage of the fantastic weather, going for long walks with my sweet pup, Bandito (a Havanese), so I thought I'd make a card to illustrate how excited he gets when we set out for our daily excursions.


To create this interactive scene card, I used the beautiful IndigoBlu Country House Stamp and colored it up with Arteza fineliner pens. I softened the loose sketchy coloring with a water brush. For the interactive feature, I used an X-Acto blade to cut open the right door from the double doors in the image. I inked the edges with a Momento tuxedo black marker so that the white edge of the paper disappeared. I also colored the inside of the door to match the outside of the door.


To represent my Bandito, I colored up one of the pups from the Jessica Lynn Original Shih Tzu stamp set. I fussy cut it out and, again, inked the edges to hide the white edge of the paper. Then I positioned this pup so that it looked like it was coming out of the house, securing the bottom and right sides behind the right door and popping up the head with foam dots on top of the left door. 


To add a springy look, I glued some fun nail art flowers onto the topiaries. For a bit of shine, I also added Ranger glossy accents to the glass in the transom above the doors, the glass in the side lamps, and the eyes and nose of the pup. Lastly the whole card front was popped up on fun foam before being attached to a black card base. The doorway was backed by a bit of vellum to soften the interior of the house.

Thanks for joining me today! If you'd like more details about the products I used or to watch the process of making this card, please visit me at my blog HERE.

Friday, December 22, 2017

Plant Dreams with IndigoBlu stamps

Hello my dear crafty friends and welcome to my new Topflight Stamps post.
This time I made a card using one large IndigoBlu stamp and the sentiment that was added using another company stamp from Topflight Stamps shop. (For the Love of  Stamps one).


The 4 layered background was made with 3 matching  card size dies in three different colors and the main image was stamped and water colored with Zig brush markers.
I actually used just a part of the colored image as it is a large image and I still wanted to show the die cut background.


The sentiment was stamped and then die cut to make this circled sentiment spot on the corner.


 Here are the stamps I used to make this project:
IndigoBlu - Cling Mounted Stamp - Country House


For the Love of Stamps - Barrow of Blooms - Clear Stamp Set

I hope that you liked my card today.
You can  buy this set and much more in the Topflight Stamps shop.
And if you wish to see more of my work you are kindly invited to my own blog.

Friday, December 1, 2017

Celebrate everything with pink Champagne

Hello my dear crafty friends and welcome to my new weekly Topflight Stamps post.
This week I am going to share my new card made with Leane Creatief most gorgeous doodling stamps and it;s really my very first time ever to use a Champagne bottle and a glass stamps on my creations.


 I made a very general Congratulations card in just two tones- pink and black and white and it fits for several events, such as a weddings, Birthdays and just general celebrations of whatever you want to celebrate.


The card layers were made with dies and one was also dry embossed with a kind of bubbles.

The stamped images were heat embossed with black embossing powder and then colored with pink and grey watercolors.
I made white pen doodling over the grey color and black pen doodling over the pink.
The yellow color is actually gold pen, but hard to see the golden sparkle on the photos.
The only embellishments added are those dark pink rhinestones.
 The sentiment die cut was cut twice and glued one over another for the contrast.
Here is the stamp set I used to make this card and you sure can see how different it looks if you use different colors for the bottle and for champagne inside.


I really hope that you like my pretty card and you can see more of my work in my own blog HERE.

Friday, October 6, 2017

Spring Love Card

Welcome to the Topflight Stamps Blog!

Be sure to join us tomorrow for our huge World Card Making Day Contest. Before we get to Irit's post, here are the details.
 
World Cardmaking Day Contest
On Saturday, October 7 we will post a link-up on our blog and we encourage all our customers to post cards that they have created with stamps from our store. You can link as many cards as you would like. The link up will be open Saturday, October 7 through Friday, October 13 at midnight EST. Our winners will be announced on the blog Sunday, October 15. 

PRIZES
1 - Tim Holtz Stamp Platform
4 - Mystery Bags Full of Stamps - retail value at least $30
5 - $10 gift certificates to the Topflight Stamps Store

Hello my dear crafty friends and welcome to my first October TOPFLIGHT stamps post.

This week the DT was challenged to use Studio Light  and/or Craft Emotions stamps and I used both on my fancy shabby style card.


As you can see this card was made over white cardstock die cut front piece using the Studio Light background 180 stamp, clear embossing ink and black embossing powder.

Then the colorful background was made over the heat embossed image using a mix of Ranger Distress Oxide inks and water and I need to say that this is the most beautiful background made in just a few seconds. 

The Bird was stamped with clear embossing ink and heat embossed with black embossing powder using Birds-Spring from Craft Emotions. Then the hand cut image was colored with Zig Real Brush water colors markers and glued over the cluster of embellishments made with clay frame, chipboards, flowers, leaves die cuts and a Love word die cut. 


Here are  the stamps I used to make this project:


I really hope that you like my shabby card and would try to make a similar one with Topflight shop gorgeous stamps from both shown companies.

If you want to see more of my work you are kindly invited to my blog!
01 09 10