Showing posts with label carabelle studio. Show all posts

Friday, November 29, 2024

O Christmas Tree


Hello friends!

Ericka here from Strangely Creative, and I hope you all had a wonderful Thanksgiving filled with family, food, and gratitude. Now that it’s Friday, I hope you’re indulging in some Black Friday shopping (hello, crafty deals!) or maybe just relaxing with some creative time. Don’t forget to check out the Topflight sale—there are so many amazing finds waiting for you!


Today, I’m sharing a festive card featuring the O Christmas Tree stamp by Kate Crane for Carabelle Studio. While it’s bittersweet that Carabelle Studio closed its doors this year, there are still plenty of their incredible stamp sets available in the store. This one in particular is a gem that offers endless creative possibilities.


I started by stamping the O Christmas Tree image on watercolor paper and heat embossing it in white. This technique not only adds texture but also creates a resist effect that’s perfect for vibrant backgrounds.


For the background, I reached for my trusty Lavinia Acrylic Sprays and Mystical Mists. The colors blend effortlessly, creating a dreamy, ethereal effect that perfectly complements the whimsical style of the stamp. I layered shades to build depth, letting the sprays do most of the work—simple and stunning!


To finish the card, I added a touch of white hand lettering to balance the composition and tie everything together. It’s always satisfying to add a personal touch like this, especially during the holiday season.

And just like that, one more Christmas card is complete and ready to spread some holiday cheer. This project reminded me of how versatile a single stamp can be when paired with the right techniques and materials. Thank you for stopping by today! Whether you’re shopping, crafting, or simply enjoying a quiet moment, I hope your weekend is filled with joy and creativity. And don’t forget to grab those Carabelle Studio stamps before they’re gone!

Happy crafting!


Topflight Stamp Supplies


Carabelle Studio - Kate Crane Oh Christmas Tree
Shop at:
TP
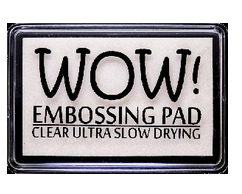
WOW! Embossing - Clear Embossing Pad
Shop at:
 TP
Lavinia - Mystical Mist Spray - Purple Orchid
Shop at:
TP
Lavinia - Acrylic Spray - Midnight Blue
Shop at:
TP
Lavinia - Acrylic Spray - Periwinkle
Shop at:
TP
Lavinia - Mystical Mist Spray - Pinkella
Shop at:
TP


Thursday, October 17, 2024

Trick OR Treat? Card

 Greetings! It's Kathi here again today to share another Mixed Media project since that's our focus this week! I've used stamps by Carabelle Studio with Fresco Finish Chalk Acrylic Paints by PaperArts, alcohol markers, modeling paste, a stencil, and die-cuts on this slightly deranged Halloween card.

Here it is!


Use Tuxedo Black Memento Ink by Imagine Crafts/Tsukineko to stamp both ravens from the Poe's Ravens Rubber Cling Stamp Set by Carabelle Studio and the eyeball from the Witches' Kit Rubber Cling Stamp Set also by Carabelle Studio onto white cardstock.  Carabelle went out of business last year, but some stamps are still available at Topflight Stamps!

Fussy-cut the ravens and the eyeball, color with Copic markers, and edge with a black marker. Use a gold marker from the Essential Metalllic Colorista Markers Set by Spectrum Noir to outline the raven's monocle and highlight his chain. Set the colored ravens and the eyeball aside. 

Use a door cutting die to cut mixed media cardstock. Use low-tack tape to cover the door frame. Paint the door with Twilight Fresco Finish Chalk Acrylic Paints by PaperArtsy. Let dry. Remove the tape and use colored pencils to add some shading to the door. Flip the door die-cut, place a piece of vellum over the windows, then adhere yellow cardstock over the vellum. Set the door aside.

Cut a piece of mixed media cardstock to 5.5" wide. Use Stone and Buff Fresco Finish Chalk Acrylic Paints by PaperArtsy to paint the cardstock. Use low-tack tape to adhere the painted mixed media cardstock to the back of a floor perspective stencil.

Add a dollop of modeling paste to a craft mat. Add a few drops of Stone Fresco Finish Chalk Acrylic Paint to the modeling paste and mix well with a palette knife. Spread the paint-tinted modeling paste over the stencil onto the painted cardstock. Remove the stencil and the tape. Let air dry for a bit, then use a heat gun at a distance to heat set it.

Create a 5.5" x 8.5" card from white cardstock. Adhere the stenciled dimensional floor to the bottom of the card. Cut a piece of brick patterned paper from the Bricks Textures 6x6 Paper Pad by Craft Consortium Ltd. to 5.5" and adhere to the card as shown. Trim whatever white space is left at the top of the card. 

Use Nocturne VersaFine Clair Inks by Imagine Crafts/Tsukineko to edge the card. Adhere the ravens and the eyeball to the front of the card. Adhere a silver metallic flat backed half globe to the door to become a doorknob.

Use alphabet dies to cut black cardstock and adhere to spell out the sentiment.

Please pop over to my blog, Kat's Tales of Stamping, for step-by-step instructions and complete supply lists. 

Topflight Stamps Products Used:


Thanks for visiting today!

Wednesday, September 18, 2024

Spooky Time with Our Halloween Theme!

Or not so spooky ha ha. Hello Lisa Hoel here. This week our Topflight Stamps focus is Halloween and Fall themes. The Halloween cards I created fall more into the "cute" category instead of spooky.

Lisa Hoel for Topflight Stamps #creativejuicefreshsqueezed #topflightstamps


I experimented with using the Carabelle Studio mask The Halloween House to make some different backgrounds. For two of them I spritzed spray stains through the mask and on the third I used the inky mask to make a monoprint.


I picked my two favorites to make cards out of. The AALL & Create die set I used is SkyCrossed Paradise (so many great details you can cut with this set!) The star of the card is the super cute little witch cat, a PaperArtsy Zinis mini stamp. I watercolored it and fussy cut out the image.

Thanks for stopping by and be sure to check out the Topflight Stamps store for a wide selection of different and hard to find stamps, stencils and other paper crafting supplies from all around the world! Also keep an eye here on the Topflight Stamps blog. There is new inspiration posted daily!

Topflight Stamps Supplies Used:

PaperArtsy Zinis stamp - ZN07

Carabelle Studio mask - The Halloween House

AALL & Create Die Set - SkyCrossed Paradise

Creative Expressions paper pad - Distress Plaid

Polkadoodles paper pad - Spooky Special 
(I used an earlier version of this pad)

Versafine Pigment Ink Pad - Onyx Black


Friday, February 23, 2024

Party Giraffe


Hello crafty friends! Ericka from Strangely Creative here and today I have a fun birthday card using the Carabelle Studio Party Giraffe. I love this cute image from Kate Crane and its perfect for a child's or an adult's birthday.


I stamped and clear embossed the image and colored it up with the Spectrum Noir Colorista Watercolor Markers in Botanical.  


Once my background was dry, I used a little Lavinia Acrylic Spray in Chartreuse and added a some AALL & Create Beachrock Washi tape for fun.


Thank you for stopping by and I hope you have a wonderful weekend!

Topflight Supplies Used


Friday, December 1, 2023

Carabelle Studio Oh Christmas Tree


Hello friends! Ericka from Strangely Creative here and today I have a quick Christmas card I made using the Carabelle Studio Kate Crate Oh Christmas Tree stamp. I love the fun trees on this long stamp. I masked off my watercolor paper and then used the PaperArtsy Infusions in Emerald Isle and Green Man.


Once it was dry, I stamped the Oh Christmas Tree stamp and white heat embossed it. I added a frame around it with a black pen and then hand wrote "Merry Christmas." Thank you for stopping by and I hope you have a wonderful week. 


Topflight Stamps Supplies Used


Friday, November 17, 2023

Carabelle Studio Fall Tags


Hello friends! Ericka from Strangely Creative here and today I have a couple of tags I created using the Carabelle Studio Geometric #3 Stencil with Lavinia Inks. I started with some ink blending with the Lavinia Elements Inks in Dark Denim, Merlot, and Violet Chalk. When I was done ink blending, I lightly spritzed the stencil with water and laid another tag on it to pull a reverse print on a tag. I Sprayed some Lavinia Acrylic Spray in Periwinkle and Mystical Mists Spray in Pinkella.


Here is the ink blended tag with a white embossed sentiment from the Hobby Arts Scene It Sentiments set.

And here is the reverse print tag with the Carabelle Studio Autumn Leaves stamped.


Thank you for stopping by and I hope you have a great weekend!

Topflight Stamps Supplies Used


Tuesday, October 31, 2023

Happy Halloween!

Happy Halloween! It's Tuesday, so you've got Kathi here to share a project with you. Here's a slimline Halloween card created with the Witches Kit Rubber Cling Stamp Set by Carabelle Studio and spiders from the Pumpkin Party Clear Stamp Set 1055 by Autour de Mwa for AALL and Create.


I started the card by positioning the pumpkin and cat stamp, the eyeball stamp, and the skull candle stamp from the Witches Kit Rubber Cling Stamp Set by Carabelle Studio  horizontally on the lid of a stamping platform. The stamps were inked with Nocturne VersaFine Clair Ink by Imagine Crafts/Tsukineko and stamped twice, once onto 140 lb. Mixed Media paper and once onto repositionable label paper. The label paper versions were fussy-cut, and placed over their counterparts on the image panel. 
A circle die was used to cut the repositionable label paper. The top and bottom of the label paper was cut to look like a cauldron and placed over the most of the masked eyeball.

A ruler was placed horizontally across the image panel. Violet Distress ink was sponged over the masked images and the ruler onto the image panel. The ruler was moved to cover the top part of the image and Brown Distress ink was sponged over the bottom portion of the image to ground the images.

A stencil from Studio Light (no longer available, but several of their other stencils are available and fabulous) was placed over the top part of the image panel. Violet then Black Distress inks were randomly brushed over the stencil to add some interest to the background. 

The masks were removed from the images which were then colored with watercolor pencils. The cauldron was colored with watercolor pencils and black Distress ink. Chalk pencil was used to add bubbling steam above the cauldron, shading to the the cauldron, and shadows below the images.

The spider from the Pumpkin Party Clear Stamp Set 1055 by Autour de Mwa for AALL and Create was stamped three times with Nocturne VersaFine Clair Ink.

A blue metallic marker from the Essentials Bright Metallic Colorista Markers by Spectrum Noir was used to color the swirls around the pumpkin. The red metallic marker from the same set was used to add the red  hourglass to the spiders' backs to transform them from normal spiders to Black Widow spiders. 

The image panel was edged with black Distress ink and adhered to a black card. 

Please pop over to my blog, Kat's Tales of Stamping, for more detailed instructions and complete supply lists.


Thanks for visiting today!


01 09 10