Showing posts with label PaperArtsy Zinis. Show all posts

Monday, July 20, 2026

A Funny Little Romance

Hey there, friends!  It's another Monday and another post with Walter.  This week's theme is PaperArtsy and I was so torn between a serious card or one with lots of whimsy since they offer so much of both.  Ultimately, something fun and whimsical won out - but I did throw in a touch of some serious elements.  I fell in love with these Zinis characters as soon as I saw them on the Topflight Stamps website - they're just so cute and fun.  The way that the little guy looks so adoringly off to the side while the little woman throws her hands up in the air (waving them like she just don't care!) looked to me like two people in love.  That's exactly what my design this week celebrates . . . a funny little romance.


I began this scene by deciding where to place my two Zinis, PaperArtsy - Zinski Mini - ZINI 36 & PaperArtsy - Zinski Mini - ZINI 37, and stamping them.  I knew that I wanted to put a stenciled heart between them and wanted to leave enough room between for that.  I then grabbed some masking paper, stamped both onto it, and fussy cut my masks.

I was ready to begin on my background once the masks were applied.  A really simple way to color a background without ink blending is to apply the ink with a baby wipe.  I pressed by inkpad onto my glass surface, grabbed a baby wipe, picked up some ink with it, and began to press the wipe against card panel.  You may swipe it across, gently rub in circles, or simply press & apply as I did to create a more gradient look.  I believe this a great technique to use in this design since it is so whimsical.  I then grabbed my pouncer brush with some white pigment ink and just lightly pounced around the panel.  This step serves two purposes - it lightens up the color a bit and also helps to give a blended look to the panel.


Lots of repeat stamping was done to finish off the design before adding the stenciled heart.  I used several stamps from PaperArtsy - Mags Woodcock - EMW004 to add in background text and a couple of floral elements.  With the stamping finished I could now move on to stenciling.  Rather than simply ink blending the heart, I thought it would be more fun to use some acrylic paint to form the shape using PaperArtsy - Stencil - Mags Woodcock - PS515.  This definitely didn't give me an exact replica of the heart on the stencil since I applied the paint with a palette knife rather than a brush.  I am okay with that though because it gave me a more imperfect & whimsical looking heart that truly goes so well with these characters.  I did one last thing to add a little more character to it - used a small sanding disk to gently sand away some of the paint & distress it.  I love the result!


I finished up by coloring these two little love birds and florals with alcohol markers and then adding in some bling using Hunkydory - Diamond Sparkles Glitter Gemstones - Amber Sparkles.

What do you think of my funny little romance?  Do you enjoy designs like this?  Let me know in the comments!  I'll see you again on the blog next Monday with another project.  Until then . . . be well!

Topflight Products Used:


Wednesday, September 18, 2024

Spooky Time with Our Halloween Theme!

Or not so spooky ha ha. Hello Lisa Hoel here. This week our Topflight Stamps focus is Halloween and Fall themes. The Halloween cards I created fall more into the "cute" category instead of spooky.

Lisa Hoel for Topflight Stamps #creativejuicefreshsqueezed #topflightstamps


I experimented with using the Carabelle Studio mask The Halloween House to make some different backgrounds. For two of them I spritzed spray stains through the mask and on the third I used the inky mask to make a monoprint.


I picked my two favorites to make cards out of. The AALL & Create die set I used is SkyCrossed Paradise (so many great details you can cut with this set!) The star of the card is the super cute little witch cat, a PaperArtsy Zinis mini stamp. I watercolored it and fussy cut out the image.

Thanks for stopping by and be sure to check out the Topflight Stamps store for a wide selection of different and hard to find stamps, stencils and other paper crafting supplies from all around the world! Also keep an eye here on the Topflight Stamps blog. There is new inspiration posted daily!

Topflight Stamps Supplies Used:

PaperArtsy Zinis stamp - ZN07

Carabelle Studio mask - The Halloween House

AALL & Create Die Set - SkyCrossed Paradise

Creative Expressions paper pad - Distress Plaid

Polkadoodles paper pad - Spooky Special 
(I used an earlier version of this pad)

Versafine Pigment Ink Pad - Onyx Black


Friday, January 20, 2023

Colorful PaperArtsy Zinski Tag


Hello friends, Ericka from Strangely Creative here and today I have a bright tag using the PaperArtsy Zinski stamp along with the Colorista Watercolour Markers.

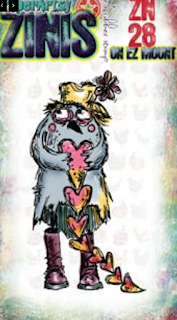
I stamped this fun Zinski Zini 28 and clear heat embossed it. I then took the Spectrum Noir Colorista Watercolour Markers and colored it up. I love these bright colors and they were easy to blend together. Once my bird was dry, I fussy cut her out. I had a tag in my stash that I had made using my gel press and some texture paste I had added color to. 

I finished my tag with the sentiments in the Studio Light Jenine's Mindful Art Sentiments and Wishes set. There are so many great sentiments in this set it was hard to narrow them down. I also added a little AALL & Create washi tape to the edges for a little contrast.

Thank you for stopping by and I hope you have a wonderful weekend!

Topflight Stamps Supplies Used


Saturday, September 10, 2022

PaperArtsy Zinski Birds & Jofy Flowers Card


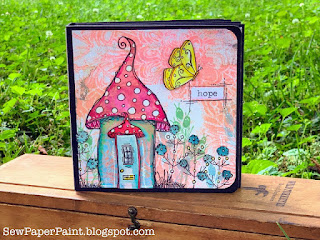
Hi friends!  It's Autumn Clark from SewPaperPaint with you today to share a fun gel printed greeting card I made for my mom.  My mom was at my house and saw my PaperArtsy mini album I made during Covid and loved it and wanted us to make one, so I first made this card for her.  You can find the details of the album using these stamps and more on my blog HERE


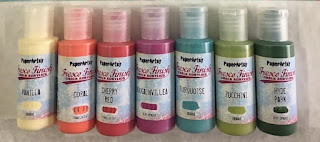
For this card I used my 6x6" Gel Press printing plate and PaperArtsy Fresco Finish Chalk Acrylics in Sargasso and Captain Peacock, along with PaperArtsy stencil by Jofy PS164.  I shared a fun gel printing tutorial for cardmaking HERE if you need a refresh. 

I made a little stand for the birdcage (JM36) and filled in with flowers from PaperArtsy Jofy stamp set JOFY111.  I colored the funky bird by Elena Zinski (mini stamp ZN23) with Prism brush markers and finished with a sticker sentiment.  Fun!  I hope this card and my mini album will inspire you today!  xx, Autumn

 Shop PaperArtsy at Topflight Stamps!


Thursday, June 9, 2022

Versafine Clair Inks - You Make Me Smile

 Hi Everyone,

Cornelia here today. This week we are featuring Versafine Clair Inks on the Topflight blog
They are beautifully vibrant pigment ink pads.

I inked up the background stamp in Tulip Red and Summertime Orange, although it looks all the same  here. I used my brayer to smooth out the transitions. Stamped the image onto white paper and heat embossed it in clear. Brushed yellow, orange, red and Medieval Blue over the heat embossed image to get that gradient background.
Stamped the little figure onto scrap paper and used whatever color was left in the brushes to color it. I did mask off the hat, eye and belt, which I colored with markers. Cut it out and added gel pen highlights. Added the heat embossed sentiment.

I hope you liked this. Thanks for visiting. 
See you next week with more Topflight Stamps inspiration.

And here are the stamp supplies I used: 

Tuesday, February 16, 2021

They're Perfect Together!

Hi there! It's Tuesday so it's Kathi here to share a project with you. Apparently I'm still in a Valentine's Day mood and felt like match-making, so I joined the birdie on  Zinski Zini #28 Cling Mounted Stamp with the birdie on Zinski Zini #29 Cling Mounted Stamp by PaperArtsy. You've got agree that they make a cute couple! I added the hazard sign from the France Papillon #1 Cling Mounted Stamp Set because sometimes love requires caution. 

Here's the card, which works for Valentine's Day and/or an anniversary. 


The bird on the left (Zinski Zini #28) was stamped first onto the image panel, then onto label paper, which was fussy-cut and placed over the image to be used as a mask. Zinski Zini #29 was then stamped onto the image panel, label paper, fussy-cut, and the fussy-cut version was used as a mask. The hazard sign was stamped onto the image panel to complete the scene. Then it too was stamped, fussy-cut, and used as a mask. Gosh. I'm so predictable. 

Once all the images and the bottom part of the image panel were masked, Pink Jellybean Prism* Ink was brushed over the Hearts and Dots Stencil by Alexandra Renke. Sparkly clear embossing powder was sprinkled over top, then heat embossed. You'll note that some of the dots around the hearts were uninked, I decided that was okay because perfection is overrated. 

Periwinkle Prism Ink was brushed over the the image panel. The horizontal mask covering the bottom of the image was removed and grey Distress ink was brushed over the masked image. I went with Distress ink because I wanted to use my Copics to add shadows.

All the masks were lifted and the images were colored with Copic markers. 

Onyx Black VersaFine Ink by Tsukineko was used to stamp the sentiment from the Love Birds #155 Clear Stamp Set by AALL and Create onto the bottom of the image panel.

The image panel was adhered to an A2 card. A frame die-cut was used to finish the card.

*Please note: Prism ink tends to stay wet longer so it's easily blendable AND you can emboss with it. Plus it's inexpensive, so you can have all the colors. 

If you'd like to know more about this card, please visit  Kath's Tales of Stamping

Topflight Products Used:


Thanks for visiting today! See you next Tuesday!


01 09 10