Showing posts with label PaperArtsy stencils. Show all posts

Monday, August 24, 2026

Notes of Love with PaperArtsy

Hi, friends!  Welcome back to the blog.  It's Walter with you today as I kick off a new week's theme, which is . . . anything goes.  I really enjoy the designs of Mags Woodcock.  I first came across her work in Somerset Studio magazine and was so excited to see her products with PaperArtsy on the Top Flight Stamp website.  This week, I used two of her coordinating products, PaperArtsy - Mags Woodcock - EMW004 - Rubber Cling Mounted Stamp Set and PaperArtsy - Stencil - Mags Woodcock - PS517 to create my card.  Let's jump into my process!


I began with an A2 sized piece of watercolor paper that I spritzed with water. Instead of painting with watercolors, I decided to paint with Distress Oxide Ink smooshed on my craft surface and mixed with water.  Using the oxide inks mixed with water gives an opaque, almost paint-like look.  I used a mop brush to first move Tattered Rose around the inside of the paper and then Antique Linen around the edges.


Once dry, I stamped the heart stamp onto the panel using Versafine Fallen Leaves ink.  I also stamped the large heart and small heart onto masking paper and set that aside.  I then stamped the image of the word Love repeated several times using Ground Espresso Distress ink.


I fussy cut each of the heart masks from the masking paper and applied them to the images.  I wanted the brown color of the stenciling to be lighter than the dark shade of Fallen Leaves so I used Ground Espresso Distress Ink to add that contrast.


I removed the masks and added spots of a varying pink color to the hearts and did that with a mixture of Spun Sugar Distress Oxide ink and water.  I then tapped the entire panel with a brush loaded with Tea Dye Distress ink to some vintage grunge.  Some subtle shine was added to the panel using the ovals on the stencil and Delicata Golden Glitz ink.  I also added some splatter using Old Paper Distress Spray Ink.  In order to add further age to the panel, I used a plastic knife to distress the edges and then ran Ground Espresso Distress ink around them.

Some kind of a floral element was needed to truly complete the design.  I stamped three of the small flowers, colored them with alcohol markers, Accented the petals with a gold gel pen, added grunge with Tea Dye Distress ink, and fussy cut them.  They were adhered with double-sided foam tape and embellished with acrylic drops that I colored gold using a Studio Light Gold Metallic Martker.


I'm really happy with this design.  With elements of love, nature, and music . . . it truly strikes the right note!  Thanks for spending some time with me on the blog today.  I'll see you again next week.  Until then . . . be well!

Top Flight Stamps Products Used:


Monday, July 20, 2026

A Funny Little Romance

Hey there, friends!  It's another Monday and another post with Walter.  This week's theme is PaperArtsy and I was so torn between a serious card or one with lots of whimsy since they offer so much of both.  Ultimately, something fun and whimsical won out - but I did throw in a touch of some serious elements.  I fell in love with these Zinis characters as soon as I saw them on the Topflight Stamps website - they're just so cute and fun.  The way that the little guy looks so adoringly off to the side while the little woman throws her hands up in the air (waving them like she just don't care!) looked to me like two people in love.  That's exactly what my design this week celebrates . . . a funny little romance.


I began this scene by deciding where to place my two Zinis, PaperArtsy - Zinski Mini - ZINI 36 & PaperArtsy - Zinski Mini - ZINI 37, and stamping them.  I knew that I wanted to put a stenciled heart between them and wanted to leave enough room between for that.  I then grabbed some masking paper, stamped both onto it, and fussy cut my masks.

I was ready to begin on my background once the masks were applied.  A really simple way to color a background without ink blending is to apply the ink with a baby wipe.  I pressed by inkpad onto my glass surface, grabbed a baby wipe, picked up some ink with it, and began to press the wipe against card panel.  You may swipe it across, gently rub in circles, or simply press & apply as I did to create a more gradient look.  I believe this a great technique to use in this design since it is so whimsical.  I then grabbed my pouncer brush with some white pigment ink and just lightly pounced around the panel.  This step serves two purposes - it lightens up the color a bit and also helps to give a blended look to the panel.


Lots of repeat stamping was done to finish off the design before adding the stenciled heart.  I used several stamps from PaperArtsy - Mags Woodcock - EMW004 to add in background text and a couple of floral elements.  With the stamping finished I could now move on to stenciling.  Rather than simply ink blending the heart, I thought it would be more fun to use some acrylic paint to form the shape using PaperArtsy - Stencil - Mags Woodcock - PS515.  This definitely didn't give me an exact replica of the heart on the stencil since I applied the paint with a palette knife rather than a brush.  I am okay with that though because it gave me a more imperfect & whimsical looking heart that truly goes so well with these characters.  I did one last thing to add a little more character to it - used a small sanding disk to gently sand away some of the paint & distress it.  I love the result!


I finished up by coloring these two little love birds and florals with alcohol markers and then adding in some bling using Hunkydory - Diamond Sparkles Glitter Gemstones - Amber Sparkles.

What do you think of my funny little romance?  Do you enjoy designs like this?  Let me know in the comments!  I'll see you again on the blog next Monday with another project.  Until then . . . be well!

Topflight Products Used:


Thursday, April 30, 2026

Strawberry Tag with PaperArtsy

Hello all!  This week at Topflight Stamps we are focusing on the PaperArtsy brand.  It's a vast category, they have so many products in our store!  For my tag, I began with a couple of Fresco Chalk Paint in two colors:  Spring and Winter Green and paired them with PaperArtsy Alison Bomber PS487 and PS472 Large Stencils.  After the background was dry, I carefully glued down some petite strawberry plants, courtesy of PaperArtsy Alison Bomber Strawberry Edition stamp set.  They'd been stamped with VersaFine Onyx Black ink on scrap white cardstock, colored and fussy-cut.  I also stamped and cut out the words that come with that stamp set:  botanical, medicinal, floral and herbal, and added them on here individually.  There's a round label that comes with the set too, and I used that, plus a postage stamp image from the PaperArtsy Alison Bomber Rosehips Edition stamp set.  They decorate a piece of abaca ribbon I've had for decades.

Hope you have a beautiful day! ~ Colleen


Supplies Used From Topflight Stamps:


Thursday, March 12, 2026

Le Petit Dahlia

Hello!  This week at Topflight Stamps we are using washi tape on our creations.  I had fun with some AALL & Create Blooming Splodge #74 - gorgeous pink flowers on this one.  I laid down a strip of the washi tape on scrap cardstock and glued it down so it has no chance of peeling up.  Then I used a flower punch from my stash and punched out a couple to use on my card.  Moving on to the card base, I positioned the PaperArtsy "Le Petit Dahlia" stencil over my card and brushed on Lavinia Truffle Dye Ink where the words appear near top and bottom.  I used a pink ink from my stash for the dahlia itself, and this Lavinia Pink Elephant ink pad is a really good match for it.  Then I cleaned the stencil, and took out some stenciling paste to highlight the word "PARIS" from it.  Back to the washi tape, I used a piece of it to decorate the very bottom of the card front, added my punched flowers, and the final touch:  pearls!  Hunkydory Diamond Sparkles Precious Pearls are my favorite way to add some bling to cards!  I used them on the washi tape punched flowers as well as surrounding the word "PARIS".  Hope you have a beautiful day! ~ Colleen  


Supplies From Topflight Stamps:


Thursday, February 5, 2026

Enjoy Life with Gossamer Gold

Hello crafters!  I've got a shimmery card to share with you today for Topflight Stamps, using Lindy's Stamp Gang Gossamer Gold spray.  Oh my, this is so gorgeous!  It's got a combination of walnut brown and gold hues in one spray.  First, I took a plain manila tag and spritzed it with this product, then a bit of water and hit it with a heat tool to help speed up drying. Once dry, I used the PaperArtsy Scrapcosy PS317 Stencil and Lavinia Truffle Dye Ink to create borders and a sentiment on the tag.  After mounting it on an old hymnal page and decorative paper, I added a twine bow and it's all set to give to my father in law for his birthday.  Thanks for joining me, and hope you have a great day! ~ Colleen


Supplies From Topflight Stamps:


Thursday, January 29, 2026

Pink Hearts Valentine

Hello!  This week at Topflight Stamps we are using red and pink as our theme.  I created a Valentine, focusing heavily on pink.  On a pink cardstock base, I stamped the script from Studio Light Victorian Dreams stamp set to cover the background, using Lavinia Spun Candy dye ink.  A manila tag is full of hearts, thanks to the same Spun Candy ink and a PaperArtsy Sara Naumann Hearts Stencil (PS121).  I used a strip of the Studio Light Victorian Dreams packaging to decorate the bottom of that tag, along with some rosette ribbon from my stash.  The butterflies are from that same stamp set, stamped in Morning Mist by Versafine Clair, trimmed and glued down in the centers of their bodies only so that the wings can stand up.  The sentiment was selectively stamped / trimmed from a PaperArtsy Alison Bomber Love Edition quote.  Wishing you a wonderful day! ~ Colleen


Supplies From Topflight Stamps:


Studio Light Victorian Dreams Stamp Set


Friday, September 19, 2025

Sunrise Inspiration: A Mixed Media Gel Press Card


Happy Friday, crafty friends! 🌅 Ericka from Strangely Creative here, and today I’m sharing a card inspired by the breathtaking fall sunrise we had here in Texas this week. The warm glow of the sky was the perfect spark to pull out my Gel Press and play with some color.


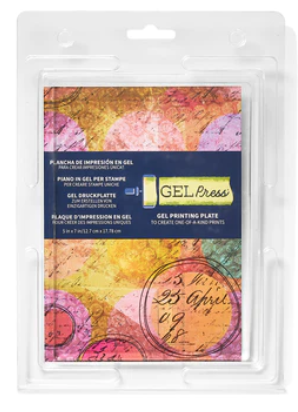
To start, I layered a blend of paints on my Gel Press to capture those dreamy sunrise tones. Once I pulled the print, I added extra depth using the PaperArtsy Kate Crane PS453 stencil with Pea Coat Fresco Paint. For a crisp contrast, I traced the stencil details with a white paint pen and doodled a few extra accents.

To finish, I added a simple hand-drawn frame around the edges and a bold sentiment from the AALL & Create Motivation Station collection—because sometimes all you need is a reminder of positivity to start the day right.


This was such a fun piece to make, and I love how the sunrise colors shine through the layers. ðŸ’›ðŸ§¡ðŸ’•


Thanks for stopping by, and I hope this inspires you to pull out your stencils and Gel Press to capture a little sunrise magic of your own. Have a wonderful weekend!


 Topflight Stamp Supplies

PaperArtsy - Kate Crane PS453
Shop at:
TP
AALL & Create - Motivation Station
Shop at:
TP
PaperArtsy - Fresco Chalk Paint - Pea Coat
Shop at:
TP
Gel Press - Reusable Gel Printing Plate
Shop at:
TP
Speedball - 2
Speedball - 2" Brayer
Shop at:
TP
01 09 10