Showing posts with label birthday. Show all posts

Thursday, March 26, 2026

Birthday Bunny

Hello!  You've got Colleen Dietrich here today to continue celebrating Topflight Stamps' 9th birthday week!  To keep up the birthday fun, I've got a card featuring a cute bunny from L'encre et L'image stamp set called The Long-Eared Family.  This little guy is holding a bouquet of clover.  I love him. 😊  I started with a background of patterned paper from Kaisercraft's Provincial paper pad.  Then I stamped that bunny on a scrap of paper with Memento Tuxedo Black Ink, colored him with alcohol markers and fussy-cut the image.  The Provincial paper pad has not only patterned papers but also punch-out ephemera, like the two scalloped borders, clock and sentiment.  So easy.  I added some bakery twine for the bunny to stand on, along with some floral embroidery trim from my stash.  Pearls from Hunkydory were the final touches.  Hope you have a wonderful day! ~ Colleen


Supplies Used From Topflight Stamps:


Thursday, February 5, 2026

Enjoy Life with Gossamer Gold

Hello crafters!  I've got a shimmery card to share with you today for Topflight Stamps, using Lindy's Stamp Gang Gossamer Gold spray.  Oh my, this is so gorgeous!  It's got a combination of walnut brown and gold hues in one spray.  First, I took a plain manila tag and spritzed it with this product, then a bit of water and hit it with a heat tool to help speed up drying. Once dry, I used the PaperArtsy Scrapcosy PS317 Stencil and Lavinia Truffle Dye Ink to create borders and a sentiment on the tag.  After mounting it on an old hymnal page and decorative paper, I added a twine bow and it's all set to give to my father in law for his birthday.  Thanks for joining me, and hope you have a great day! ~ Colleen


Supplies From Topflight Stamps:


Thursday, May 29, 2025

Starry Birthday

Hello!  This week at Topflight Stamps, we are sharing our star-themed creations. I've got a starry birthday card to show, which positively GLITTERS in person, thanks to Spectrum Noir Glitter Paste in Candlelight Gold and the Darkroom Door Starry Night Small Stencil.  The glitter paste is a dream to spread over a stencil, goes on easily and give such a 'wow' factor.  The background panel is navy, which is a good contrast for the gold stars.  The white panel was made with with a Crealies Stitched Rectangle, on which a sentiment from Visible Image Go To Words was stamped.  I finished it up with some gold star ribbon trim from my stash, and a few red stars.

Hope you have a wonderful day! ~ Colleen


Supplies Used From Topflight Stamps Store:

Crealies Stitched Rectangle Dies


Darkroom Door Starry Night Small Stencil


Thursday, April 3, 2025

Lavender Birthday

Hello!  It's Thursday, so you've got Colleen with you to share during our "Anything Goes" week at Topflight Stamps. I used a page from Creative Expressions Nature's Compendium paper pad as my inspiration for a lavender card.  On a panel of lavender paper, I inked the edges and stamped some cute blackberries from the Lavinia Blackberry clear stamp.  I stamped extra blackberry images on a scrap of white cardstock, and fussy cut them.  Then, I die-cut a light plum rectangle using a Crealies Stitched Rectangle die, and mounted it on top of the lavender / blackberry background.  On a white piece of cardstock, die-cut with a circle, I stamped a birthday sentiment from the very versatile Hobby Art Stamps Hydrangea stamp set.  Also from the same set, I stamped little hydrangea blossoms and leaves, then fussy cut those.  It was fun to create little clusters of blossoms, berries and leaves on two corners of the sentiment circle.  Each blossom got a little dot of glitter glue, too.


Supplies Used From Topflight Stamps Store:


Creative Expressions - Nature's Compendium Paper Pad


Thursday, March 27, 2025

Reindeer Head Birthday

Hello!  It's Colleen with you again during the Topflight Stamps Celebration Week!  I've got a masculine birthday card to share.

I started with this realistic brick background paper from Craft Consortium Brick Textures pad, and pulled colors from it for the rest of the card.  This paper pad has a lot of different brick textures, in all kinds of colors, so versatile.  This cute Dixi Craft Reindeer Head die became the focal point of the card.  I die cut multiples and stacked several on top of one another, to give dimension.  The sentiment is from Visible Image Go To Words, a staple in my stamp stash.  After stamping it, I fussy-cut and lightly inked the edges with light brown.  The final touch was some burlap ribbon trim I had on hand.


Supplies Used From the Topflight Stamps Store:


Dixi Craft Reindeer Head Die


Sunday, June 26, 2022

Tracy Scott PaperArtsy Neon Floral Birthday Card


Hi friends!  It's Autumn Clark from SewPaperPaint with you today to share a zingy summertime birthday card featuring stamps by Tracy Scott for PaperArtsy.  I had a blast making this card using some bright colors of PaperArtsy Fresco Chalk Acrylics.  I did a gel printed background using Tracy's stencil PS126.  I used Sargasso, Dirty Lime, Tango, Bubble Gum and Captain Peacock. 

I stamped the flower onto one of my prints, which primarily had Bubble Gum Frescos on it.  I stamped the flower leaves with Sargasso onto a book page and fussy cut them.  Then I used Tracy's stamp set TS025 to add some black and Peacock Distress Oxide stamping onto my gel printed background.  The little black dots come from both black gesso splatters and washi tape.  I added a label tape sentiment to finish it off.  I hope this bright card made you smile today and want to get out your gel prints and do some stamping!  Hugs, Autumn

Fun mixed media supplies at Topflight Stamps!


Monday, March 8, 2021

Raspberry Tracy Scott Flowers & Butterflies Cards


Hi friends!  It's Autumn Clark from SewPaperPaint with you today to inspire you on using up extra stamped backgrounds.  You may remember THIS post (and video tutorial HERE) where I shared how to use PaperArtsy Infusions with Versamark ink to make embossable stamped images for resist, well during that process I was left with a load of stamped backgrounds, I mean why not go ahead and stamp them while you are playing, right?!


Here's the lot I was left with...


I knew the funky butterfly from the PaperArtsy Tracy Scott Stamp Set ETS22 would work perfectly with these backgrounds, and to make it easier to do a batch in one quick sitting, I stuck with a monochrome palette.  This was also because the Magenta Infusions I used were so bright and beautiful, I thought it only needed a little contrast with black & white.
 

I added another tap of Magenta Infusions to some water to use with my waterbrush to add a little color to the wings of my butterflies, then layered my scraps like so.  I used the Pronty Quote Stickers and an older PaperArtsy stamp set to emboss a sentiment to finish them off.  It always feels good to sit down and make a good batch of cards in a short time, so let me encourage you to always make extra pieces and keep them near by.  Have a great week friends!  Hugs, Autumn


Check out the assortment of PaperArtsy Infusions at Topflight Stamps today!!


Monday, December 28, 2020

Darkroom Door Eat More CUPCAKES Flap Front Cards


Wow!  This eventful year is coming to a close and I don't know about you but I feel a sense of peace as it ends and a new beginning approaches...  I wanted to spend a little time over Christmas break to stock up on some birthday cards for next year, so I created a little assembly line with my stamp platform and some adorable Darkroom Door stamps.  


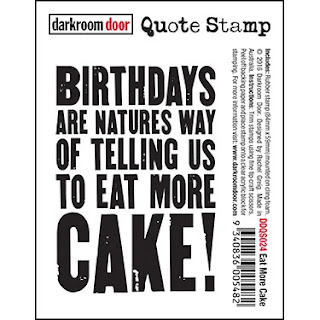
I grabbed my pad of Hunkydory watercolor cardstock and cut it as show, with one sheet making two 4 x 5.25" panels for backgrounds and two strips at 2.75 x 8.25".  I repeat stamped my focal sentiment, Eat More Cake by Darkroom Door, onto the bottom half of the strips, then scored slightly above to create flaps for my cards.

I die cut a little tab to hold the flap shut.  To do this, I marked the end of my top flap on the bottom panel with a pencil, then I used washi tape to position my smallest circle die in place.  I pulled the top panel up from under the die and took it to the die cutting machine.  I lined my top plate up a little over the line on the top of the circle to make a partial cut.

I used Prism Inks in a variety of colors using the Direct to Paper (DTP) technique to color my panels.  I shared a video tutorial on this HERE.  To get the cupcakes on the inside of my flaps to remain white, I stamped them in permanent ink (because dye inks will smear with this technique) and then colored over the image with the Darkroom Door Resist Crayon before using the DTP with Prism Inks.  After I spritzed and blended my inks as desired, I heat set them and the crayon, which magically melts into the paper so it is no longer shiny.


I just love this Cupcake stamp!  The top of the flap is the perfect size to store a giftcard above it.  I made sure to only glue the top half of the flapped panel onto the card base so there was room to close it.  For my backgrounds I repeatedly stamped the new Sketchy Stars, some embossed in white.  I hope these cards inspire you to get to work on building a happy 2021 for yourself and the ones you love.  Big creative hugs, Autumn from SewPaperPaint


Check out this deal on Prism Dye Ink Pads!


01 09 10