Showing posts with label glitter paste. Show all posts

Thursday, May 29, 2025

Starry Birthday

Hello!  This week at Topflight Stamps, we are sharing our star-themed creations. I've got a starry birthday card to show, which positively GLITTERS in person, thanks to Spectrum Noir Glitter Paste in Candlelight Gold and the Darkroom Door Starry Night Small Stencil.  The glitter paste is a dream to spread over a stencil, goes on easily and give such a 'wow' factor.  The background panel is navy, which is a good contrast for the gold stars.  The white panel was made with with a Crealies Stitched Rectangle, on which a sentiment from Visible Image Go To Words was stamped.  I finished it up with some gold star ribbon trim from my stash, and a few red stars.

Hope you have a wonderful day! ~ Colleen


Supplies Used From Topflight Stamps Store:

Crealies Stitched Rectangle Dies


Darkroom Door Starry Night Small Stencil


Friday, December 27, 2024

Sparkle into the New Year

Hello, crafty friends!

Ericka here from Strangely Creative, and I hope you had a wonderful Christmas celebration filled with joy and love. We’ve been busy catching up on everything as we prepare to welcome the new year, but I couldn’t resist sneaking in one last project before the countdown begins! Today, I’m sharing a fun and vibrant card designed to kick off the New Year with plenty of sparkle and shine!


I started this card with a lively print I made using my gel press and alcohol inks. The bright colors instantly remind me of fireworks and celebration—perfect for waking up the New Year!

To give my card that extra wow factor, I added Spectrum Noir Candlelight Gold Glitter Paste through the PaperArtsy Kate Crane 442 stencil. The stencil’s unique shapes paired with the golden sparkle create a bold and eye-catching design that screams celebration!


Once the glitter paste was dry, I brought in some WOW! Embossing Metallic Gold powder to add an embossed sentiment. I used the AALL & Create Snippet Alphabet stamp to spell out a fun greeting, along with the "Hello" sentiment from the PaperArtsy Scrapcosy 29 set. These finishing touches tie everything together beautifully.


And there you have it—a cheerful and bright card to ring in the New Year! I love how the vibrant background and shimmering details create a festive feel perfect for this time of year.

P.S. Don’t forget to check out the amazing sales happening now to stock up on supplies for all your creative projects in the New Year. Let’s make 2024 a year full of color and creativity!


Topflight Stamp Supplies

PaperArtsy - Scrapcosy 29
Shop at:
TP
PaperArtsy - Kate Crane 442
Shop at:
TP
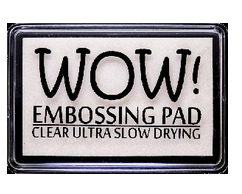
WOW! Embossing - Clear Embossing Pad
Shop at:
 TP
WOW! Embossing - Metallic Gold Rich Pale
Shop at:
 TP
Spectrum Noir - Glitter Paste - Candlelight Gold
Shop at:
TP

Monday, April 15, 2019

Crafty Individuals | Clean and Simple Mixed Media with Jenny

Hi everyone, Jenny here,  and welcome to the Topflight Stamps blog!  Today I have a card that has a lot of mixed media elements,  but is still clean and simple!


I'm using the Crafty Individuals Butterfly Bouquet stamp for this card.  It has a mixed media feel,  so I decided to heat emboss it over a watercolor background. 

To create my card, I first took a panel of watercolor cardstock and dipped it into Distress Oxides in Spun Sugar and Squeezed Lemonade that I had smushed onto my craft mat and spritzed with water.  I dried it, then redunked - repeat three times and you get a soft and pretty watercolor layered look.  


I then stamped the Butterfly Bouquet several times along the base and up the side of the card in embossing ink and heat embossed in Vanilla White embossing powder.   I then die cut the panel with a stitched rectangle die.
To add another layer of media on top, I used the Alexandra Renke Butterfly Pattern stencil, which I laid over the top and added iridescent glitter paste over top in the centre.


To finish my card,  I popped up the panel on foam onto a white notecard.  I then die cut the Paper Rose Happy Birthday sentiment from white and silver mirror card stock and added it directly into the centre of the panel.  


A few sequins finished the card!


Monday, April 8, 2019

AALL & Create | Combing Metallics with Jenny

Hi everyone and welcome to the Topflight Stamps blog!


It's Jenny here,  and today I'm using Rose Gold glitter paste with a gorgeous AALL & Create Mosaic stencil to create my background.

I laid down the stencil over the top of some pale pink cardstock and smoothed the Rose Gold glitter paste over the top, making sure to line up the stencil so that the pattern was even on all sides. I then set it aside to dry.


While they panel was drying, I thought it would be fun to combine metallics, so I die cut the Jane Davenport Fair Feathers die from silver mirror cardstock. When the panel was dry, I adhered it to the background using a strip of foam tape in the centre.


I needed a large sentiment to cover up the foam strip, so using a panel of slightly darker pink cardstock, I heat embossed this sentiment from Katzelkraft's Fun Quotes - Darkside in Rose Gold embossing powder, to co-ordinate with the background.


I die cut it with a deckle edge frame and then popped it over the feather with more foam tape.


You can check out my blog for more details on the supplies I used. Have a great day!

Monday, March 11, 2019

Color Blocked Butterflies

Hi Everyone and welcome to the Topflight Stamps blog - it's Jenny here! The clocks went forward in the USA today - ugh - I hate losing an hour. Such a small amount of time yet it really throws your day off!! I thought I'd create a couple of cards to bright up the rest of the day!


Today I am over on the Topflight Stamps blog and I have two cards for you which feature a similar theme - color blocking. I'm using a technique I saw Yana Smakula use recently. I created two panels using sparkly cardstock in rose, pale pink and a sage green by adhering strips to a piece of A2 size cardstock. I then trimmed one of the panels into 1 inch strips and adhered them to a white card base using foam tape, switching each strip but keeping the green down the centre.

I kept each of the cards simple. For this one I used Carabelle Studios Flight of the Butterflies.
I heat embossed one of the butterflies on vellum with metallic silver embossing powder and then fussy cut it out.
I adhered it to the color block strips with a foam strip. I heat embossed the sentiment from For The Love of Stamps Occasion Sentiments in white embossing powder directly onto the color blocks. As a finishing touch I added some clear sequins.
For my second card, before I adhered the panel to a notecard, I used the gorgeous Butterflies Stencil by Alexandra Renke.

I smoothed silver glitter paste all over the panel.

When dry, I adhered it to a white notecard. My sentiment is the Layered Hello by Paper Rose Studio. I die cut it from vellum and some of the card stock left over from creating the color blocking.

I then adhered it the the centre of the card. I added a layer of Diamond Stickles for extra sparkle.

I thought it needed a little something else so I heat embossed the teeny tiny 'Love' sentiment (from an older Alexandra Renke Love Hearts stamp set) onto black cardstock in WOW! Bright White Opaque embossing powder, trimmed it out and popped it up on foam tape. I finished the card with some of the same sparkling clear sequins.

You can check out more info on the supplies I used over on my blog. Have a wonderful day!
01 09 10