Showing posts with label die cutting. Show all posts

Monday, January 20, 2025

Joyful Robins

Hello!  Colleen Dietrich here to share with you a card as we highlight AALL & Create products this week!   I used the ATC Festive die set for my sentiment.  It looks pretty with a subtle silver glitter paper, and lives up to the 'festive' name!  I also used the Crafty Individuals - Jolly Holly Robins to coordinate with the 'joy' die cut.  Those little birds are singing amidst holly branches... definitely a joyful scene!  These were mounted on a panel of deep red patterned paper, to make both the image and the die cut pop.

Be sure to check out all of the AALL & Create items in the Topflight Stamps store.  So, so many AALL options - over 1,000 items!


Items used from the Topflight Stamps store:


Friday, June 21, 2024

AALL & Create Gel Press Butterflies


Ericka from Strangely Creative here, and today I’m absolutely thrilled to share my latest project with you all! I had a blast playing with the AALL & Create Nature's Doily dies to create a vibrant and whimsical butterfly page. These dies are simply a joy to work with, especially when paired with some colorful gel press prints.

First things first – let's talk about gel press prints. If you haven't tried them yet, you're in for a treat! Gel printing is an art technique that allows you to create beautifully layered and textured backgrounds. The unpredictability and uniqueness of each print make it an exciting process every single time.

For this project, I selected a couple of my favorite gel press prints, bursting with bold and cheerful colors. The intricate cuts of the Nature’s Doily dies add a delicate, lace-like quality to these vibrant prints, creating a stunning contrast that immediately catches the eye.


Once I had my prints ready, it was time to get cutting! The Nature’s Doily dies are incredibly detailed, which can be both a delight and a challenge. With a bit of patience and a sharp die-cutting machine, I dry cut the pieces, eagerly anticipating how they would come together on the page.

The assembly process is where the real fun began. Using foam tape, I layered the die-cut pieces to create different dimensions. This technique adds depth and a dynamic, three-dimensional effect to the page. The butterflies seemed to flutter off the paper, their wings casting delicate shadows that enhance the overall composition.


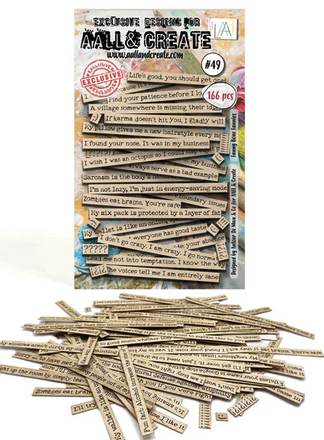
No project is complete without a finishing touch that brings everything together. For this page, I chose a fun sentiment from the AALL & Create Ephemera Funny Bone Funnies. The playful words added a lighthearted and whimsical element, perfectly complementing the cheerful butterflies and colorful background. 

Thank you for stopping by and sharing in my creative adventure. I hope this project inspires you to dive into your own stash of gel press prints and explore the possibilities with the Nature’s Doily dies. Remember, the joy of creating lies not just in the final piece, but in each step of the process.

Happy crafting, and may your creative journey be filled with color, texture, and lots of fun!


Topflight Stamp Supplies
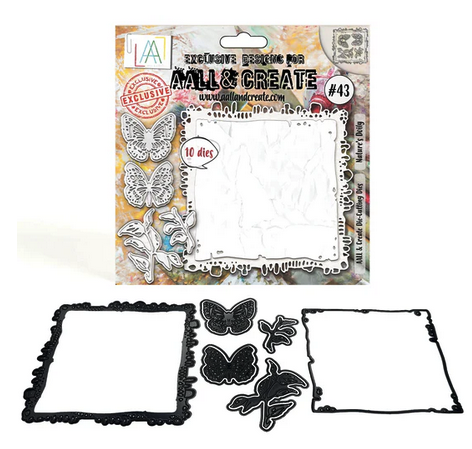
AALL & Create - 43 - Nature's Doily
Shop at:
TP
AALL & Create - Ephemera Die-cuts - 49 - Funny Bone Funnies
Shop at:
TP
3-D Foam Tape
3-D Foam Tape
Shop at:
TP
Double Sided Tape
Double Sided Tape
Shop at:
TP
PaperArtsy - Fresco Chalk Paint - Beach Hut
Shop at:
TP
PaperArtsy - Fresco Chalk Paint - Bermuda
Shop at:
TP
PaperArtsy - Fresco Chalk Paint - Blueberry
Shop at:
TP
PaperArtsy - Fresco Chalk Paint - Bubble Gum
Shop at:
TP
PaperArtsy - Fresco Chalk Paint - Cerulean
Shop at:
TP
PaperArtsy - Fresco Chalk Paint - Flamingo
Shop at:
TP
PaperArtsy - Fresco Chalk Paint - Gumboots
Shop at:
TP
PaperArtsy - Fresco Chalk Paint - Peach Nectar
Shop at:
TP
PaperArtsy - Fresco Chalk Paint - Peachy Keen
Shop at:
TP

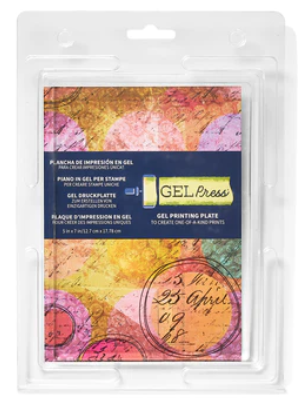
Gel Press - Reusable Gel Printing Plate
Shop at:
TP


Speedball - 2
Speedball - 2" Brayer
Shop at:
TP

Monday, January 25, 2021

Embossing Resist with PaperArtsy Infusions Powder


Happy Monday friends!  It's Autumn Clark from SewPaperPaint with you to share some fun ideas using PaperArtsy Infusions pigment powder.  If you know me, you can testify that I am a terrible procrastinator.  Sometimes I just hate that about myself, but sometimes with art projects I procrastinate and let ideas sort of "marinade" in my mind and then go wild when the time comes to get things done.  This was the case today and I am so glad it was!  I kept trying and trying to think of a new idea for Infusions powders and I think I have come up with one, a way to use them for embossing resist.  For my pair of tags, I've used opposite colors to show you how you can achieve a layering effect.  Because these pigment powders are extremely water reactive, they need to be sealed somehow if you want to add any wet medium on top.  My solution was this:


I used Versamark reinker and a brayer, spreading a thin layer of reinker onto my gel press printing plate.  I like using the plate for stamping with paints because it is a little soft, so I figured it would work well with Infusions too.  I used seven drops of reinker and several shakes of Raspberry Infusions.  I sprayed just a couple of drops of water as needed to help the pigment spread.  I used it as an "ink pad", brayering smooth between stamping.  I embossed my images with clear powder, which stuck beautifully to the Infused Versamark ink.  I ended up having a ton of pigment left on my gel press, so I spritzed with water and made all of the other backgrounds shown here, as not to waste the pigment.  I didn't emboss them for time sake.  The trick was continued spritzing and brayering between stamping.  I washed my brayer and gel press with soap and water and a little brush because they got a little sticky from the Versamark ink drying out while I stamped, so don't do this if you've built up a lot of good paint on your plate that you want to use for a paint pull because it will get washed off.  
 
*Update: Instagram video tutorial HERE


The moment of truth cane to see if my embossed pigment bled: I spritzed my embossed tags with water then sprinkled on A Bit Jaded Infusions and let the colors run around.  They did NOT mix with my embossed portions and I was so happy!  I truly cannot wait to try this technique again.


I pulled out my Prism Ink Pad color chart and found a perfect match to A Bit Jaded, the Peacock Green Prism ink pad.  I made another panel of dyed Raspberry and then embossed the flower by Tracy Scott in Peacock and clear EP.  So far we have, embossing, stamping, spritzing, now we have dipping and watercolor.  I used a Sizzix die and a water brush for the foliage and added some contrast to my flower with a white Posca pen.


I decided to let my tags flatten under some books and moved onto another panel to play.  This time I used my stamped and spritzed background with another of Tracy's dotty mini stamps.  I mixed in a stamp set by Sara Naumann for the foliage this time.


To get this fluffy flower, I simply spritzed the stamp while positioned on my stamp platform with water.  I spritzed the brayer too, then sprinkled on Infusions and moved the pigment around with the brayer and stamped onto three sheets of copy paper.  I then lined up the three sheets and cut them all out as one, easy peasy.  I glued the centers together and crinkled the layers.  It was a very effective way to stamp and left the most beautiful watery effect on the images.


Finally, I soaked a whole sheet of copy paper in water and added a little more A Bit Jaded Infusions, folding the paper over and wrinkling it to help the color blend out.  I cut a long strip folded it into thirds to cut out the fabulous First Edition Doily Die.  (Die cutting thin paper requires layers, so double or triple up!)  I was inspired to try this by my latest adventures in making tea stained paper.  Oh the possibilities!


I love the doilies tucked into my tags for texture!  So let's recap.  Take some time to play with your PaperArtsy Infusions powder and try the following.  I hope you're inspired!  Hugs, Autumn

Embossing
Stamping
Spritzing
Dipping
Watercolor
Brayering
"Tea staining"

Check out the assortment of PaperArtsy Infusions at Topflight Stamps today!!


Tuesday, December 17, 2019

WHEEEE!


Hello everyone!  Betsy on the blog here today sharing this fun & easy card.  I have used
two stamps sets today:

Hobby Art Ltd - Wheeee!


and

For The Love of Stamps - Sparkling Snowflakes


I first die cut my base using a dotted rectangle die.  For paper I used a piece of card stock 
that I did the shaving cream/dye reinker on.  This swirly method of applying color to a piece
of card stock usually makes a lot.  I have a stack of these! 
 But it really gave the look I was going for in this project!
I also cut a piece of plain what card stock with the same dotted rectangle die 
except one size smaller.  Then I cut it again with a stitched sloping hillside die.
I stamped my image with an alcohol friendly ink on a scrap piece
of white card stock. 


Then I colored it with Copic markers - with minimal shading and
fussy cut my image leaving a narrow white border.  I then heat embossed
with white embossing powder small snowflakes.


I adhered the snow slope piece and then foam taped the colored image on top at
an angle so they looked like they were sliding!  I added a variety of little sparkly
gemstones and some Stickles to the snow and my card was finished!


This was such a fun card to put together!

Topflight Stamps Products Used:

Other Products Used:
Prepared background panel
Copic Markers
Various Gemstones
White Gel Pen
2 Nesting Rectangle Dies
Sloping Hillside Die
Stickles
Memento Tuxedo Black Ink
White Embossing Powder
Glue


For a more detailed tutorial please check out my blog:

Thanks for stopping by!
Betsy


Tuesday, November 19, 2019

Take the Path Less Travelled


Hello everyone!  Betsy here on the blog today.  I hope you've all had a great week!  
Today I'm bringing you a card featuring :
Art by Marlene by Studio Light "Little Ladies"


I also used:


I started my project by using the stencil on a panel of white A2 size card stock with Metallic Gilding Polish in Golden Olive.  Once that was dry I stamped the decorative elements. 


I next stamped the little girl with hybrid black ink and colored her with Copic markers.  I added shimmer to the wings and also doodled in them with a fine line black pen, then added dots with a white gel pen.  Next I fussy cut her out.
I covered a white A2 size top folding card and adhered my background paper to it.  I heat embossed in white my chosen sentiment.


My background paper was heavily textured.  When I heat embossed it, there were definitely missed places where the ink didn't stamp.  I was able to fill those in with a white gel pen.

It was time to assemble my card.  I really didn't like the way the stenciled background looked behind the little girl, so I die cut a 3 1/2" circle out of it and used it instead.  
It really put the focus on the little girl.
I popped her up on foam tape on top of the circle and added some gems.  And that finished my card!


Topflight Stamps supplies used:


Other supplies used:

Copic Markers
White A2 size top folding card base
Background paper
White card stock panel
Black hybrid ink
Fine line black marker
White gel pen
3 1/2" circle die
Metallic Gilding Polish - Golden Olive
Shimmer pen/Liquid Stardust
Gems
Foam tape

Thank you for stopping by today!

For a more detailed tutorial on this card, please stop by my blog:
https://caringheartcards.blogspot.com


01 09 10