Thursday, November 30, 2023

Katzelkraft Christmas

    Hi Everyone,

Cornelia here today. This week's theme is anything goes here on the blog. 
I am now in major Christmas card mode. Don't expect to see much else for the next couple of weeks...
I have a shaped card for you today. I don't make those very often...
It's quite an easy one. You take a 11x8.5" piece of card stock and cut it lengthwise in half. Then you fold it along the diagonal. and then you fold it again, matching up the long and short ends. I hope that was clear....This creates a nice pocket - you could use it as a gift card or money holder as well.
I stamped onto the card. Added some wood patterned paper to the inside. cut  some paper to fit the outer backside and stamped the Santa in his bed onto it. Brushed around in black and blue.
I hope you liked this. Thanks for visiting. 
See you next week with more Topflight Stamps inspiration.

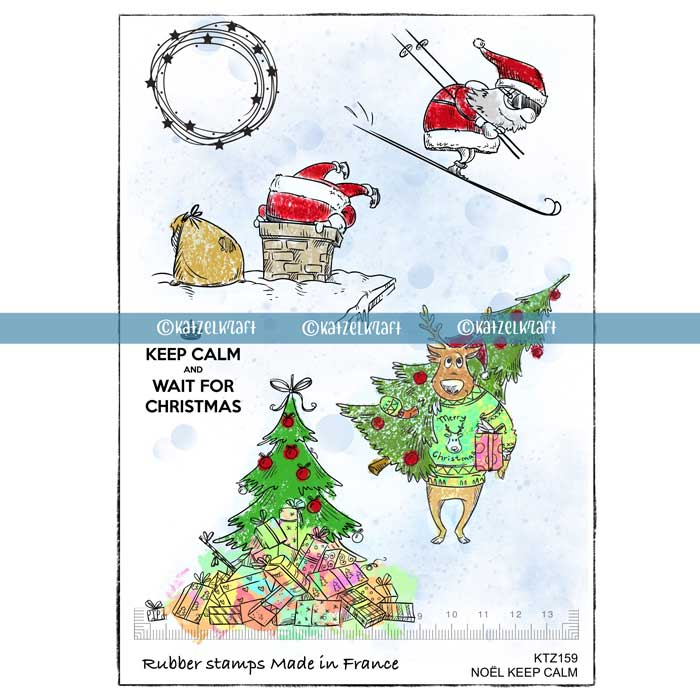
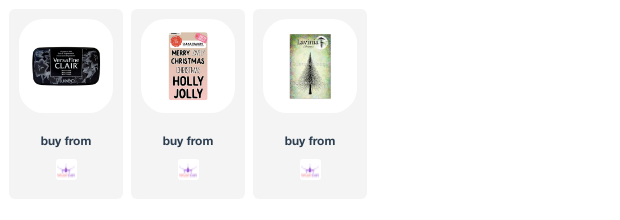
And here are the stamp supplies I used: 


Wednesday, November 29, 2023

Wander without Reason

Hello Crafty Friends, Mary Key here! Today I am going to use Katzelkraft KTZ280 - Winter Wonderland and Into the Wild KTZ281.

I will be using a lightweight watercolor paper I am trying out. I will be using the Grizzly Bear stamp and then I used masking fluid. I did it overnight and was stamping the trees the next day with Lavinia Elements inks, first with Greensleeves and then on top with the Pine


I then spritz some water using a water bottle for spritzing water all onto my watercolor paper and heat dry using my heat gun, carefully not to heat the dry masking part.


After heating and drying my watercolor paper, I then stamped again the tree with Lavinia Elements Olive.


I then took off the masking part, but I knew that it would tear the watercolor paper (watercolor paper to thin) the weight was light on the watercolor paper which tore some of the bear image. 

Not to worry, I did another stamped image of the bear on the same watercolor paper and watercolor the bear and then fussy cut it and sponge the outer side of the bear with black ink. I then wanted my card to look worn and just went over the outer edge with my scissors and then started to add some Versamark with WOW! Embosing Powder. I love the texture of  WOW! embossing powder gives with some specs of other colors and some glitter mixed in the embossing powder. Topfligt Stamps has so many colors to choose from and different texture.


I then added my card to kraft cardstock and added the sentiment from Katzelkraft - Into the Wild KTZ 281. Here is my completed card.


Thank you for stopping by and keep creating!

Topflight Stamps Supplies Used:


Tuesday, November 28, 2023

Merry Christmas

It's Tuesday so you've got Kathi here to share a project with you. 

However, before I get to that, I wanted to remind you that Topflight's Cyber Monday Sale ends tonight, November 28th, at 11:59 P.M.


This week our team's theme is "Anything Goes". I'm still in holiday card making mode, so here's another Christmas card, this time created with the Cold Hands Clear Stamp Set 941 by Janet Klein for AALL and Create


The penguins, from the Cold Hands Clear Stamp Set 941 by Janet Klein for AALL and Create, were stamped with Copic-friendly ink onto white cardstock, fussy-cut, colored with Copic markers, and edged with a black pen. When that was done, they were set aside while I created a background for them.
Low-tack tape, cut in a curve was placed over the bottom of the image panel. Premier Blending Tool by Hunkydory Crafts were used to sponge first Della Blue then Violet Chalk Elements Inks by Lavinia Stamps over the tape onto a white cardstock panel.

Shimmery white pigment inks were sponged over the The Christmas Snowflakes Mixed Media Stencil by Stamperia. The low-tack tape was removed from the base of the background panel and the same white inks were sponged across the base of the image panel. The panel was heat set, cut with the largest scalloped cutting die from the Rectangle Card Passe Partout Essentials Die Set by Studio Light, then detailed with chalk pencils. 

White cardstock was cut with the largest plain rectangle die from the  Rectangle Card Passe Partout Essentials Die Set. The outside .5" of this panel was sponged with Della Blue then Violet Chalk Elements Inks, then used to mat the background panel.

The sentiment, from the Holiday Fox Clear Stamp Set 607 by Janet Klein for AALL and Create, was stamped onto black cardstock, heat embossed, then die-cut. 

The penguins were adhered to the background panel as shown. The sentiment flag was adhered, then the matted image panel was adhered to a white card. A snowflake sequin was added to the sentiment flag to finish the card.

Please pop over to my blog, Kat's Tales of Stamping, for more detailed instructions and complete supply lists.


Thanks for visiting today!

Monday, November 27, 2023

Warm and snuggly piggies

Hi  MEL PILLING   here today with some charming guinea pigs, all dressed up for the cold. Pink Ink Designs have a wonderful array of beautifully detailed and sweet designs. 


I did a landscape using an home made acetate hill mask and Blender Brushes, using Elements Ink in  Blue Lagoon  and  Dark Denim.   Then I did some Lavinia trees in     Versafine Clair Nocturne .  I stamped the piggies right onto the background.  When I did this, I wiped the ink off the stamp where the PJ’s would be first. You don’t want any hairs showing there.  Then I drew in a rough wood floor. I stamped the piggies on clean Bristol card and again on patterned paper.   I sketched PJs on the fancy paper piggies.  Then cut out just the PJs.  Darken the edges with the side of a black marker from behind. I glued the PJ’s onto the white piggies.  I then coloured the piggies with watercolour markers. You can also shade the PJ’s here with a pale grey watercolour marker.  Then I cut out these piggies and glued them onto the background.

 I used a find black pen to draw in wire behind the piggies. I did the lines freehand. They don’t have to be super straight.  I did a little spot on every place where the wires joined.   Liquid Pearl berries on the plants. 

STAMPS USED


This paper doll style PJ application is a lot of fun. It will make you look at all your stamps in a new way. I hope you give it a try.

And don’t miss the great Cyber Monday sale at Topflight Stamps for 25% off on orders of $20.00 or more!!


Thanks for joining me today on the Topflight Stamps blog.  Happy crafting!!

Saturday, November 25, 2023

Merry Christmas x 2

 Hi friends. Alanna here with a pair of clean and simple Christmas cards to share with you today. Before I get to my cards, I do want to remind you or let you know that the Black Friday sale currently going on ends today, Saturday, November 25th. You can save 20% off your entire order and orders over $50 get a free gift. 

To get started, I took the Wild Pine stamp from Lavinia Stamps and stamped it directly onto my white A2 notecard with two shades of green ink. I love the size of this image. As you can see, it fills an A2 card front very nicely. I then took a brown marker and colored over the stamping for the tree trunk. 

I then stamped my sentiment which is two separate stamps from the Holly Jolly set from Studio Light with Versafine Claire Nocturne ink. I then added some splatter with some light blue ink over everything. 

Find the products I used below in the Topflight Stamps store.

Happy crafting! ~ Alanna

Friday, November 24, 2023

Gel Press Christmas Tag


Hello friends! Ericka from Strangely Creative here and I hope you had a wonderful Thanksgiving. Today I have a fun colorful Christmas tag I made using some gel press prints along with the AALL & Create Tag It Yourself die with some Visible Image stamps. 


I started by die cutting some gel press prints I had in my stash. I love the jagged edges of these dies for a fun look. 


I layered my tags and then on the smallest tag, I stamped the Visible Image Grunge Christmas Words and heat embossed it with WOW! Tarnished Teal. I then stamped the Snowflake Grunge on another gel print and fussy cut it out to add it to my tag.


I added a smaller tag in my stash using the Visible Image Christmas Tree Grunge


Thank you for stopping by and I hope you have a wonderful week! Don't forget to take advantage of the Black Friday sale going on now till the 25th!


Topflight Stamps Supplies Used


Thursday, November 23, 2023

Christmas Gift Tags with Lavinia Stamps

 Hi Everyone,

Cornelia here today. This week's theme is all about tags, containers or gift card holders on the Topflight blog
I went with tags - always come to good use!
Those tags are really easy to make and you can easily mass produce them. I used a tag die from my stash and cut them out of card stock. I brushed the tags with two different inks (Lavinia Elements see below and wild honey distress ink) and used my beloved Lavinia stamps to create the scenery. I did some generational stamping as you can see. Added some white splatters for some snow and added the heat embossed sentiment. Lastly I attached some twine from my stash.
I hope you liked this. Thanks for visiting. 
See you next week with more Topflight Stamps inspiration.

01 09 10