Showing posts with label DT Alanna. Show all posts

Monday, December 16, 2024

Simple Alcohol Ink Coloring

  Hi friends. Alanna with you today with featuring the beautiful Poppies stamp from Katzelkraft.  I used this image a few weeks ago on a card. If you missed that blog post, click here.

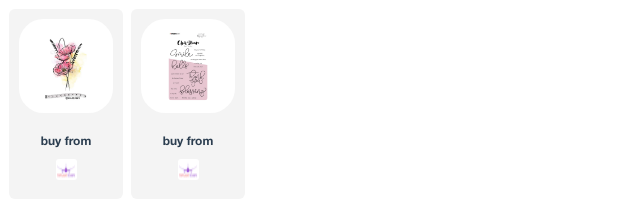
For this card, I stamped the Poppies image with alcohol friendly black ink. I then used my OLO markers and colored in the image. After the image was colored, I stamped the sentiment, which is from the Basic Wishes set from Studio Light, a favorite of mine.

I trimmed down the panel and added it to black card stock for a thin mat. This was then added to an A2 notecard, and the card is complete.

Find these products I used below in the Topflight Stamps store. 
Crafty hugs! ~ Alanna

Monday, December 9, 2024

Merry Christmas

Hi friends. Alanna here with you today with a fun Christmas card featuring the beautiful Wild Pine image from Lavinia along with some ephemera from AALL & Create.

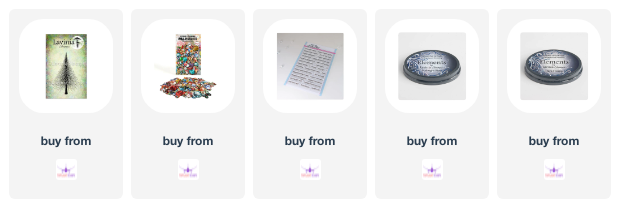
To get started, I stamped the Wild Pine image from Lavinia onto a white panel using green ink. I used my stamp positioner to be able to stamp it again with a darker shade of green ink in some areas. I then blended on Dark Denim and Midnight Blue Lavinia Elements inks surrounding the tree. I added some white splatter using some white paint.

I then took the Merry Monarchs ephemera from AALL & Create and added a few ornaments to the card with foam tape. I finished off the card by adding in a stamped sentiment from the Classic Sentiments set from Heffy Doodle. I then trimmed my panel down and added it to a white A2 notecard.

Find these products I used below in the Topflight Stamps store. 
Crafty hugs! ~ Alanna

Monday, December 2, 2024

Merry Christmas with Kittens and Save 25%

 Hi friends. Alanna here with you today showcasing this adorable and super quick and easy Christmas card, perfect for the feline lover in your life. Also, Donna is running a Cyber Monday sale. Save 25% off your order today, December 2nd and 3rd. See the bottom of this post for all the details.

To get started, I stamped one of the images from the Sketches Backgrounds stamp set from Visible Image several times onto my white A2 notecard with grey ink. I then took out 3 of the ephemera pieces from the Jolly Cats ephemera collection from AALL & Create and added them with foam tape to my card. 

I finished off my card with the sentiment which is from the Classic Sentiments set from Heffy Doodle.

Find these products I used below in the Topflight Stamps store. 
Crafty hugs! ~ Alanna

Monday, November 25, 2024

Creating a Tropical Card

  Hi friends. Alanna with you today with a fun tropical themed card featuring the Tropical Sunset image from Crafty Individuals.

To get started, I stamped the Tropical Sunset image with some light grey ink onto a piece of white cardstock using my Misti. I didn't remove my stamp. I did this so I could see where the various portions of the image were. I then took my inks and blended on colors in blue, yellow, and aqua.

After my ink blending was done, I stamped the Tropical Sunset image again with Versafine Claire Nocturne ink. I stamped the sentiment which is from the More Classic Sentiments set from Heffy Doodle.

I trimmed the panel down and added it with foam tape to my white A2 notecard and that finishes it off.

Find these products I used below in the Topflight Stamps store. 
Crafty hugs! ~ Alanna

Monday, November 18, 2024

Repeat Stamping

  Hi friends. Alanna with you today with featuring this super clean and simple card. It features the beautiful Poppies stamp from Katzelkraft.

To get started, I stamped the Poppies image using my Misti stamping tool directly onto my A2 notecard using Versafine Claire Nocturne ink. I then trimmed down several pieces of card stock and adhered them directly over top of my stamping at an angle. I trimmed off the sides and then stamped the Poppies image again.

I stamped my sentiment from the More Classic Sentiments set from Heffy Doodle and finished the card off by rounding the bottom two corners and adding in some clear gems.

Find these products I used below in the Topflight Stamps store. 
Crafty hugs! ~ Alanna

Monday, November 11, 2024

Having fun with Lavinia Sprays

  Hi friends. Alanna with you today with this fun card featuring sprays from Lavinia to create my background. To get started, I created my background with watercolor paper using Periwinkle, Blue Moon, and Pinkella sprays from Lavinia. 

I then took the Daisy Delight background stamp from Darkroom Door and stamped it with Versafine Claire Nocturne ink. I added on die cuts which are from the Woodland Window die set from AALL & Create. I finished off the card by adding in a stamped sentiment from the More Classic Sentiments set from Heffy Doodle.


Find these products I used below in the Topflight Stamps store. 
Crafty hugs! ~ Alanna

Monday, November 4, 2024

Need to Mass Produce Christmas Cards?

Hi friends. Alanna with you today with a pair of super quick and easy Christmas cards to share. If you find yourself in need of quick cards that are easy to mass produce and easy to mail, then these fit the bill.

They all start with the gorgeous Jingle all the Way paper from Craft Consortium. I took one of the patterns and trimmed it down and then stamped the sentiments. The large Christmas is from the Holly Jolly set from Studio Light. The smaller sentiments are from the Christmas Tree set, also from Studio Light. All of them were stamped with the Versafine Claire Acorn ink. 

After my stamping was done, I adhered the panels to white A2 notecards. Now I have two more very mail friendly Christmas cards for my stash.
Find these products I used below in the Topflight Stamps store. 
Crafty hugs! ~ Alanna

Monday, October 28, 2024

Quick Coloring for your Christmas Cards

Hi friends. Alanna here on the blog with you today with a quick and easy Christmas card to share with you today. I don't know about you but sometimes I feel like images that need to be colored need to have a lot of time taken in coloring the image. But for Christmas cards, we don't always have that kind of time.

On my card today, I stamped the image from the Sketchy Holly set from Craft Consortium onto white cardstock with alcohol friendly black ink using my Misti. Note that the stamp comes with the coordinating die which is amazing.

After my image was stamped, I took my OLO markers and quickly colored in the image, just adding a touch of shading. I then put my panel back into my Misti and stamped the image again, this time using my favorite Versafine Claire Nocturne ink. I love how crisp this makes the image. 

I then trimmed this panel down and added splatter with some mica spray from my stash. I added the sentiment which is from the Season's Greetings Wordies Sentiments Sheets from Creative Expressions. These are so nice as there are lots of sentiments with both black and white backgrounds, perfect for your holiday cardmaking.

After my sentiment was added, I added my panel to a piece of black cardstock, trimmed slightly larger. This was then added to a white A2 notecard to finish off the card.

Find these products I used below in the Topflight Stamps store. 
Crafty hugs! ~ Alanna

Thursday, October 24, 2024

Merry Christmas with a Stenciled Background

 Hi friends. Alanna here with you today and this week, our focus is on Christmas and winter. I have a somewhat unique Christmas card to share with you today. I started by blending on two shades of green ink through the Leafy stencil from Visible Image directly onto my kraft A2 notecard.

I then stamped the sentiments which are from the Holly Jolly set from Studio Light with Versafine Claire Nocturne ink. I rounded the right-hand corners and then added in some small red gems to mimic berries and that completes this card.

Find these products I used in the Topflight Stamps store below.
Crafty hugs! ~ Alanna

Monday, October 21, 2024

2 Christmas Cards with Unexpected Embossing

Hi friends. Alanna here on the blog with you today and I have a pair of Christmas cards to share with you. 

I started by taking one of the back sides of a patterned paper from the Jingle All the Way collection from Craft Consortium and I stamped both corners with the large Sketchy Holly stamp and die from Craft Consortium with Versafine Claire Acorn ink. I then heat embossed my Merry Christmas sentiment which is from the Classic Sentiments set from Heffy Doodle with red embossing powder. 

As I was pouring the embossing powder over my sentiment, some of it was sticking to my stamped images as apparently the ink was still wet somewhat. At this point, I decided I actually liked how the image looked part red and part brown so decided to go for it. 

I trimmed down my panels and added them to some red cardstock. They were then added to white A2 notecards and that completes these cards.
Find these products I used below in the Topflight Stamps store. 
Crafty hugs! ~ Alanna

Monday, October 14, 2024

Stenciling over Patterned Papers

 Hi friends. Alanna here on the blog with you today with this pair of cards with a bit of a mixed media feel.

To get started, I trimmed down papers from the Wood Textures 6x6 paper pack from Craft Consortium. I then took the Leafy stencil from Visible Image and used a blending foam and white pigment ink and blended it directly onto the patterned paper.

I added foam tape directly to my white A2 notecards and then added the panels onto them. I die cut one of the butterfly dies from the Nature's Doily die set from AALL & Create. I die cut the outline die twice from white card stock and adhered them together. I then die cut the outline and center portion of the inner die together with some champagne-colored glitter card stock.  

I stamped my sentiment from the Classic Sentiments set from Heffy Doodle and trimmed it out. I added some thin strips of card stock behind it for a bit of dimension and then added it over top of my butterfly. 

I then used a die from my stash and die cut tiny circles from the same glitter card stock I used for the butterfly and added a few onto the card. 

Find these products I used below in the Topflight Stamps store. 
Crafty hugs! ~ Alanna

Monday, October 7, 2024

Paints & Stenciling on your Background

   Hi friends. Alanna with you today with this fun Halloween card. This week, our focus is on paints, and I chose to use a couple of different colors of paint from Lavinia.

To get started, I took a paintbrush and just brushed on Spruce and Dewberry paints onto some white card stock. I let it dry and then inked on the Cobweb stencil from AALL & Create using black ink. I didn't do it very dark or give it an even application as that isn't the look I was going for.

I then stamped Marcie and one of the cat images from Hocus & Pocus, both from Lavinia. I stamped my sentiment which is from the Classic Sentiments set from Heffy Doodle and then added my die cut frame which was cut from purple glitter fun foam. The frame die is part of the die set from Heffy Doodle called Elm Street.

Find these products I used below in the Topflight Stamps store. 
Crafty hugs! ~ Alanna

Thursday, October 3, 2024

Merry Christmas with Washi Tape

 Hi friends - Alanna with you on the blog today. Make sure to read to the end to find out how you can save 20% of your order.

If you've been here before, you know I am a huge fan of the washi tape rolls from AALL &Create that create small scenes. If you haven't seen their washi tapes, many of them create designs after you lay out 4 or 5 lengths. It makes creating cards so easy. I added the washi tape to white cardstock and then trimmed it down.

I was so excited to use the new Hoppy Holidays washi tape from AALL & Create. I added it to a square notecard and then finished off the card by adding in my stamped sentiment which is from the Classic Sentiments set from Heffy Doodle.


Here is the sale info for World Card Making Day. Woohoo for saving 20%.


I hope you've been inspired today.
Find all the products I used in the Topflight Stamps store below. Crafty hugs! ~ Alanna
Monday, September 30, 2024

Hello

 Hi friends. Alanna here on the blog with you today with this pair of cards featuring this beautiful feather image from the Forever in Your Heart set from Visible Image.

To get started, I took the Blue Moon Mist Spray from Lavinia and sprayed it onto pieces of watercolor cardstock that I had misted just a bit with water beforehand so that the spray would move a bit. I couldn't capture it in the photos, but these sprays are mica infused and the shine and shimmer in real life is just gorgeous.

After my panels were dry, I stamped the large feather image from the Forever in Your Heart set two times on each of the panels, rotating the panel after stamping the first image. I used my favorite black ink, the Versafine Claire Nocturne ink, to do the stamping. I added foam tape to the backs of these panels and added them to white A2 notecards.

I then stamped the hello sentiment which is from the Basic Wishes set from Studio Light onto some oval die cuts. I added those to my cards and then finished the cards off with a few white pearls.

I hope you've been inspired today.
Find all the products I used in the Topflight Stamps store below. Crafty hugs! ~ Alanna

Monday, September 23, 2024

Thinking of You

Hi friends. Alanna here with you today using a new to me company brand, Stampotique by Katzelkraft. All week on the blog this week, the designers will be showcasing this brand. 

For my card today, I am using the adorable Betsy stamp. It is an unmounted red rubber image. I just took some repositionable adhesive and attached it to my Misti stamping tool. I stamped the image in Versafine Claire Nocturne ink and then used some watercolor markers to color in the image. 

The sentiment is from the Forever in Your Heart set from Visible Image. After my stamping and coloring was done, I trimmed the panel down and added it with foam tape to a light blue A2 notecard.

I hope you've been inspired today.
Find all the products I used in the Topflight Stamps store below. Crafty hugs! ~ Alanna
Monday, September 16, 2024

Happy Halloween with Lavinia

 Hi friends - Alanna with you on the blog today where we are sharing fall and Halloween cards inspiration with you this week.

For my card, I create a night sky with Lavinia Elements Premium Dye Ink Pads along with a few stamp sets from Lavinia.

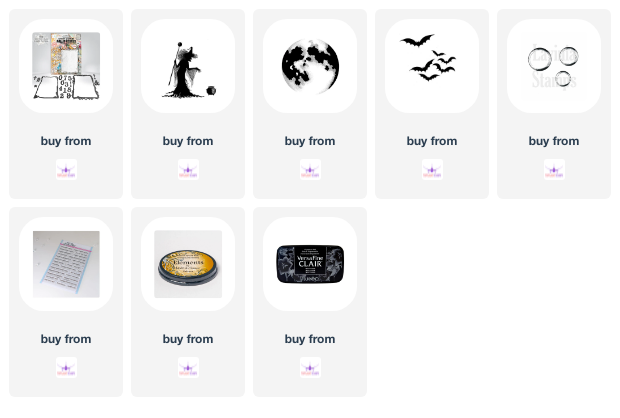
To get started, I die cut a piece of white cardstock using one of the dies included in the Numberama die set from AALL & Create. I then did my ink blending (all colors listed and linked at the bottom of the post). I took the Moon stamp from Lavinia and inked it up directly over my ink blended background using the Sahara ink. I then took a blending brush and added in a bit of extra ink just to help fill it in a bit.

I then stamped the witch and cauldron images which are from the Willow the Witch set. I took the smallest image from the Bubbles set and added my bubbles coming out of the cauldron. I took the Bats stamp set and stamped them in the sky and flying over my moon. 

I then stamped my sentiment which is from the Classic Sentiments set from Heffy Doodle. I die cut the frame die I used before, but this time cut it from black cardstock and adhered the two together, slightly offsetting them. I then decided I needed just a bit more interest in my sky, so I added in some Frosted Juniper Distress Mica Stain. I added a piece of cardstock over my witch and cauldron as I wanted to avoid the splatter over them.

I hope you've been inspired today.
Find all the products I used in the Topflight Stamps store below. Crafty hugs! ~ Alanna

Monday, September 9, 2024

Just Because Mini-Slimline Cards

 Hi friends. Alanna back with you on the blog today and our focus this week is on the Katkin Krafts brand.

I have a pair of mini slimline cards to share with you today. They measure about 6.25x3.75 inches. For my cards, I started by trimming down papers from the Pigment Infusions 6x6 collection from Craft Consortium and then I stamped directly onto them with the Dance with Dahlias set from Katkin Krafts. I love all the detail in these images, and they would look great colored, but I chose to just stamp them with my favorite Versafine Claire Nocturne ink.

After my stamping was done, I added the panels to my white notecards. I then added the stamped sentiments which are from Heffy Doodle's More Classic Sentiments set. I finished off the cards by adding in some white pearls.


Find the products I used on these cards below in the Topflight Stamps store. 
Crafty hugs! ~ Alanna

Thursday, September 5, 2024

Monday, September 2, 2024

Get Well Soon Washi Cards

 Hi friends. Alanna with you today sharing this pair of cards made with the Thriving Terrarium washi tape from AALL & Create. In full disclosure, I purchased all of their washi tapes that create small scenes or images so these are not the last of these types of cards you will see from me. :) I just think this washi is so much fun! If you want to see other cards I've made using this type of washi tape, click here, here, and here.

To get started, I rolled out the four lengths of washi needed to create the image onto some white card stock. I then took one of the dies from the Heart Marks the Spot die set from AALL & Create and die cut the image. This particular die just cuts a circle with lines going around. There is no outer cut line. I then trimmed my panels down and rounded the corners.

I took some paper from the Ombre paper collection from Craft Consortium and stamped my sentiment which is from the Go to Words set from Visible Image. I added my panels to white A2 notecards and then added my succulent images with foam tape. Some enamel dots from my stash finish off these cards.

Find these products I used in the Topflight Stamps store below. 
Crafty hugs! ~ Alanna

Monday, August 26, 2024

Candy Cane Christmas with Creative Expressions

 Hi friends. Alanna on the blog with you today with a fun Christmas card. Our focus this week is on the Creative Expressions brand.

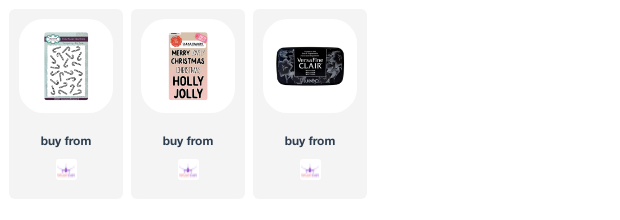
I started creating this card by stamping the Candy Cane Background image with alcohol friendly black ink. I then added in some quick coloring with one red marker.

I trimmed my panel down and then stamped two of the sentiments from the Holly Jolly set from Studio Light with Versafine Claire Nocturne ink.

I added this panel down to a a piece of black card stock. I then added this to a white A2 notecard. I then decided I wanted just a little bit of something extra. So, I took some silver glitter card stock and trimmed down two thin strips to add on either side of the black card stock.

Find the products I used in the Topflight Stamps store below.

Crafty hugs! ~ Alanna
01 09 10