Showing posts with label Paperartsy Infusions. Show all posts

Wednesday, August 19, 2026

Magicals Butterflies with AALL & Create

Hello, Lisa Hoel here. This week at Topflight Stamps our theme is "Outdoors". I love seeing butterflies in my garden this time of year so I was inspired to make a card focusing on them. I used the AALL & Create die set Starflight to cut out the butterflies and arch shape out of heavy duty cardstock. I glued the butterflies down first, then, when dry, I spritzed it with water and Lindy's Magicals powders. I really like how it pooled in the nooks and crannies for some intense mica gleam.


Lisa Hoel for Topflight Stamps #creativejuicefreshsqueezed #topflightstamps


The green background is colored with Emerald Isle PaperArtsy Infusions Dye crystals. I also used the Lavinia Laurel stencil to add the leafy texture.

Thanks for stopping by and be sure to check out the Topflight Stamps store for a wide selection of different and hard to find stamps, stencils and other paper crafting supplies from all around the world! Also keep an eye here on the Topflight Stamps blog. There is new inspiration posted often!

Topflight Stamps Supplies Used:

AALL & Create die set - Starflight

Lavinia stencil - Laurel

Lindy's Magicals Pigment Powders - Enchanted Forest

Lindy's Starburst Spray - Autumn Maple Crimson (Autumn Leaves set)

PaperArtsy Infusions Dye crystals - Emerald Isle

AALL & Create stamp set - Everyday Sentiments


Sunday, August 9, 2026

Layers of Color: Creating a Mixed Media Journal Page with Sprays & Infusions


Hello crafty friends! Ericka from Strangely Creative here, and today I'm spending some time in my art journal, experimenting with two of my favorite mixed media products—Lindy's Gang Starburst Sprays and PaperArtsy Infusions.

Both of these products create incredible effects, but they each bring something completely different to a project. The Starburst Sprays add vibrant color and beautiful shimmer, while the Infusions introduce rich, moody tones and a touch of grunge. Combining the two is one of my favorite ways to create backgrounds full of depth and unexpected details.


✨ Why I Love These Products

One of the things I love most about Lindy's Gang Starburst Sprays is the incredible variety of colors and finishes available. Whether you choose the sprays or powders, the colors can be soft and dreamy or bright and sparkling, depending on the look you're after.

PaperArtsy Infusions bring something entirely different to the table. The combination of dye pigments and walnut crystals creates darker, more distressed effects that add beautiful contrast and texture to any background.

Together, they create the perfect balance between vibrant color and vintage grunge.


🎨 Building the Background

To begin my journal page, I taped off the edges and applied a layer of gesso.

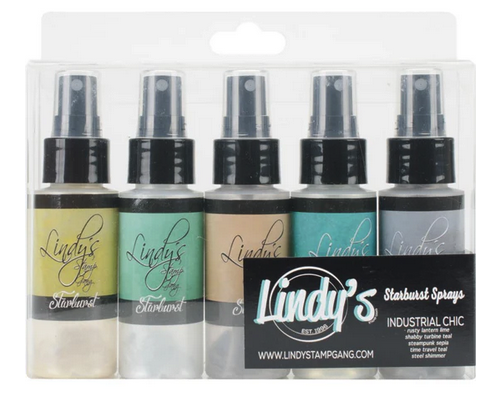
While the gesso was still slightly wet, I sprayed Lindy's Gang Steampunk Sepia and Time Travel Teal from the Industrial Chic collection across the page. A light mist of water helped the colors blend and flow together, creating soft transitions and interesting patterns.


After setting the page aside to dry, I sprinkled on PaperArtsy Infusions in In the Navy with just a touch of Cerise. A quick spritz of water activated the pigments and walnut crystals, adding rich layers and a distressed look to the background.


One of my favorite things about working with sprays and Infusions is that no two pages ever turn out exactly the same.


🍃 Creating the Focal Elements

While the background dried, I created some coordinating embellishments on watercolor paper using the PaperArtsy Tracy Scott 226 stencil. For color, I reached for Rusty Lantern Lime and Shabby Turbine Teal sprays, allowing the vibrant shades to contrast against the darker journal background.


Once everything was dry, I carefully cut it out and arranged it on the page.


✍️ Finishing Touches

To complete the spread, I added:

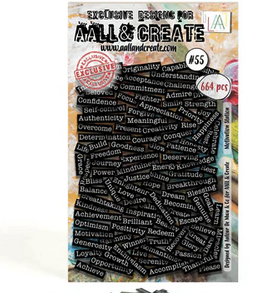
  • Sentiments from AALL & Create's Motivation Station
  • Highlights with a gold pen
  • Extra layers to bring movement and balance to the page 


Those final details tied everything together and added a little extra sparkle to the grungy background.


Thank you so much for stopping by today! I hope this journal page inspires you to pull out your sprays, embrace the unexpected, and spend some time experimenting in your art journal.


Have a wonderful week and happy creating! 💙✨


 Topflight Stamp Supplies

PaperArtsy - Tracy Scott PS226
Shop at:
TP
AALL & Create - Motivation Station
Shop at:
TP
Lindy's Gang - Industrial Chic Sprays
Shop at:
TP
PaperArtsy - Infusions Dye - Cerise
Shop at:
TP
PaperArtsy - Infusions Dye - In the Navy
Shop at:
TP

Tuesday, August 4, 2026

Soar!

Greetings! It's Tuesday so you've got Kathi here to share a project with you! This week's focus is on Mixed Media with an emphasis on pigment powders. I created an encouragement card with the Tracy Scott 59 (TS059) Rubber Cling Stamp Set, the Tracy Scott 53 (TS053) Rubber Cling Stamp Set, the Scrapcosy 36 (ESC36)  Rubber Cling Stamp Set, and Sleight Blue, Sunset Beach, and Violet Storms Infusions — all by PaperArtsy.

Here it is!


Cut a piece of 9" x 12" Mixed Media paper in half. Secure one half of the Mixed Media paper to the base of a stamping platform. Position the hexagons and the bee from the Tracy Scott 59 (TS059) Rubber Cling Stamp Set by PaperArtsy facedown on the Mixed Media paper. Press the platform's lid onto the back of the stamps and lift.

Gently dip a blending foam on a Premier Ink Blending Tool by Hunkydory Crafts into a jar of Distress Micro Glaze to pick up some of the glaze. Use the Premier Ink Blending Too to apply the glaze to the stamps. If you wish, you can spread the Distress Micro Glaze with a blending brush. Close the platform's lid to transfer the glaze to the Mixed Media panel. Repeat these steps to ensure good impressions for all the stamps.

Remove the image panel from the stamping platform and place it onto a craft mat.

Lightly sprinkle Sleight Blue Infusions by PaperArtsy onto the bottom part of the image panel. Lightly sprinkle Sunset Beach Infusions over and around the bee. Lightly sprinkle Violet Storms Infusions by PaperArtsy over the top part of the panel and wherever the powder seems light. Mist the image panel with a water-filled Fine Spray Mister by Spectrum Noir to activate the Infusions' pigments. You will note that the Distress Micro Glaze acted as a resist and the images' outlines remained white. 

Tilt the background panel to encourage the Infusions pigments to blend. Use a paintbrush to spread them further if so desired. Gently dip a paper towel into any puddles to remove excess water. 

When you're happy with the background, thoroughly heat set the image, trim to slightly less than 5" x 7". Use the edge of a pair of scissors to distress the edges of the image panel.

Pat an anti-static tool over the image panel then place the image panel back onto the base of a stamping platform. Position the "Soar" sentiment stamp from the Tracy Scott 53 (TS053) Rubber Cling Stamp Set by  PaperArtsy towards the top left. Position the "Free to Fly..." sentiment stamp from the Scrapcosy 36 (ESC36)  Rubber Cling Stamp Set by PaperArtsy centered under the bee (but straight -- oops!). Ink both sentiments with Dahlia Purple VersaFine Clair Ink by Imagine Crafts/Tsukineko and stamp. Add Clear Gloss Embossing Powder by WOW to the wet ink, dump the excess powder back into the container, and heat set the embossing powder.

Adhere the image panel to a white 5" x 7" card.

Please pop over to my blog, Kat's Tales of Stamping, for step-by-step instructions, notes, and complete supply lists.

Topflight Stamps Products Used:


Thank you for visiting today!

Tuesday, November 19, 2024

Happy PURR-day Gift Card and Tag

Greetings! It's Tuesday so you've got Kathi here to share a project with you. This week the team is focusing on gift card holders, tags, or containers. Since December is only a few weeks away, I need several of these because there are family birthdays, friends' birthdays, and the winter holidays!

Here's my gift card that has a pull-out tag, made with AALL and Create's Ribboned Whisker Wonders Clear Stamp Set 1214, the Purrfect Gift Clear Stamp Set 121 (retired), the Totally Dotty Stencil 87the Top of the Pops Die Set 45 and the Tag It Yourself Die Set 27BrushosPaperArtsy Infusions, and VersaFine Clair Inks were
 used as well.

Here's the card by itself:

Here's the card with the gift card pulled out of its hiding place.


This card was a bit complicated, albeit fun, to make. Rather than completely bore you, I'll give you the condensed version, then you can pop over to my blog for the verbose and boring instructions.

Tuxedo Black Memento Ink by Imagine Crafts/Tsukineko was used to stamp the cats and presents from the Ribboned Whisker Wonders Clear Stamp Set 1214 by AALL and Create. The image was masked and the solo cat (in orange) was stamped atop one of the gifts, positioned so it appears that he is lazily playing with the toy. The masks were lifted, the images were colored with Copic markers, then the panel was cut with the flag die from the Top of the Pops Die Set 45 by AALL and Create.

Sleight Blue and Rusty Car Infusions by PaperArtsy were sprinkled onto wet Bristol paper, misted again to activate the dyes. The background needed more blue and purple tones, so Ultramarine and Violet Brushos by Colourcraft added in the same way. The paper was thoroughly heat set, cut with the second largest flag die from the Top of the Pops Die Set 45, flattened, and used to mat the colored image panel die-cut.

ArcticVery PeriBlue Belle, and Medieval Blue VersaFine Clair Inks by Imagine Crafts/Tsukineko were brushed onto another piece of Bristol paper working from the heaviest application of the lighter blues to the lightest application of the dark blues to create the background panel. Fantasia and Lilac Bloom VersaFine Clair Inks were brushed over the Totally Dotty Stencil 87 by AALL and Create  to add a pattern to the background panel. The panel was trimmed to 4.75" x 6.75" and edged with Fantasia VersaFine Clair Ink. The panel was heat set and set aside so I could make the gift tag.

The same inks were brushed onto another piece of Bristol paper, which was then cut with the smallest tag die from the Tag It Yourself Die Set 27 by AALL and Create and a pocket die from another die set in my stash. The slot die from the Top of the Pops Die Set 45  was used to cut a slot on the top of the tag.

Fantasia VersaFine Clair Ink was used to stamp the sentiment onto a strip of leftover inked paper and die-cut.

The layers were all adhered and the sentiment strip was adhered to finish the card.

Please pop over to my blog, Kat's Tales of Stamping, for step-by-step complete instructions and supply lists.


Thanks for visiting today!

Thursday, September 12, 2024

Kaktin Krafts Space Card

Hello, Lisa Hoel here. This week our Topflight Stamps brand focus is on Katkin Krafts. I'm back with a second card using the "Fly Me to the Moon" stamp set. 


Lisa Hoel for Topflight Stamps #creativejuicefreshsqueezed #topflightstamps


I first stamped the image onto smooth watercolor paper with clear WOW embossing ink, then embossed with clear powder. This was to create a resist image. After that I spritzed it with water and then sprinkled on Royal Blood and a touch of Slime PaperArtsy Infusions powder.

Thanks for stopping by and be sure to check out the Topflight Stamps store for a wide selection of different and hard to find stamps, stencils and other paper crafting supplies from all around the world! Also keep an eye here on the Topflight Stamps blog. There is new inspiration posted daily!

Topflight Stamps Supplies Used:

Katkin Krafts stamp set - Fly Me to the Moon

PaperArtsy Infusions Colored Stains - Royal Blood

PaperArtsy Infusions Colored Stains - Slime

Versafine Pigment Ink Pad - Onyx Black


01 09 10