Showing posts with label watercolor. Show all posts

Monday, July 27, 2026

Dreams Come True with L'Encre et l Image

Happy Monday, friends!  It’s Walter on the blog with you today and the theme this week is Anything Goes.  My mind immediately turned to another my favorite brands, L’ENCRE at l image, and one of their recent releases, Arsene my Sweetheart.  This character is adorable and so versatile – he can be royalty, a clown, a magician, or just a simple boy like I portrayed him this week.  I paired him with elements from another L’ENCRE product, Imminent Departure, to create a wonderful, inspirational card.


I began by deciding on the placement of my paper airplane, boy, and paper boat.  I then stamped those images onto an A2 sized piece of watercolor paper and then stamped them again onto masking paper.  I created masks to protect my images and make it easier to watercolor the background.  Once the masks were fussy cut, I covered my images and got ready to color the panel.


I used colors from Lindy’s Magicals Nantucket Pearls (Whale Watch Blue & Salt Water Taffy) to watercolor a blended evening sky.  The Lindy’s Magicals blend so easily, and the bits of mica give such an amazing shimmer.  I started by misting my panel and then sprinkling a little bit of Whale Watch Blue at the top of it.  I used a paint brush to move the color around while spraying with additional mists of water as needed to move & lighten the color.  I continued adding blue and then started to mix in a little Salt Water Taffy about 2/3 of the way down the panel before switching to just the pink to finish it off.


Once dry, I stamped the compass image behind the paper airplane and my sentiment with clear embossing ink.  I sprinkled silver embossing powder over the compass and removed the mask.  I then sprinkled white embossing powder over the sentiment and heat set both images.


I was now ready to add color to my stamped images.  I removed the remaining masks and started coloring them with alcohol markers.  I used two light shades of cool gray color the paper airplane and boat.  I chose colors for the rest of the boy image that would allow me to use just a few to not overwhelm the scene.  I have a tip for you for coloring hair – especially curly hair – that a friend passed along to me.  I began by uniformly coloring his hair with a darker shade of brown.  I then used the fine tip end of a lighter brown to add little dots to lighten up portions of the darker brown.  The final step was to use a darker shade of orange and add more dots.  Coloring hair this way gives it the illusion of texture and highlights that make it more interesting than just one color.

I finished off the scene using a silver metallic marker to add varying sizes of dots in the sky to represent stars and then adding three Hunky Dory Diamond Sparkles Silver Pearls.  This scene is so charming and cute!  The sentiment, which translates to “I want my dreams to come true,” is so fitting and is certain to inspire and encourage someone.

I hope that you enjoyed this creation and post.  I’ll see you here again next week.  Until then . . . be well!

Topflight Products Used:

Friday, June 19, 2026

One Stamp, Two Looks: Summer Watercolor Play with Tracy Scott 108


Hello friends! Ericka from Strangely Creative here, and today I'm sharing a project that combines two of my favorite things: summer crafting and watercolor play.

One of the things I love most about summer break is finding a little extra time to experiment in my craft room. Between running kids to activities and enjoying the slower pace of the season, I've been spending some time practicing watercolor techniques and exploring different ways to use my supplies.

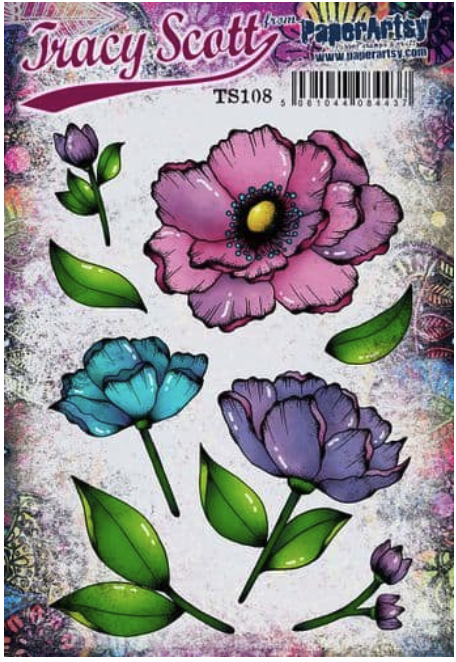
For today's project, I pulled out the beautiful PaperArtsy Tracy Scott 108 set and challenged myself to create two completely different cards using the same image and the same Lindy's Gang Magicals.


🎨 Card One: Soft & Dreamy Watercolor

For my first card, I stamped and heat embossed the floral image using white embossing powder.


I wanted a soft, flowing look, so I used a simple wet-on-wet watercolor technique. First, I applied clean water to each petal, then dropped in color from my Lindy's Gang Magicals and let the pigments move naturally across the image.

This technique is one of my favorites because it creates beautiful blends without requiring a lot of effort. The colors soften into one another and create a delicate, almost dreamy effect.

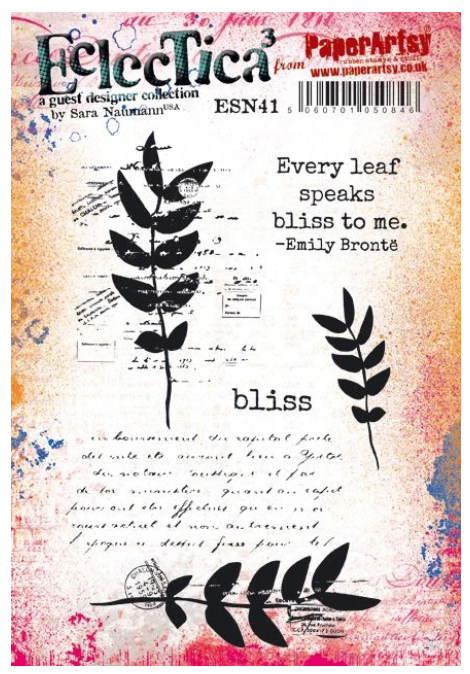
Once the flower was dry, I added a sentiment from the PaperArtsy Sara Naumann 41 set and finished the card with splatters of gold acrylic paint.

There is something so satisfying about those final splatters. They always seem to bring everything together.


✨ Card Two: Bold & Bright

For my second card, I wanted to create something with a little more contrast and drama.


This time, I heat embossed the floral image using gold embossing powder, which immediately gave the design a warmer and more elegant feel.

I used the same watercolor technique but reached for slightly brighter, more vibrant colors. It's amazing how simply changing the embossing color and increasing the color intensity can completely transform the look of a project.


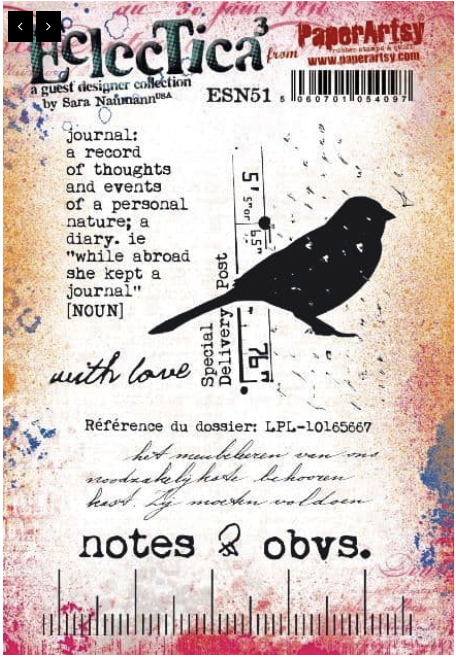
To finish the card, I added a sentiment from the PaperArtsy Sara Naumann 51 set and repeated the gold paint splatters to tie everything together.


🌿 Same Stamp, Different Results

This project was a wonderful reminder that you don't always need new supplies to create something fresh.

By changing:

  • The embossing color
  • The intensity of the watercolor
  • The sentiment

you can create a completely different mood with the exact same stamp.


One card feels soft and peaceful.

The other feels bright and bold.

And honestly, I love them both.


Thank you so much for stopping by today! I'd love to know which version you prefer: the soft white embossed flower or the bold gold embossed one?

Have a wonderful weekend filled with creativity, sunshine, and a little time to play.


Topflight Stamp Supplies 

PaperArtsy - Sara Naumann 41
Shop at:
TP
PaperArtsy - Sara Naumann 51
Shop at:
TP
PaperArtsy - Tracy Scott 108
Shop at:
TP
Embossing - Bright White Ultra Fine
Shop at:
TP
WOW! Embossing - Clear Embossing Pad
Shop at:
TP
WOW! Embossing - Metallic Gold Rich Pale
Shop at:
 TP


Friday, December 12, 2025

Loose Watercolor Florals with Jane’s Doodles and Lindy’s Magicals

Hello crafting friends!
Ericka here from Strangely Creative, and today I’m sharing a soft, loose watercolor piece featuring the Just for You stamp set from Jane’s Doodles at Creative Expressions. This set is full of beautiful blooms, and it pairs perfectly with the rich, vibrant tones in the Lindy’s Gang Magicals – Steampunk Soirée collection.


To start, I stamped the floral image onto watercolor paper and heat-embossed it in gold. I added a small pinch of each Magical to my palette, mixed in a drop of water, and let the colors bloom. After lightly spritzing the watercolor panel, I dropped in the pigment with a brush and let it flow. The combination of gold embossing and loose watercoloring gives the florals a soft glow, and the Magicals bring that unmistakable bright, shimmery finish.


Once the panel was completely dry, I heat-embossed the sentiment and added a simple hand-drawn gold border to frame the piece. It’s an easy technique, but it delivers a clean, elegant look with plenty of color and shine.


Thanks for stopping by today. I hope you get a moment to sit down, make something beautiful, and enjoy a little creative time this weekend.


 Topflight Stamp Supplies

Creative Expressions - Just for You
Shop at:
TP

WOW! Embossing - Clear Embossing Pad
Shop at:
TP
WOW! Embossing - Embossing Pen
Shop at:
TP
Lindy's Gang - Magicals Steampunk Soiree
Shop at:
TP


Saturday, November 1, 2025

Bright & Merry Christmas Tags with Lindy’s Magicals and PaperArtsy JOFY


🎄 Hello crafty friends and happy November!
Ericka here from Strangely Creative, and I’m officially diving into the Christmas spirit with some bright and merry tags featuring Lindy’s Gang Magical Sprays in the gorgeous Victorian Bouquet Shimmer set and the adorable mini PaperArtsy JOFY 94 tree. 🎨🌲


These little tags were pure joy to make — and a great way to use up those extra bits of watercolor paper we all have lying around! I started by misting the sprays one layer at a time, drying between colors to let each shade shine through. The shimmer is magical (pun totally intended 😉).


Once the background was just right, I stamped the tiny tree and heat-embossed it in crisp white. To finish, I brushed a hint of gold acrylic paint around the edges because every Christmas project deserves a little sparkle! ✨


Thanks so much for stopping by, and I hope this inspires you to pull out your Lindy’s Magicals and get a head start on your holiday crafting! 🎁

💗 Happy creating!


Topflight Stamp Supplies 

PaperArtsy - JOFY Mini 94
Shop at:
TP
WOW! Embossing - Clear Embossing Pad
Shop at:
TP
Lindy's Gang - Victorian Bouquet Shimmer
Shop at:
TP

Friday, July 25, 2025

Feathered Friends & Magical Colors: A Mixed Media Watercolor Adventure


Happy Friday, crafty friends!
Ericka here from Strangely Creative, and today I’m excited to share a pair of whimsical bird cards that combine some of my favorite things—watercolor play, stamping, and a touch of texture magic!


These cards were inspired by the beautifully detailed birds from PaperArtsy Sara Naumann Set 64 and 41. I’ve had this stamp set in my stash for a while and thought it would pair perfectly with the vibrant colors of Lindy’s Gang Magicals (think Brushos, but with extra shimmer and personality!).


 💧 Watercoloring with Magicals
I started by sprinkling the magical powder pigments onto watercolor paper and activating them with water. Watching the colors bloom and blend is half the fun—no two pieces ever turn out the same, which makes it perfect for background play or creating focal panels.


🖋 Stamping & Details
Once the watercolor was completely dry, I added some handwriting in the background. I then stamped the bird images in Versafine Clair Nocturne Ink for crisp, rich detail. I love how the bold ink contrasts with the soft, dreamy watercolor underneath.


📎 Finishing Touches
To add some artsy flair and texture, I pulled out some AALL & Create washi tape—these patterns always bring such a quirky charm to mixed media projects. I also ran the edges through my sewing machine for a hint of stitched texture and movement. Finally, I sketched hand-drawn frames around each card to tie everything together and give them that finished look.


These cards are simple in design but rich in detail—and most importantly, they were so much fun to make.


🕊️ Whether you’re a seasoned mixed media artist or just dipping your toes into watercolor and stamping, I hope these sweet bird cards inspire you to get inky this weekend.

Thanks for stopping by, and have a creative and colorful day!


Topflight Stamp Supplies


PaperArtsy - Sara Naumann 41
Shop at:
TP
PaperArtsy - Sara Naumann 64
Shop at:
TP
AALL & Create - Washi Tape #3 Artour de Mwa
Shop at:
TP
AALL & Create - Washi Tape #39 Scriptual
Shop at:
TP
AALL & Create - Washi Tape Heritage Scroll
Shop at:
TP
Tsukineko - VersaFine Clair - Nocturn
Shop at:
CS | AZ | TP


Friday, May 16, 2025

Blooming Birthday Wishes with Studio Light


Hello crafty friends and happy almost summer!
Ericka from Strangely Creative here, and what a whirlwind of a week it's been—with birthdays, end-of-school celebrations, and sunshine sneaking in a little earlier each day!


To keep the celebratory vibes going, I’ve created a birthday card featuring one of my favorite Studio Light sets: Big Roses. I’m a total sucker for bold blooms, so this stamp set was calling my name!

I started by stamping the roses and white heat embossing them for a crisp, elegant look. To add some soft texture, I reached for the Studio Light Script Background and clear embossed it behind the flowers, which gave the card a beautifully subtle vintage feel.

For color, I used my Spectrum Noir Watercolor Markers, keeping things light and loose. Once the coloring was done, I gave the background a light spritz with water to let the colors blend and bloom naturally—just like real roses do after a rain shower.


After letting everything dry, I added a sentiment from the Studio Light Basic Wishes set using Versafine Clair Twilight ink and heat embossed it with clear powder for a smooth, glossy finish.

And that’s it—simple, floral, and perfect for a summer birthday!

Thanks so much for stopping by today. Wishing you sunshine, creativity, and a beautiful weekend ahead!


 Topfight Stamp Supplies

Studio Light - Basic Wishes
Shop at:
TP
Studio Light - Big Roses
Shop at:
TP
Studio Light - Script Background 2
Shop at:
TP
WOW! Embossing - Clear Embossing Pad
Shop at:
TP
Tsukineko - Versafine Clair - Twilight
Shop at:
TP


Spectrum Noir - Colorista Watercolour Markers - Botanical
Shop at:
TP
Spectrum Noir - Colorista Watercolour Markers - Vibrant
Shop at:
TP


01 09 10