Showing posts with label rainbow. Show all posts

Friday, August 23, 2024

Creating a Colorful Birthday Card with Crealies Rainbow Die


Hello friends!

Ericka from Strangely Creative here and I’m excited to share a quick and cheerful birthday card I made using the adorable Crealies Rainbow Die. This die is a true gem—it cuts both a frame and large inserts, making it incredibly versatile for various projects. For this card, I decided to give some of my leftover gel press prints new life by transforming them into a vibrant and unique rainbow.


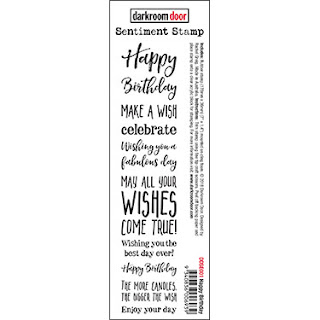
I love how the die perfectly showcases the beautiful textures and colors from the gel press prints, creating a one-of-a-kind rainbow that’s full of personality. Once I had my rainbow laid out, I reached for the Visible Image Happy Birthday stamp to complete the card with a crisp and clean sentiment. The simplicity of this design really lets the rainbow shine, and I’m thrilled with how it turned out!

T

One of the best things about the Crealies Rainbow Die is its small size, which makes it perfect for using up those scraps and leftovers that we all have tucked away. There are so many fun ways to play with this die, and I can’t wait to experiment with more ideas in the future.

Thank you so much for stopping by! I hope this card inspires you to dive into your stash and create something beautiful with those leftover prints and papers. If you haven’t tried the Crealies dies yet, I highly recommend checking them out—they’re a delightful addition to any crafter’s toolkit.

Happy crafting, and until next time!


Topflight Stamp Supplies


Crealies - Partzz - Rainbow
Shop at:
TP
Visible Image - Happy Birthday
Shop at:
VI | SC | TP
WOW! Embossing - Clear
Shop at:
TP
Tsukineko - VersaFine Clair - Nocturn
Tsukineko VersaFine Clair - Nocturn
Shop at:
TP


Monday, March 23, 2020

Darkroom Door Stamps Sentiment Strips Cards


Hello friends!  It's Autumn Clark from SewPaperPaint here with you today to share a few cards featuring the Darkroom Door Sentiment Strip Stamps.  I made these cards for our local stamp convention as samples for the Topflight Stamps booth.  These sentiment stamps are truly versatile and incredibly fun to play with. 


For this card I featured the Happy Birthday Sentiment Stamp.  I embossed it in navy EP over a sanded metallic kraft core panel, that I splashed with watered inks to achieve a mercury glass effect.  


For the background I embossed the Starry Night Background Stamp in white and spritzed it with water, then added In the Navy Infusions powder to the top of the panel and spritzed with more water, letting it bleed downward.  I finished with a die cut star and some fibers to make a "shooting star" to wish upon. 


I made a few other simple cards to showcase the Sentiment Strips versatility.  Here, I partially stamped a portion of the Thank You Sentiment Stamp with Prism Artic Mist and clear embossed it along the bottom of my panel.  I then stamped the Fun Flowers Background Stamp in Versamark ink and embossed with Aqua EP.  I used the Artic Mist ink pad direct to paper (DTP) onto the panels to add more color.  I just LOVE the texture of the foam on these pads.  It is perfect for DTP techniques...


And this DTP technique might just be the most fun of all!  For this fun card, I clear embossed the Happy Birthday Sentiment Stamp three times on my background.  Then I applied the Prism Ombre Ink Pad in Purples across my card panel repeatedly to make these stripes!  It works a charm!   I stamped a portion of the sentiment in the darkest purple of the ombre pad and clear embossed to make my focal image.  I die cut it and layered on a torn purple background with a row of Diamond Sparkles Gemstones in Pretty Pinks using the Silhouette Pick-Me-Up Tool.

Finally, I did a super simple bookmark or gift bag hanger stamping the Happy Birthday Sentiment Stamp in Versafine and sponging a rainbow with Distress Inks.  You could make dozens of these in an hour and have them on hand as birthday treats for coworkers. 


I hope this has given you some new ideas.  Thanks for joining me, Autumn

Blog:  SewPaperPaint
Facebook: Autumn Clark
Instagram: @sewpaperpaint
Pinterest: Autumn S Clark

Check out the full range of Sentiment Stamps HERE!


https://topflightstamps.com/products/darkroom-door-happy-birthday-sentiment-stamps-red-rubber-cling-stamp?_pos=7&_sid=0b3828f44&_ss=r

https://topflightstamps.com/products/darkroom-door-thank-you-sentiment-stamps-red-rubber-cling-stamp?_pos=6&_sid=2231a928d&_ss=r

https://topflightstamps.com/products/darkroom-door-starry-night-background-red-rubber-cling-stamps?_pos=8&_sid=ace0133e0&_ss=r

https://topflightstamps.com/products/paperartsy-infusions-dye-the-nave?_pos=6&_sid=d7f979a10&_ss=r

https://topflightstamps.com/products/hunkydory-prism-dye-ink-pad-arctic-mist
https://topflightstamps.com/products/darkroom-door-fun-flowers-background-red-rubber-cling-stamps?_pos=7&_sid=a281c7e43&_ss=r

https://topflightstamps.com/products/hunkydory-prism-ombre-ink-pad-purples?_pos=6&_sid=88820e719&_ss=r

https://topflightstamps.com/products/hunkydory-premier-blending-tool?_pos=1&_sid=af05472ff&_ss=r

https://topflightstamps.com/products/silhouette-pick-me-up-tool?_pos=2&_sid=0ca3fa7dd&_ss=r

Sunday, March 15, 2020

Darkroom Door Quote and Background Stamps


Happy Sunday friends!  I'm sharing a little bonus post with a few more cards I made for our recent trade show booth with the INCREDIBLE Darkroom Door Quote stamps and Backgrounds.  I'll be sharing all of the fine details on my blog SewPaperPaint if you're interested.  The first card here is a fancy fold card with the Stars background stamp, hand painted stripes and the Look for Stars quote stamp. 


The next card features the Fun Flowers background stamp and the Wonderful quote stamp.  And the final card was made by watercoloring the Cupcake eclectic stamp over the Stars background stamp.  The tiny words are from the Birthday sentiment strip stamp. 


Shop Darkroom Door stamps and stencils today at TopflightStamps.com!  

https://topflightstamps.com/products/darkroom-door-fun-flowers-background-red-rubber-cling-stamps?_pos=7&_sid=c0178b913&_ss=r
https://topflightstamps.com/products/darkroom-door-cupcake-red-rubber-cling-stamps?_pos=1&_sid=1d4647a42&_ss=r

https://topflightstamps.com/products/darkroom-door-wonderful-red-rubber-cling-stamp?_pos=1&_sid=56acb1072&_ss=r

https://topflightstamps.com/products/darkroom-door-look-for-the-stars-red-rubber-cling-stamp?_pos=4&_sid=866649162&_ss=r
https://topflightstamps.com/products/darkroom-door-starry-night-background-red-rubber-cling-stamps?_pos=6&_sid=866649162&_ss=r
 https://topflightstamps.com/products/darkroom-door-happy-birthday-sentiment-stamps-red-rubber-cling-stamp?_pos=1&_sid=ad3ca6aa6&_ss=r

Monday, October 15, 2018

Cute Little Houses Two Ways - That's Crafty!

Hi Everyone and welcome to the Topflight Stamps blog! It's Jenny here, and today I'm here with a couple of card projects that use the exact same stamp set, but which have a very different look. 


The set I'm using today is this whimsical Sketchy Houses by That's Crafty - Melina Dahl.  They're clear stamps and it's an extra large set, so the images are a great size for cards.   I just love the little heart touches and the style. 


I'm also using the Squiggles stencil by That's Crafty which is small but perfect for repeat stenciling or centre focal points like I'm doing here. 


For my first card, I used the stencil with some Shimmerz Barely Blue embossing paste, to create a focal point for my house.  I then heat embossed the smallest house and plant in white embossing powder.  


I scribbled over the images with Tombow markers in pink, purple and aqua, spritzed them with shimmer spray, then fussy cut them out.  I adhered them both with foam tape to the dried embossing paste, and popped the panel onto a white card base.  As a finishing touch I added Nuvo Glitter drops around the edge of the panel, and glossy accents to the windows for shine.


For my second card, I used a panel of grey cardstock and heat embossed the row of houses in WOW! Opaque Red embossing powder. I then ink blended Faded Jeans and Fired Brick Distress Oxides around the edges up to the outline of the houses. I flicked some water to create a mottled sky, and then die cut out the entire piece with a stitched rectangle die.  I also added Clear Wink of Stella to the houses for some shimmer.


I adhered the panel to a white card base, then added glossy accents to the windows again.  For the sentiment I used this fab Hello die by Studio Light which i die cut several times in red cardstock and layered together.  I backed with a panel of blue cardstock and then dropped Nuvo Crystal Glaze into the wells created by the die cuts.  When dry, I added another red die cut over the top and then adhered to my card!

I think you'll see you can get very different looks with the exact same stamp set by changing up your media and colors!  Hope you like it!! 

Jenny

Tuesday, June 26, 2018

Topflight Stamps - Carabelle Studio Rainbow Unicorn

Hi Everyone and welcome to the Topflight Stamps blog.  It's Jenny here, and today I'm showcasing a fabulous Unicorn stamp to create a fun and sparkly rainbow card.  


The stamp set I used is the Carabelle Studio My Beautiful Unicorn which I fell in love with when I saw it.  Isn't it cool?!


To create the card, I first created the background panel by ink blending Distress Oxide inks over a panel of Bristol Smooth cardstock in a rainbow pattern.  I spritzed it with a Shimmer spray for added sparkle, and when dry, I stamped the stars from the set multiple times in a zig zag in Versamark embossing ink, which I heat set with gold embossing powder. 


I stamped the main Unicorn image onto another sheet of Bristol in waterproof black ink and embossed with clear embossing powder.  When dry, I colored it with Zig Clean Color Real Brush markers, and tried to recreate the rainbow look in the main panel.  I also added some white gel pen on the nose and eye, and Diamond Stickles on some of the parts of the mane for extra sparkle.  I cut the image out with my Scan N Cut and mounted it on foam tape onto the centre of the rainbow panel, and adhered the whole piece to a white card base. I decided to go without a sentiment so that the card can be used for lots of different occasions (or framed!)  My 2 year old loves it ! 

For more details on other supplies I used, please see my blog.


I hope you have a sparkly day!
01 09 10