Showing posts with label background. Show all posts

Monday, April 5, 2021

Tracy Evans Poppies for AALL and Create


Now for today's inspiration...  Hi friends!  It's Autumn Clark from SewPaperPaint with you today to share a few slimline cards featuring the gorgeous Poppy Seedheads stamp by Tracy Evans for AALL & Create.  I have been itching to use this gorgeous stamp and finally sat down to some good old inky fun.  

I used different combinations of Distress Inks to make my backgrounds and to watercolor the poppies.  I cut them out and mounted them for dimension. 

I wanted to tie the red from the poppies in another way, so I stamped a portion of one of my all time favorite AALL & Create stamps, Enumerated by Olga Heldwein and cut it with postal edge scissors.  I popped it up and added a twine bow and snippet of label tape.  These were fun to make!  I hope they've inspired you to have a play.  Hugs, Autumn


Shop these gorgeous stamps at Topflight Stamps today!

Monday, March 22, 2021

Carabelle Studio Field Birds Cards with Lavinia Ink Pads


Hi friends!  It's Autumn Clark from SewPaperPaint with you today to share a couple of cards featuring the gorgeous new Jen Bishop birds stamp by Carabelle Studio.  There are three new bird stamps in this release, and they are just gorgeous.  I wanted to make a pair of vibrant cards with them.

I have been very excited to play with the new Lavinia Elements Premium Dye Ink Pads, which are now in stock at Topflight Stamps.  After seeing the amazing video tutorials Lavinia has shared on Instagram about using these pads with a brayer on the gel press, I had to try it.  Basically you lightly brayer this special formula of ink onto your gel plate, then sprinkle with watered down Brushos.  I used the Mermaid Lavinia pad and this amazing brayer by Speedball and added a light coat onto my gel plate, then since I didn't have Brushos handy, I tried adding watered Distress Inks with a normal brush.  I got little spotches and not the pooling effect that you get when you use the fan brush as they do in the Lavinia videos.  But I loved the background nonetheless!  I still had a lot of ink on my gel plate, so I decided to spritz it with water and pull a second print.  It was just as beautiful, only lighter.  I probably could have pulled a third print, but didn't have any paper handy... ha ha ha.


I stamped both backgrounds with Field Birds 1.  To create some contrast, I stamped them again and watercolored the birds to mount back over my backgrounds.  To add a little more interest I stamped the cancellation from Carabelle's My Stamp 2 along the edges.  I used the gorgeous Crealies Double Stitched Dies to cut the backgrounds nice and neat.  I am so excited about the possibilities for making backgrounds with these inks and can't wait to try again.  Thanks for joining today!  Hugs, Autumn

Find these beautiful products today at TopflightStamps.com!


Monday, January 4, 2021

A Trio of Infusions Backgrounds

Hello Fans of Topflight Stamps. Karen Bearse here in the New Year 2021, with a trio of Infusions Backgrounds for you. I wish you all the best for the New Year & pray that this pandemic ends & the world heals. For now let's get some crafty play on, to distract & de-stress. 

Here is my trio of fun. For the tutorial & details on this delicious product hop on over to my blog. 

Infusions are luscious powder pots of pigment with walnut crystals. They are activated when wet. You can use water, gesso, decoupage glue to bring out the color. Have fun & experiment!


The stencil I used is Arty Arrows by Clarity. There are so many great stencils it is hard to pick just one!


Use whatever tags or paper you have that work with Mixed Media. A great place to play is an art journal like the ones Art By Marlene has.

Here is a step from the tutorial. You have to love all that nummy color! Thanks for joining me on Mixed Media Monday, I hope you have time to get inky!

Sunday, March 15, 2020

Darkroom Door Quote and Background Stamps


Happy Sunday friends!  I'm sharing a little bonus post with a few more cards I made for our recent trade show booth with the INCREDIBLE Darkroom Door Quote stamps and Backgrounds.  I'll be sharing all of the fine details on my blog SewPaperPaint if you're interested.  The first card here is a fancy fold card with the Stars background stamp, hand painted stripes and the Look for Stars quote stamp. 


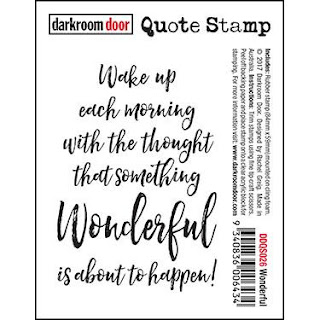
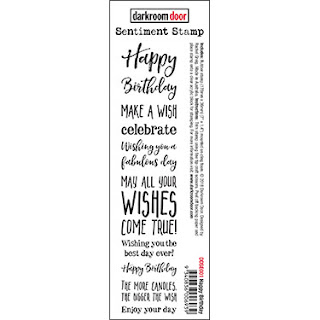
The next card features the Fun Flowers background stamp and the Wonderful quote stamp.  And the final card was made by watercoloring the Cupcake eclectic stamp over the Stars background stamp.  The tiny words are from the Birthday sentiment strip stamp. 


Shop Darkroom Door stamps and stencils today at TopflightStamps.com!  

https://topflightstamps.com/products/darkroom-door-fun-flowers-background-red-rubber-cling-stamps?_pos=7&_sid=c0178b913&_ss=r
https://topflightstamps.com/products/darkroom-door-cupcake-red-rubber-cling-stamps?_pos=1&_sid=1d4647a42&_ss=r

https://topflightstamps.com/products/darkroom-door-wonderful-red-rubber-cling-stamp?_pos=1&_sid=56acb1072&_ss=r

https://topflightstamps.com/products/darkroom-door-look-for-the-stars-red-rubber-cling-stamp?_pos=4&_sid=866649162&_ss=r
https://topflightstamps.com/products/darkroom-door-starry-night-background-red-rubber-cling-stamps?_pos=6&_sid=866649162&_ss=r
 https://topflightstamps.com/products/darkroom-door-happy-birthday-sentiment-stamps-red-rubber-cling-stamp?_pos=1&_sid=ad3ca6aa6&_ss=r

Monday, January 13, 2020

PaperArtsy Mini Stamps Quirky Valentines


Hi everyone!  It's Autumn Clark of SewPaperPaint here sharing my first post as TopFlight Stamps Blog DT member.  I'm thrilled to be joining this team and to be sharing stamp projects with you.  Today I've made a pair of fun cards featuring PaperArtsy Minis/Zinis.  I was playing around with the new Prism ink pads to see what kinds of backgrounds I could come up with and these are the results.


To create these backgrounds I rubbed the pads direct to paper (DTP), then spritzed the paper with water and put it face down onto my craft mat to allow the colors to pool and bleed.  Then I stamped PaperArtsy EM35 by Seth Apter repeatedly onto the panel.  I spritzed the stamped images heavily and let the images fade, blotting where I had too much water.  The result is soft and subtle "patterned paper".  I made two sheets to coordinate.


I stamped PaperArtsy ZN37 Zinski Mini on part of my pink panel.  I cut out the clothing portion and layered onto another stamped image, which I colored with Prism Brush Markers in Heavenly Sunset.  I sponged the edges of this panel with Thundercloud Prism ink.  


I layered Hunkydory Diamond Gemstone Sparkles in Pretty Pinks with die cut hearts coated in Stickles.


To get the neat pink shadow along the edge of my grey panel, I outlined the perimeter with one of the Prism brush markers.  Then I spritzed a puddle of water onto my craft mat and dipped the edge of the panel into it.  I let it dry naturally and this was the effect.


I didn't want to waste the scraps from my backgrounds so I put together a second card with PaperArtsy JM27 Jofy Mini stamp.  Again, I colored the image with Prism Markers and added highlights with Stickles and a white Uniball pen.  I added more Hunkydory Gemstones and a bit of baker's twine.  The sentiments for both cards are stickers.  Thanks so much for joining me today.  I hope you are inspired to make some backgrounds today and play with your Prism Markers.


Follow me on social media for more stamp art inspiration:
Instagram: @sewpaperpaint


Tuesday, March 6, 2018

Studio Light - Focus on Backgrounds

Welcome to the Topflight Stamps blog! Today I'm showcasing a couple of gorgeous backgrounds by Studio Light, and showing a couple of different ways you can use backgrounds as the focal image for your projects.   


I used one of the beautiful backgrounds Topflight Stamps carries by Studio Light in last week's post here, using ink blending and emboss resist.  This week I'm using two more backgrounds with watercolor and masking. 


The backgrounds I used by Studio Light are the 196 (a distressed floral pattern) and a text pattern, similar to 212 (not the exact same one I used  here but the effect is the same).


For one of my cards I also used a Rose Image from Rose Garden 1 by Craft Emotions. 

To create the first card, I heat embossed the background using Versamark embossing ink and white embossing powder onto a panel of watercolor card.  I then painted it with pink,  duck egg and blue Peerless watercolors in a random fashion and let it dry naturally.  I cut the panel diagonally and then popped it up on foam tape on a white card base.    The die cut frame and sentiment strip are dies from my stash.  I added a couple of gems for some sparkle.


For my second card, I used masking paper with a diecut circle and adhered it to a white card panel.  I then stamped the text background stamp in purple dye ink.  Before removing the mask, I sponged round the edges and then removed the mask. 


I stamped the rose from the Craft Emotions stamp set in black ink, fussy cut and popped up on foam tape with a white heat embossed sentiment.  I scattered a couple of sequins and popped the whole panel up onto a  lilac shimmer card base.

As always, you can find more details about the cards over on my blog.  Please leave me any comments or questions!

Have a wonderful week!

Jenny 
01 09 10