Showing posts with label background stamp. Show all posts

Monday, April 5, 2021

Tracy Evans Poppies for AALL and Create


Now for today's inspiration...  Hi friends!  It's Autumn Clark from SewPaperPaint with you today to share a few slimline cards featuring the gorgeous Poppy Seedheads stamp by Tracy Evans for AALL & Create.  I have been itching to use this gorgeous stamp and finally sat down to some good old inky fun.  

I used different combinations of Distress Inks to make my backgrounds and to watercolor the poppies.  I cut them out and mounted them for dimension. 

I wanted to tie the red from the poppies in another way, so I stamped a portion of one of my all time favorite AALL & Create stamps, Enumerated by Olga Heldwein and cut it with postal edge scissors.  I popped it up and added a twine bow and snippet of label tape.  These were fun to make!  I hope they've inspired you to have a play.  Hugs, Autumn


Shop these gorgeous stamps at Topflight Stamps today!

Monday, March 22, 2021

Carabelle Studio Field Birds Cards with Lavinia Ink Pads


Hi friends!  It's Autumn Clark from SewPaperPaint with you today to share a couple of cards featuring the gorgeous new Jen Bishop birds stamp by Carabelle Studio.  There are three new bird stamps in this release, and they are just gorgeous.  I wanted to make a pair of vibrant cards with them.

I have been very excited to play with the new Lavinia Elements Premium Dye Ink Pads, which are now in stock at Topflight Stamps.  After seeing the amazing video tutorials Lavinia has shared on Instagram about using these pads with a brayer on the gel press, I had to try it.  Basically you lightly brayer this special formula of ink onto your gel plate, then sprinkle with watered down Brushos.  I used the Mermaid Lavinia pad and this amazing brayer by Speedball and added a light coat onto my gel plate, then since I didn't have Brushos handy, I tried adding watered Distress Inks with a normal brush.  I got little spotches and not the pooling effect that you get when you use the fan brush as they do in the Lavinia videos.  But I loved the background nonetheless!  I still had a lot of ink on my gel plate, so I decided to spritz it with water and pull a second print.  It was just as beautiful, only lighter.  I probably could have pulled a third print, but didn't have any paper handy... ha ha ha.


I stamped both backgrounds with Field Birds 1.  To create some contrast, I stamped them again and watercolored the birds to mount back over my backgrounds.  To add a little more interest I stamped the cancellation from Carabelle's My Stamp 2 along the edges.  I used the gorgeous Crealies Double Stitched Dies to cut the backgrounds nice and neat.  I am so excited about the possibilities for making backgrounds with these inks and can't wait to try again.  Thanks for joining today!  Hugs, Autumn

Find these beautiful products today at TopflightStamps.com!


Friday, July 24, 2020

Darkroom Door Fun Flowers


Happy Friday! Ericka here with a Fun Flower background card using Darkroom Door.


I love these whimsical flowers and all the fun ways you can use this background.


I created the background by first using the Hunkydory Prism Powders which are bright color powders with beautiful shimmer.


I then used the WOW! Embossing Powder in Gold Pearl for a soft gold embossing.


I also love the Darkroom Door Sentiment Strip Dream Big and all the different ways you can use these great sentiments.


For more information on how I created my card, check out my blog Strangely Creative. Also don't forget to check out the sale this month. Have a wonderful weekend!

https://topflightstamps.com/collections/christmas-winter?ref=xuzipf8pid

Sunday, March 15, 2020

Darkroom Door Quote and Background Stamps


Happy Sunday friends!  I'm sharing a little bonus post with a few more cards I made for our recent trade show booth with the INCREDIBLE Darkroom Door Quote stamps and Backgrounds.  I'll be sharing all of the fine details on my blog SewPaperPaint if you're interested.  The first card here is a fancy fold card with the Stars background stamp, hand painted stripes and the Look for Stars quote stamp. 


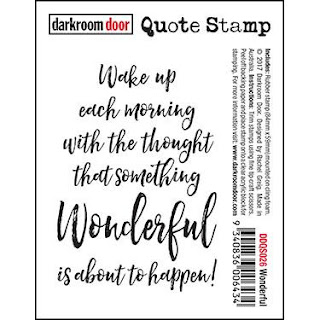
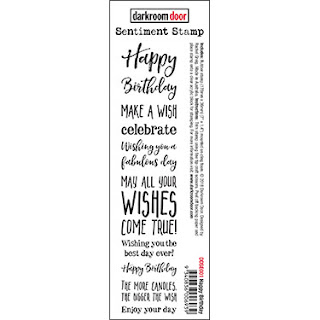
The next card features the Fun Flowers background stamp and the Wonderful quote stamp.  And the final card was made by watercoloring the Cupcake eclectic stamp over the Stars background stamp.  The tiny words are from the Birthday sentiment strip stamp. 


Shop Darkroom Door stamps and stencils today at TopflightStamps.com!  

https://topflightstamps.com/products/darkroom-door-fun-flowers-background-red-rubber-cling-stamps?_pos=7&_sid=c0178b913&_ss=r
https://topflightstamps.com/products/darkroom-door-cupcake-red-rubber-cling-stamps?_pos=1&_sid=1d4647a42&_ss=r

https://topflightstamps.com/products/darkroom-door-wonderful-red-rubber-cling-stamp?_pos=1&_sid=56acb1072&_ss=r

https://topflightstamps.com/products/darkroom-door-look-for-the-stars-red-rubber-cling-stamp?_pos=4&_sid=866649162&_ss=r
https://topflightstamps.com/products/darkroom-door-starry-night-background-red-rubber-cling-stamps?_pos=6&_sid=866649162&_ss=r
 https://topflightstamps.com/products/darkroom-door-happy-birthday-sentiment-stamps-red-rubber-cling-stamp?_pos=1&_sid=ad3ca6aa6&_ss=r

Saturday, February 15, 2020

Darkroom Door Bohemian Lace Journal & Poppy Card


Happy Sunday friends!  It's Autumn Clark from SewPaperPaint with you for a Saturday Special post.  I'm sharing a super quick and easy altered journal/sketchbook that you could easily make as gifts for your boho loving friends. 


My friend @carolinasweetlee taught me this technique for making chalkboard paper.  Simply freshly reink your Black Soot Distress Oxide pad and rub it until you cover 98% of a sheet of cardstock.  The white spaces look like a wiped chalkboard.  Now, you need to let this dry 100%!  It will give you black fingerprints and you can easily make a mess, so heat set the paper and set aside for a while.  And clean your fingers!  ;0

I had intended to turn this panel into a card, but liked it so much I adhered it to a purchased journal.  I stamped the Darkroom Door Arrows Background stamp in Black Soot DOX onto white cardstock and stitched it across the chalkboard piece.  Then I stitched lots of laces and velvet trim.


I embossed the Darkroom Door Wander Quote stamp in Brass EP and mounted it over my collage.  You could use any color of EP here to coordinate with your own trims.  I adhered a trio of vintage buttons along the top. 


Lastly, I sanded the kraft paged notebook to remove the sheen so it would tie in with the chalkboard.  I adhered my panel onto the front, then adhered lace "bookmarks to the inside front cover with cloth tape.


I used the remainder of my Black Soot chalkboard panel to whip out another simple card using the same stamps.  I tucked in a paper poppy and added red stitching and embossing to give this card more of a pop.  


I hope you find these projects inspiring and will take a peek at the Topflight Stamps shop for more Darkroom Door stamps to spark your muse.  

Find me on social media:
Blog:  SewPaperPaint
Facebook: Autumn Clark
Instagram: @sewpaperpaint
Pinterest: Autumn S Clark

Shop for Darkroom Door Stamps Now!
https://topflightstamps.com/collections/darkroom-door-australia

https://topflightstamps.com/products/darkroom-door-arrows-background-red-rubber-cling-stamps?_pos=3&_sid=a42d1ef9a&_ss=r

https://topflightstamps.com/collections/darkroom-door-australia/products/darkroom-door-wander-red-rubber-cling-stamp

Monday, February 10, 2020

Sara Naumann Valentines with PaperArtsy Infusions


Happy Monday friends!  It's Autumn Clark from SewPaperPaint with you to share some quick and easy mixed media Valentine cards.


I've been having a good 'ole time playing with my PaperArtsy Infusions powders.  I wanted to try them with an embossing resist.  I chose one of Seth Apter's mini stamps, EM41, for my background, stamping it three times across my card to make a stripe.  I clear embossed it three times to get a nice chunky texture so my Infusions would have a spot to pool.


I always spritz my panels with water before adding my Infusions powders so they have somewhere to stick.  I used Magenta first.  I let the color bleed and sprayed with more water, moving the powder with my finger tips (you can use a brush if you like) until I achieved the desired effect.  Next I added Terracotta and let the color bleed toward the Magenta, leaving some light space in the middle.


For my first card, I decided to stamp the large bird from Sara's ESN34 stamp set in black gesso.  I thought the gesso would work well over the embossing and I prefer a matte black image to a glossy black embossing.  I used my stamp platform and applied the gesso with a foam wedge, stamping two or three times until I achieved the desired coverage (then cleaning my stamp immediately).  When the image was dry, I added highlights with a white Uniball pen.  I inked the edges of my panel with Versafine Onyx Black.


For my next card, I simply made a random background with Magenta and Terracotta Infusions, completely covering a sheet of watercolor paper.  When my panel was dried, I used texture paste through Sara's stencil PS092.  I let the stencil paste air dry overnight, knowing it would pull the pigment and tint the paste as it dried.  I squealed when I awoke and saw it!  :)


I wanted to add another bold focal image to this card, but didn't want to cover the glorious background, so I stamped the butterfly row from Sara's ESN33 stamp set, again in black gesso, but this time onto a piece of torn vellum.  I stitched the vellum to my background.  Both sentiments are stickers, highlighted with watered black ink.  The hearts were cut from the rest of the sheet of inky background paper I made for this card.


I hope you've enjoyed seeing Infusions powders in action today and will try making some Infused backgrounds of your own.  Hugs, Autumn

Blog:  SewPaperPaint
Facebook: Autumn Clark
Instagram: @sewpaperpaint
Pinterest: Autumn S Clark

See all of Sara Naumann's designs HERE! 

https://topflightstamps.com/products/paperartsy-sara-naumann-34-rubber-cling-mounted-stamp-set?_pos=25&_sid=903de0b7f&_ss=r

https://topflightstamps.com/products/paperartsy-sara-naumann-33-rubber-cling-mounted-stamp-set?_pos=23&_sid=903de0b7f&_ss=r

https://topflightstamps.com/products/paperartsy-stencil-sara-naumann-ps092-1?_pos=15&_sid=903de0b7f&_ss=r
 
https://topflightstamps.com/products/paperartsy-seth-apter-mini-41-rubber-cling-mounted-stamp-set?_pos=22&_sid=9f60a0483&_ss=r


https://topflightstamps.com/collections/types?q=Infusions%20Dye%20Stain


https://topflightstamps.com/products/hunkydory-prima-watercolor-paper-pad?_pos=1&_sid=4d298df39&_ss=r
01 09 10