Showing posts with label Valentines card. Show all posts

Friday, January 23, 2026

Textured Hearts: A Gel Press Valentine Card


Hello crafty friends! Ericka from Strangely Creative here, and I’m back with another mixed media card that’s full of texture, layers, and a whole lot of heart. Today’s project features the AALL & Create Heart Collage stamp, and honestly, this one never gets old.

Over the weekend, I pulled out my gel press and decided to play. No pressure, no plan. Just paint, curiosity, and some leftover packaging materials that were too interesting to toss. Those bits of texture turned out to be the perfect background starter. Slightly grungy, slightly imperfect, and exactly what I love for a handmade Valentine. If you want to see how that background came together, I shared the full process over on Instagram. Definitely worth a peek if you like seeing layers build from nothing.


Once the background was fully dry, I white heat embossed the Heart Collage stamp right over the top. That crisp white against the busy gel print instantly pulled everything together. To add a little extra detail, I grabbed my white paint pen and filled in some of the tiny hearts. Small step, big payoff. It adds just enough contrast and makes those hearts pop without overwhelming the background.

To finish the card, I hand-drew a simple frame around the edge to ground the design and keep the eye focused inward. For the sentiment, I reached for one of my favorites from Creative Expressions Sentiment Sheets. Clean, bold, and easy. Sometimes simple really is the best choice.

This Heart Collage stamp is one of those designs that works with just about everything. Heat embossing, mixed media, clean cards, messy cards. It plays well with all of it. If you’re looking for a stamp that earns its keep, this one definitely does. Here are all the Valentine's I've made so far with this awesome stamp.


 Thanks so much for stopping by today. I hope this card inspires you to experiment with texture, use what you already have on your desk, and maybe even look twice at that packaging before it hits the trash. Until next time, stay creative and keep getting inky.


 Topflight Stamp Supplies

AALL & Create - Heart Collage
Shop at:
TP
Embossing - Bright White Ultra Fine
Shop at:
TP
WOW! Embossing - Clear Embossing Pad
Shop at:
TP
WOW! Embossing - Metallic Gold Rich Pale
Shop at:
TP
Creative Expressions - Sentiment Sheets - Birthday
Shop at:
TP
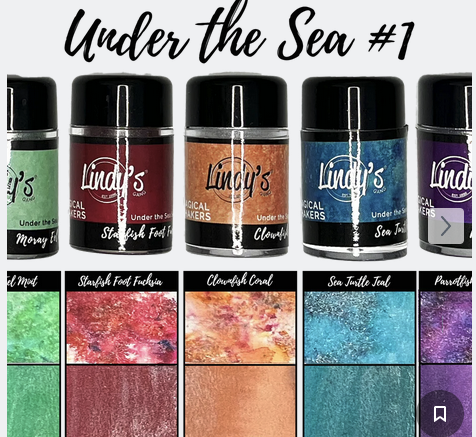
Lindy's Gang - Magical Shakers - Under the Sea #1
Shop at:
TP
Lindy's Gang - Magical Shakers - Under the Sea #2
Shop at:
TP
Gel Press - Reusable Gel Printing Plate
Shop at:
TP
Speedball - 2
Speedball - 2" Brayer
Shop at:
TP
Lavinia 5/8 Stencil Brush
Shop at:
TP


Saturday, January 17, 2026

Playful Hearts & Ocean Hues: A Valentine Card with AALL & Create and Lindy’s Gang


Hello friends! Ericka from Strangely Creative here, and today I’m sharing a card that was pure fun from start to finish. I’ve been playing with the Heart Collage stamp from AALL & Create, designed by Janet Klein, and honestly, this stamp just begs to be experimented with. Hearts, doodles, layers, what’s not to love?


To bring those whimsical details to life, I paired the stamp with the rich, shimmery pigments from Lindy’s Gang Magicals, specifically Under the Sea #1 and Under the Sea #2. If you know me, you know I can’t resist bold color with a little surprise sparkle.

How This Card Came Together

I started by heat embossing the Heart Collage onto two panels: one embossed in crisp white and the other in warm gold. This simple change set the stage for two very different looks using the same stamp. After lightly spritzing both panels with water, I sprinkled Under the Sea #2 onto the white-embossed panel and Under the Sea #1 onto the gold-embossed panel.


Watching the colors bloom and react with the water is always my favorite part. Those vibrant blues, teals, and pops of green paired with the playful hearts instantly gave me Valentine vibes without going traditional pink and red. The contrast between the white and gold embossing added just enough elegance to balance out the fun.


Why I Love This Combo

The mix of doodled hearts and ocean-inspired colors creates a card that feels fresh, modern, and full of personality. It’s a great reminder that Valentine’s Day cards don’t have to follow the rules. Sometimes the most eye-catching projects come from unexpected color palettes.

Thanks so much for stopping by today. I appreciate you spending a bit of your time here, and I hope this inspires you to pull out your favorite stamps and Magicals and just play. Have a wonderful weekend and happy creating!


Topflight Stamps Supplies


AALL & Create - Heart Collage
Shop at:
TP
Creative Expressions - Sentiment Sheets - Birthday
Shop at:
TP
WOW! Embossing - Clear Embossing Pad
Shop at:
TP
WOW! Embossing - Metallic Gold Rich Pale
Shop at:
TP

Lindy's Gang - Magical Shakers - Under the Sea #1
Shop at:
TP
Lindy's Gang - Magical Shakers - Under the Sea #2
Shop at:
TP
Gel Press - Reusable Gel Printing Plate
Shop at:
TP
Speedball - 2
Speedball - 2" Brayer
Shop at:
TP


Thursday, January 30, 2025

Floral Postcard

Hello friends!  It's Colleen Dietrich here, bringing you some inspiration from Topflight Stamps!  This week we are featuring creations that focus on the colors red and pink.

I made a card using two stamp sets from Crafty Individuals.  If you've never seen the selection of Crafty Individuals stamps in the Topflight store, go take a peek.  So many to choose from!

The sets I used are Crafty Individuals - Floral Postcard and Crafty Individuals -  Vintage Tickets & EphemeraI stamped the postcard and colored the bee and the floral bouquet.  Then I inked the edges of the postcard to 'age' it.  Before adding it to the card front, I stamped the bright pink card base with a "post card" image from the Vintage Tickets & Ephemera.  This created a background with subtle interest.

Once the floral postcard was mounted to the card front, I lightly inked up a little postage stamp that says "HALF PENNY" along the bottom edge, from the Vintage Tickets & Ephemera set.  I tucked it underneath the floral postcard, along with a scattering of red pearls.  This makes a cute valentine, doesn't it?  Something different, something unexpected.


Thanks for joining me today!
Here are the supplies I used from Topflight Stamps:


Crafty Individuals - 302 - Floral Postcard


Friday, January 10, 2025

Love in Layers: Gel Press Print Mixed Media Cards


Hello, crafty friends! Ericka here from Strangely Creative, and today I’m excited to share two gel press print cards that bring a beautiful mix of texture, color, and heart—literally! These cards combine old book pages, stunning stencils, and vibrant paints to create a truly unique look.


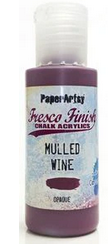
I started by applying PaperArtsy Pixie Dust Fresco Paint to my gel press and pulling the print onto an old book page. Next, I layered Mulled Wine Fresco Paint and placed the PaperArtsy PM001 Heart Stencil over it, pulling the print onto another book page. After removing the stencil, I added a little more Pixie Dust paint and pulled up the original page, creating a layered and textured effect that I love on book paper.


To add sentiments, I stamped the PaperArtsy Sara Naumann EM119 sentiment using Versafine Nocturne ink, clear-embossed it for dimension, and repeated this process on both prints.


For embellishments, I turned to my stash, cutting out flowers from a previous gel press print and stamping the PaperArtsy Tracy Scott 58 floral design on them. I highlighted the centers with a white pen and added colored pencil for dimension.


For extra texture on my darker print, I used the Seth Apter Mini 108 stamp with Versafine Fantasia ink, layering in even more depth. Both cards were finished with hand-drawn frames for a personal touch.

I absolutely love how the layered gel press prints bring these cards to life. Using book pages adds a vintage flair, while the vibrant paints and textures give them a modern twist.


Thank you for stopping by! I hope these inspire you to play with your gel press and create something truly unique this weekend.

Happy crafting!


Topflight Stamp Supplies

PaperArtsy - Tracy Scott 58
Shop at:
TP
PaperArtsy - Seth Apter Mini 108
Shop at:
TP
PaperArtsy - Sara Naumann EM119
Shop at:
TP
PaperArtsy -  Emma Godfrey PM001
PaperArtsy - Emma Godfrey PM001
Shop at:
TP
WOW! Embossing - Clear
Shop at:
WOW US | TP
Tsukineko - Versafine Clair - Fantasia
Shop at:
TP
Tsukineko - VersaFine Clair - Nocturn
Shop at:
 TP
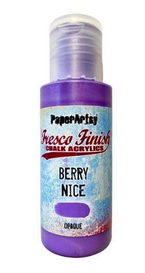
PaperArtsy - Fresco Chalk Paint - Berry Nice
Shop at:
TP
PaperArtsy - Fresco Chalk Paint - Mulled Wine
Shop at:
TP
PaperArtsy - Fresco Chalk Paint - Pixie Dust
Shop at:
TP

Friday, January 12, 2024

Darkroom Door Valentines


Hello friends! Ericka from Strangely Creative and today I am making a Valentines Day card using Darkroom Door. I started by creating a background using Lavinia's Pinkella Mystical Mists and Claret Acrylic Spray. Once my background was dry, I used the Darkroom Door Handwritten Ledger and stamped it on my background with white ink.


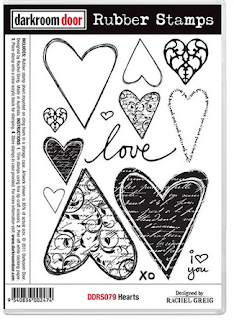
I then used the Darkroom Door Grunge Border stencil with texture paste to add additional interest to my background. I sprayed the Lavinia's Kingfisher Mystical Mists and Teal Acrylic Spray and stamped the Darkroom Door Heart stamp and gold heat embossed it


I finished my card by adding some black pencil highlights as well as a hand drawn frame. Thank you for stopping by and don't forget to check out the stencil sale going on now.


Topflight Stamps Supplies


01 09 10