Showing posts with label emboss resist. Show all posts

Monday, March 23, 2020

Darkroom Door Stamps Sentiment Strips Cards


Hello friends!  It's Autumn Clark from SewPaperPaint here with you today to share a few cards featuring the Darkroom Door Sentiment Strip Stamps.  I made these cards for our local stamp convention as samples for the Topflight Stamps booth.  These sentiment stamps are truly versatile and incredibly fun to play with. 


For this card I featured the Happy Birthday Sentiment Stamp.  I embossed it in navy EP over a sanded metallic kraft core panel, that I splashed with watered inks to achieve a mercury glass effect.  


For the background I embossed the Starry Night Background Stamp in white and spritzed it with water, then added In the Navy Infusions powder to the top of the panel and spritzed with more water, letting it bleed downward.  I finished with a die cut star and some fibers to make a "shooting star" to wish upon. 


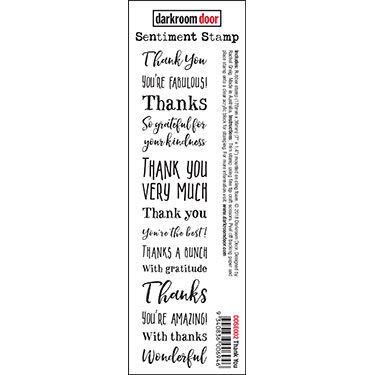
I made a few other simple cards to showcase the Sentiment Strips versatility.  Here, I partially stamped a portion of the Thank You Sentiment Stamp with Prism Artic Mist and clear embossed it along the bottom of my panel.  I then stamped the Fun Flowers Background Stamp in Versamark ink and embossed with Aqua EP.  I used the Artic Mist ink pad direct to paper (DTP) onto the panels to add more color.  I just LOVE the texture of the foam on these pads.  It is perfect for DTP techniques...


And this DTP technique might just be the most fun of all!  For this fun card, I clear embossed the Happy Birthday Sentiment Stamp three times on my background.  Then I applied the Prism Ombre Ink Pad in Purples across my card panel repeatedly to make these stripes!  It works a charm!   I stamped a portion of the sentiment in the darkest purple of the ombre pad and clear embossed to make my focal image.  I die cut it and layered on a torn purple background with a row of Diamond Sparkles Gemstones in Pretty Pinks using the Silhouette Pick-Me-Up Tool.

Finally, I did a super simple bookmark or gift bag hanger stamping the Happy Birthday Sentiment Stamp in Versafine and sponging a rainbow with Distress Inks.  You could make dozens of these in an hour and have them on hand as birthday treats for coworkers. 


I hope this has given you some new ideas.  Thanks for joining me, Autumn

Blog:  SewPaperPaint
Facebook: Autumn Clark
Instagram: @sewpaperpaint
Pinterest: Autumn S Clark

Check out the full range of Sentiment Stamps HERE!


https://topflightstamps.com/products/darkroom-door-happy-birthday-sentiment-stamps-red-rubber-cling-stamp?_pos=7&_sid=0b3828f44&_ss=r

https://topflightstamps.com/products/darkroom-door-thank-you-sentiment-stamps-red-rubber-cling-stamp?_pos=6&_sid=2231a928d&_ss=r

https://topflightstamps.com/products/darkroom-door-starry-night-background-red-rubber-cling-stamps?_pos=8&_sid=ace0133e0&_ss=r

https://topflightstamps.com/products/paperartsy-infusions-dye-the-nave?_pos=6&_sid=d7f979a10&_ss=r

https://topflightstamps.com/products/hunkydory-prism-dye-ink-pad-arctic-mist
https://topflightstamps.com/products/darkroom-door-fun-flowers-background-red-rubber-cling-stamps?_pos=7&_sid=a281c7e43&_ss=r

https://topflightstamps.com/products/hunkydory-prism-ombre-ink-pad-purples?_pos=6&_sid=88820e719&_ss=r

https://topflightstamps.com/products/hunkydory-premier-blending-tool?_pos=1&_sid=af05472ff&_ss=r

https://topflightstamps.com/products/silhouette-pick-me-up-tool?_pos=2&_sid=0ca3fa7dd&_ss=r

Monday, June 17, 2019

Let Your Dreams Blossom | For the Love of Stamps

Hi Everyone!

Jenny here with a card that uses one of my favorite techniques - emboss resist. 


I'm using a stamp set by one of my favorite brands at Topflight Stamps - For the Love of Stamps.  I'm using the Floral Favorites set full of lots of whimsical flowers and a few great sentiments. 

To create my card, I arranged the flower and leaf stamps in my MISTI stamp positioning tool over a panel of Bristol Smooth white cardstock, as close together as possible.  I then stamped them in embossing ink and heat embossed in white.  I removed the stamps and then rearranged them all again, repeating the steps until the entire panel was covered.


I used my Zig Clean Color Real Brush Markers to swipe stripes in a variety of purple and pink (and a touch of blue) horizontally across the panel.  I then spritzed heavily with a shimmer spray to enable the color to gently blend into each other.   The embossing resists the spray, and when dry, you can buff it off with a dry cloth.  I trimmed down this panel and popped it up on foam tape to a white notecard. 


The sentiment was heat embossed in white on black cardstock trimmed out and popped up on more foam tape.  As a finishing touch I added some iridescent jewels.

Love how this sparkles in the light!

Monday, February 18, 2019

Paper Rose | Heat Embossing Three Ways

Hi Everyone!

Welcome to the Topflight Stamps blog ! 


It's Jenny here, and today I'm playing with the gorgeous Paper Rose Bouquet of Flowers stamp with heat embossing.  I've created three cards with similar color schemes to show case the versatility of the technique and the stamp!


In my first card, I stamped the image multiple times with embossing ink,  and then heat embossed in pink embossing powder on cream cardstock.


I then blended co-ordinating ink (I used Distress Ink in Picked Raspberry) around the edges, mixed it with water and added a few spatters with a paintbrush, and also a few spatters of clean water to distress the ink a little.   The sentiment is from AALL & Create's Birthday Animals, stamped in black ink.  As a finishing touch I added some clear and pink sequins.


For my next card I use die cutting to spot light the heat embossed image.  I heat embossed the Paper Rose stamp on grey cardstock in metallic silver embossing powder. I then die cut the image using an heart die and edged the die cut in Black Soot Distress Ink.


I die cut some sticky back pink fun foam with the same heart die and adhered it to the heat embossed heart, slightly shifted so it peeped out and then adhered the entire piece to a white card base.  I added a sentiment from the Penelope Dee You Are Amazing stamp set in black ink and some pink sequins to finish.


My final card uses watercolor resist.  I stamped the image all over a panel of hot press watercolor cardstock (which is smoother, and better for heat embossing) and heat embossed in white embossing powder.


I taped the panel down to a board and spritzed liberally with water. I then used PaperArtsy Infusions in Raspberry and taped the powder over the panel in four or five places.  I tipped the board and let the color bleed out and added a little more water to blend. I then let it dry naturally.  When dry, I die cut it with a stitched rectangle die and adhered to a white card base.


The sentiment (from the Penelope Dee set) was heat embossed on grey cardstock in white and die cut with a stitched rectangle die. I then backed it with the pink fun foam and adhered to the centre of the card.  I added pink sequins again as a finishing touch!

Hope this gave you some inspiration for different ways to use heat embossing and your stamps!  You can head on over to my blog to see the additional supplies I used.   Have a great day!

Tuesday, February 27, 2018

High Tea Emboss Resist - Studio Light, Ultimate Crafts and ClarityStamp

Hi Everyone and welcome to the Topflight Stamps blog!

Today I have a pretty, soft card for you using stamps by Studio Light and Ultimate Crafts. I used the emboss resist technique with ink blending, and some simple Copic coloring to create the card. 


The stamps I used were this Studio Light background stamp which features gorgeous distressed flourishes, and Ultimate Crafts High Tea which features some super pretty, hand drawn look stamps which I love.   Both are clear cling stamps. 


I also used these AMAZING brushes from ClarityStamp for ink blending.  They make blending so easy to get a beautiful, light subtle blend, with no big marks!


To create the card, I first created the background panel.  I stamped the Studio Light Stamp in Versamark embossing ink onto Neenah Solar White cardstock and then heat embossed in white embossing powder.  


I trimmed the cardstock down to 4" x 5.25" and then used one of the Clarity brushes to blend three colors of pink dye ink across the panel, getting lighter towards the top.  To really bring out the embossed pattern, when done blending, take a dry babywipe and gently buff the embossing to remove any excess ink.   I also spattered a little bit of gold spray mist onto the panel with a paintbrush.  I popped the whole panel up on foam tape to a Neenah Solar White card base.


I stamped the images from the Ultimate Crafts High Tea in copic friendly black ink, and then colored them with Copic markers (three shades of RV and three shades of BG).   I added some gold gel pen for accents to match the background spatter, and some Sugar Stickles glitter (colorless glitter) on the cake and tops of the macarons for subtle sparkle.   I then trimmed them out with my Scan N Cut. 


The sentiment was from a set in my stash and was heat embossed in gold onto light grey cardstock, and trimmed out using a fishtail banner die.   I popped it, and the images up onto the panel using foam squares.   

Hope you like it!  If you want to see a full list of supplies, please hop over to my blog here.   Have a fabulous day !

Jenny 
01 09 10