Hello! This week at Topflight Stamps, our theme is the company Woodware. I chose to use their Viola stamp set, one of my faves! On a piece of recycled store-bought greeting card, cut to fit my card base, I painted a background that would nicely highlight the Violas. I used PaperArtsy Fresco Finish Koala paint to cover the evidence LOL and made a fresh, clean place to stamp the Viola. Once that was dry, I used Lindy's Stamp Gang Pixie Dust Spray randomly on the panel. And once that was dry, then stamped Viola in VersaFine Onyx Black ink on top. On a separate piece of paper, I painted PaperArtsy Fresco Finish Wisteria and let it dry, then stamped Viola there too so I could trim and paper-piece onto my card. I added a butterfly from AALL & Create Delicate Wings (fussy-cut and layered on), some gems from my stash, and inked the edges of the panel with Lavinia Graphite Dye Ink. Wishing you a wonderful day! ~ Colleen
Thursday, February 26, 2026
Painted Woodware Violas
Friday, August 22, 2025
Sparkly Nature Card with PaperArtsy Sara Naumann Stamps
Hello crafty friends, it’s Ericka from Strangely Creative! ✨
Today I’m diving into one of my favorite creative combos—gel prints, sparkly textures, and beautiful nature-inspired stamps. For this card, I played with the PaperArtsy Sara Naumann 51 stamp set to create a nature card that shimmers and shines in all the right places.
Building the Background
I started with a gel press print using the gorgeous new PaperArtsy Fresco Finish colors in Watermelon, Coastal, and Admiral. These three shades blend into such a dreamy background that is vibrant yet soft enough to let the details shine through.
Adding the Details
Next, I stamped the focal images from the Sara Naumann 51 set with Versafine Clair Pine Cone ink and heat embossed them in clear powder. This gave my images a crisp outline and just the right amount of glossy texture.
But I wanted to bring in a little extra movement so out came the Sara Naumann 090 stencil! Using Spectrum Noir Glitter Paste, I added a couple more sparkling birds that really catch the light and bring that magical feel to the card.
Finishing Touch
Once the glitter paste dried, I completed the card with a simple but meaningful sentiment from the Lavinia Sentiment Stickers. Sometimes all you need is just a few words to tie it all together.
The Final Look
This project is all about texture, shimmer, and layering different mediums. Between the bold gel press colors, glossy embossed images, and glittery stencil birds, the card feels alive with nature’s energy. Thanks so much for stopping by today! I hope this sparkly card inspires you to mix up your gel prints with stamping and stencil textures for your next project. Wishing you a creative and joyful close to the month and enjoy the last week of August! 💖
Topflight Stamp Supplies
![]() PaperArtsy - Sara Naumann 51 Shop at: TP |
![]() PaperArtsy - Sara Naumann PS090 Shop at: TP |
![]() Lavinia - Sentiment Stickers - Uplifting Collection Shop at: TP |
![]() Tsukineko - VersaFine Clair - Pine Cone Shop at: TP |
![]() PaperArtsy - Fresco Paint Seth Apter Admiral Shop at: TP |
![]() Spectrum Noir - Glitter Paste - Candlelight Gold Shop at: TP |
![]() PaperArtsy - Fresco Paint Tracy Scott Watermelon Shop at: TP |
![]() PaperArtsy - Fresco Paint Tracy Scott Coastal Shop at: TP |
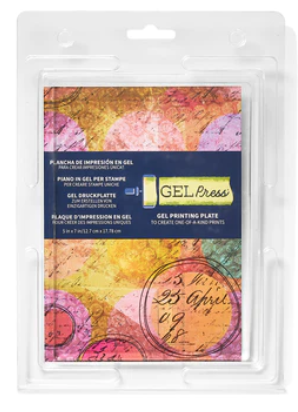
![]() Gel Press - Reusable Gel Printing Plate Shop at: TP | |
![]() Speedball - 2" Brayer Shop at: TP |
Wednesday, February 24, 2021
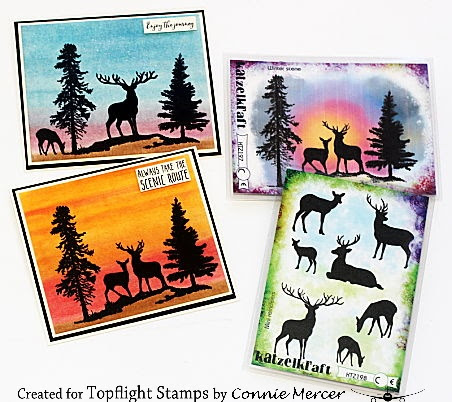
KatzelKraft Card fun!
Hi, Connie here with a couple of silhouette cards using KatzelKraft
stamps (coming all the way from France). PanPastels were
used for color.
To create the background divide the paper into thirds (in your mind). You can use ink,
colored pencils or other mediums for the scene. You can visualize
the ground, then a dark color and then a light color, which creates the
sky.
using the stamp, as it is packaged. The Night Sky card is masked
off, using post-it notes, to omit the pair of deer in the center of
the stamp. The doe and stag deer were added to the scene image
using a stamp platform.
Thanks for stopping by~
Monday, October 8, 2018
Indigoblu No Line Watercolor
I lusted after this stamp set for so long before I finally grabbed it and I decided to tackle the largest stamp in the set with no line watercoloring. I say 'tackle' as this did take a lonnnng time to color in. It's incredibly intricate and this technique requires patience at the best of times!
To create my card I used hotpress watercolor cardstock, which takes water well but is very smooth and great for stamping on. I used Inkon3 fadeout ink to stamp my image, which creates a very pale outline allowing you to watercolor the image without a solid line (hence the 'no-line').
I used pan watercolors and a number 2 brush to color my image, primarily blending a dark yellow and a dark pink to create the blend on the main florals, and then a light and dark pink on the smaller flowers. For contrast I added some details with color pencils. When finished, I added some glitz by coloring over the spots around the edge with a glitter gel pen.
I stamped the sentiment from the set in black ink and as a finishing touch, stamped the butterfly in dark ink once on the panel and then again on a scrap of watercolor cardstock, painted it and fussy cut it out, popping it up on foam tape on the card panel.
To finish, I die cut out the panel with a stitched rectangle die, matted it on burnt orange cardstock and mounted on a white card base.
The IndigoBlu stamp sets are some of my favorite - you might have noticed! I absolutely love their florals and butterflies - be sure to check them out over at the Topflight Stamps store!
Jenny