Thursday, May 23, 2024

Paperartsy Minis

Hi Everyone,

Cornelia here today. This week we are featuring Paperartsy Minis. This includes stamps and stencils. There are some super cool stamps in that collection!
used a background form my stash, which I made with a gel plate. I stamped onto scrap paper and colored everything with alcohol ink markers. I cut everything out and added it tomy background. The sentiment is from a Katzelkarft set. Just doodled a fram around it. Lastly I added some balck ink directly to the edges of my card base.
I hope you liked this. Thanks for visiting. 
See you next week with more Topflight Stamps inspiration.

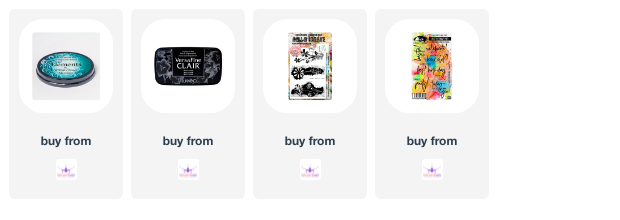
And here are the stamp supplies I used: 

Wednesday, May 22, 2024

PaperArtsy Minis with Topflight Stamps – ATCs

Hello, Lisa Hoel here! This week on the Topflight Stamps blog, we are focusing on PaperArtsy mini stamps and stencils. They are perfect for projects both large and small! I created a series of ATCs (Artist Trading Cards) to showcase them. (So much fun to make!)

Lisa Hoel for Topflight Stamps – ATCs made with PaperArtsy mini stamps and stencils

ATCs are great for using up bits and pieces of backgrounds and die cuts that you may have laying about. The small size of the PaperArtsy minis are perfect too!

Lisa Hoel for Topflight Stamps – ATCs made with PaperArtsy mini stamps and stencils


I used scraps of Gel Press prints, inky backgrounds and other papers for the ATC bases. I added die cuts made using the AALL & Create SkyCrossed Paradise Die Set. It has lots of fun detail dies in it.


Lisa Hoel for Topflight Stamps – ATCs made with PaperArtsy mini stamps and stencils

Thanks for stopping by and be sure to check out the Topflight Stamps store for a wide selection of different and hard to find stamps, stencils and other paper crafting supplies from all around the world! 

Topflight Stamps Supplies Used:

PaperArtsy Mini Stamp - EM50

PaperArtsy Mini Stamp - LPM12

PaperArtsy Mini Stamp - LPM14

PaperArtsy Mini Stamp - LPM13

PaperArtsy Mini Stamp - ZN22

PaperArtsy Mini Stamp - ZN35

PaperArtsy Mini Stencils - PM026

PaperArtsy Mini Stencils - PM025

AALL & Create Die Set - SkyCrossed Paradise
Lavinia Chalk Paint - Lime Zest
WOW Embossing Powder - Polished Silver
Versafine Ink - Black Onyx


Tuesday, May 21, 2024

Happy Bird Day!

Greetings! It's Tuesday which means you've got Kathi here to share a project with you. This week the TFS team is showcasing PaperArtsy's wonderful mini stamps and mini stencils. They might be small, but they pack a big punch! I have quite a nice collection of these little treasures so I had a hard time deciding what to use. In the end, I decided to make a birthday card as those are always useful.


Using a stamping platform and Tuxedo Black Memento Ink by Imagine Crafts/Tsukineko, I stamped the Royal Bird (Kate Crane Mini Cling Stamp KCM004) twice — once onto the image panel and once onto repositionable sticker paper, which was fussy-cut and placed over its counterpart on the image panel. 

The cupcake (Zinski Mini Rubber Clling Mounted Stamp Zini25) was stamped with Tuxedo Black Memento Ink slightly to the right of the royal bird so that the top layer would be close to his beak. Again, it was stamped again on repositionable sticker paper, which was fussy-cut and placed over its counterpart on the image panel. 

The chef bird (Zinski Mini Rubber Cling Stamp Zini27) was positioned a little off kilter so that his toque would be behind the cupcake. And don'tcha know that the cupcake was also stamped a second time onto repositionable sticker paper, fussy-cut, and used to mask the chef on the image panel. 

A ruler was placed horizontally over the base of the image panel. Pink Copic-friendly ink was sponged over the ruler and the masked images to color the background. 

Starting on the left side of the image panel, Copic-friendly inks were sponged over the shaped apertures of the Hot Picks Mini Stencil PM021 and over the masked images. I continued this until I had a nice rainbow of cool shapes on the background.

The ruler was moved to cover and protect the top part of the image panel. Grey Copic-friendly ink was sponged over the bottom of the stencil and the bases of the masked images to ground them. 

The ruler and masks were removed and the images were colored with Copic markers, then highlighted with a white gel pen.

Blue Belle VersaFine Clair Ink by Imagine Crafts/Tsukineko was used to stamp the sentiment on the top left. 

The image panel was adhered onto a grey A2 card to finish up the project.

Please pop over to my blog, Kat's Tales of Stamping, for step by step instructions and complete supply lists. 

Topflight Stamps Products Used:


Thanks for visiting today!

Monday, May 20, 2024

2 Floral Birthday Cards

 Hi friends. Alanna here with a pair of birthday cards today in my signature clean and simple style. For these cards, I started by taking the Flower Smudge Flower Smudge set from AALL & Create and stamped it directly onto white card panels that measure 4x5.25 inches. 

If you want to see other posts of mine using the Flower Smudge set, click here and here.

I stamped the images using the Mermaid Elements ink from Lavinia. These inks are an absolute dream to stamp with and to blend with.

After my focal images were stamped, I stamped my sentiments which are all from the Best Birthday Ever Best Birthday Ever set from Visible Image. I love the sentiments in this set, especially the one that says bestie. I stamped them with Versafine Claire Nocturne ink. After these were stamped, I allowed them to dry so as to not smudge the ink. I then took two pieces of black card stock that measure 4x5.25 inches and I adhered them more to the left of some teal A2 sized note cards. 

I then added my stamped panels. Because they are the same size as the black panels, they are offset a bit which I thought was a fun look. I finished off the cards with some white pearls from my stash.

Find all the products I used below in the Topflight Stamps Topflight Stamps store. Crafty hugs! ~ Alanna

Thursday, May 16, 2024

Hobby Art - Hogs and Kisses

 Hi Everyone,

Cornelia here today. This week we are featuring Hobby Art here on the Topflight blog. It's a wonderful British stamp company. You may want to check them out!
I started out stamping the tree first. Once the ink had dried I stamped the hedgehog and masked him. I colored him with alcohol ink markers. I brushed the background with distress inks. I stamped and heat embossed the sentiment.

I hope you liked this. Thanks for visiting. 
See you next week with more Topflight Stamps inspiration.

And here are the stamp supplies I used: 


:

Wednesday, May 15, 2024

Fun with Fungi – Hobby Art Mushroom Card

Hello, Lisa Hoel here! This week our brand focus over at Topflight Stamps is Hobby Art. I love this set called Fungi and I wanted a chance to play with the new Lavinia Dinkles Ink Powder to create some backgrounds.


After creating several Dinkles backgrounds and picking one to use, I stamped the mushrooms with permanent black ink and then watercolored over the top. I'll have to experiment more with ink powder; it's lots of fun to play with!

Thanks for stopping by and be sure to check out the Topflight Stamps store for a wide selection of different and hard to find stamps, stencils and other paper crafting supplies from all around the world! Also keep an eye on the Topflight Stamps blog. There is new inspiration posted daily!

Topflight Stamps Supplies Used:

Hobby Art stamp set - Fungi

Paper Artsy - Seth Apter Mini 50

AALL & Create - Everyday Sentiments

Lavinia Dinkles - Lime Divine

Versafine Clair Ink - Shady Lime
Versafine Ink - Black Onyx

Tuesday, May 14, 2024

Happy Birthday!

Greetings! It's Tuesday so you've got Kathi here to share a project with you. This week my teammates and I are showcasing  Hobby Art Ltd..'s wonderful stamps. 

Here's my card created with the super-cute Get Your Goat Clear Polymer Stamp Set by Hobby Art Ltd.


Using a stamping platform and Tuxedo Black Memento Ink by Imagine Crafts/Tsukineko,  I stamped one of the goats-on-the-rocks and two kids from the Get Your Goat Clear Polymer Stamp Set by Hobby Art Ltd. twice — once onto white cardstock and once onto repositionable sticker paper.

The sticker paper versions were fussy-cut and placed over their counterparts on the image panel as masks. The rockpile stamp from the Get Your Goat Clear Polymer Stamp Set was positioned under the large goat as shown and stamped twice — once onto the image panel and once onto repositionable sticker paper. Once again, the sticker paper version was fussy-cut and placed over its counterpart on the image panel as a mask.

One of the hills masks from the Mini Hills Mask Set by Lavinia Stamps was placed about 2" from the bottom of the image panel to protect it. Copic-friendly blue ink was brushed over a stencil and the masked goats onto the image panel to create a cloudy sky. 

The hills mask was moved a bit downward and mid-green Copic-friendly ink was brushed over the top of the mask, the masked kids, and the masked rocks to create the top part of the lawn. 

The flattish mask from the Acetate Hills Masks  Set by Lavinia Stamps was placed a bit below the top of the hill and the mid-green Copic-friendly ink was brushed over the top of the mask onto the image panel. This was repeated until there were several mid-green curves on the bottom of the image panel. Lighter green Copic-friendly ink was brushed onto the image panel to fill in the lawn area.

The masks were removed and the goat, kids, amd the rocks were colored with Copic markers. A green Copic marker was used to add some grassy detail to the lawn area. 

Tuxedo Black Memento Ink by Imagine Crafts/Tsukineko was used to stamp the three butterflies from the Get Your Goat Clear Polymer Stamp Set by Hobby Art Ltd onto the sky area. They were colored with Copic markers.

The image panel was cut with the largest die from Card Passe Partout Essential Rectangles Die Set by Studio Light.

Using a stamping platform and Nocturne VersaFine Clair ink by Imagine Crafts Tsukineko the three sentiments were stamped onto the image panel as shown. The image panel was adhered to an A6 grey card.

Please pop over to my blog, Kat's Tales of Stamping, for step-by-step instructions and complete supply lists.

Topflight Stamps Products Used:


Thanks for visiting today!
01 09 10