Friday, February 28, 2025

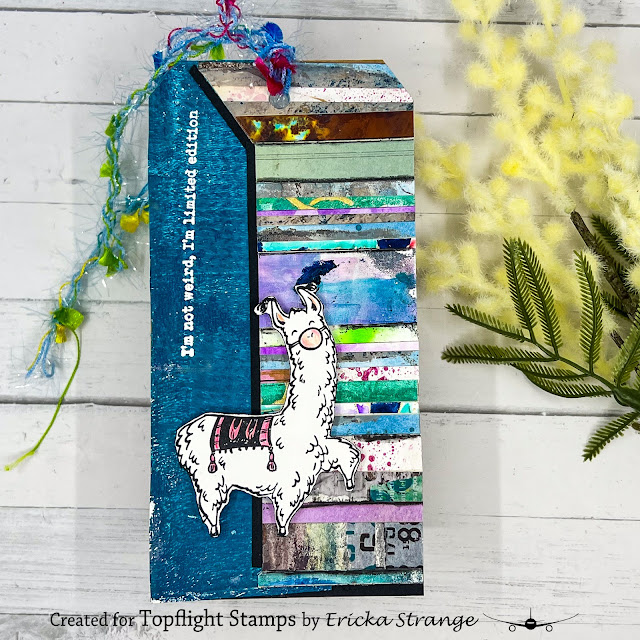
Whimsical Mixed Media Tag with Scraps & Katzelkraft


Hello friends! Ericka from Strangely Creative here, and today I’m sharing a fun and whimsical mixed media tag—created entirely from snippets!

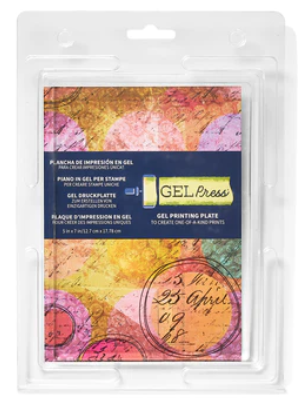
I love finding new ways to repurpose leftover bits from past projects, and this tag was the perfect opportunity to do just that. I started by layering various snippets together and adhering them to a Gel Press print that had been waiting for its moment to shine. The mix of textures and colors gave my tag a unique, collage-like background—one of my favorite ways to add interest to a project!


For the focal point, I stamped and cut out the adorable Katzelkraft Llama, giving my tag a playful touch. To finish it off, I added a white heat-embossed sentiment from the Katzelkraft Whatchamacallit set, which tied the whole look together.

This project was a great reminder that even the smallest scraps can become something beautiful and unexpected! So before you toss those leftover prints and paper bits, challenge yourself to create something fresh and fun.


 I hope this tag inspires you to dig into your scraps and let your creativity run wild! Happy crafting! 🎨✨

Let’s connect! If you try a project like this, I’d love to see it—share it with me on social media @strangelycreative!


Topflight Stamp Supplies

Katzelkraft - Llamas
Shop at:
TP
Katzelkraft - WHATCHAMACALLIT
Shop at:
TP


Thursday, February 27, 2025

Katzelkraft Bird

Hello!  Today is Thursday, so you've got Colleen here to share a project with you.  This week, we are highlighting Katzelkraft products.  In the Topflight Stamps store, you'll find close to 300 Katzelkraft items, such a wide variety!

The set I used for today's card is called Ephemera.  On a pale pink patterned piece of paper, I stamped the script image from the Ephemera set in a light ink. The bird from the same set was stamped in Lavinia Graphite ink on light colored cardstock, then fussy cut.  A sentiment from Crafter's Companion Fabulous Fuchsia Loving Thoughts was stamped in the bottom left corner of a pink patterned paper.

I added a strip of lace overtop of the papers, dotted it with pearls, and added the pretty bird.  Love those long tail feathers!


Supplies Used From Topflight Stamps Store:


Crafter's Companion - Fabulous Fuchsia Loving Thoughts


Wednesday, February 26, 2025

Getting Crazy with Katzelkraft

Hello, Lisa Hoel here. This week at Topflight Stamps our brand focus is on Katzelkraft. I love the variety of design styles they have and this quirky Owls is a new favorite! I used it in creating a funny mixed media card:


Lisa Hoel for Topflight Stamps #creativejuicefreshsqueezed #topflightstamps


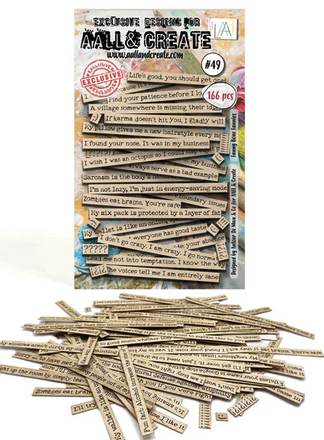
The background is a gel print from my print stash. I used the AALL & Create Olives & Ivy Stencil and texture paste to make a pattern over that. I added some Sea Salt Embossing Powder to the paste while it was wet. When dry, I heat embossed the powder. I also used some of the ready to go AALL & Create Ephemera Funny Bone Funnies #49. They are so handy and a fun way to add some snark to your project.

Thanks for stopping by and be sure to check out the Topflight Stamps store for a wide selection of different and hard to find stamps, stencils and other paper crafting supplies from all around the world! Also keep an eye here on the Topflight Stamps blog. There is new inspiration posted daily!

Topflight Stamps Supplies Used:

Katzelkraft Stamp Set - Owls

AALL & Create Stencil - Olives & Ivy #172

AALL & Create Washi Tape - Burlap Black #16


AALL & Create Ephemera - Funny Bone Funnies #49

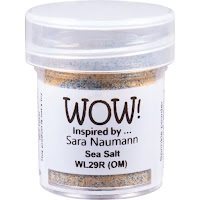
WOW! Embossing Powder - Sara Naumann Sea Salt

Versafine Pigment Ink Pad - Onyx Black


Tuesday, February 25, 2025

You Are Purr-fect

  NEWSFLASH! 
All AALL and Create Products are 25% off until midnight Tuesday, February 24th EST! Click over right now to take advantage of this great sale! 


~~~ Back to our regularly scheduled programming!~~~

You've got Kathi back again today to share another card with you. This week the Topflight Stamps team is focusing on Katzelkraft's wonderful stamps. As a crazy cat lady, I had to use one of Katzelkraft's fabulous cat stamps.

Here's my card created with the Cat with Chair Solo Unmounted Red Rubber Stamp and the 


Use a craft knife and a pair of scissors to fussy-cut the image. Color the image with Copic markers, edge it with a black pen, and set it aside.

Use one of the twelve dies included in the Crea-Nest-Lies XXL Double Stitched Rectangle Die Set by Crealies to cut another panel of white cardstock which will become the background layer for the card.

Place a piece of low-tack tape along the bottom of the die-cut panel. Sponge or brush Arctic VersaFine Clair Ink by Imagine Crafts/Tsukineko over the tape and the die-cut background panel to color the cardstock. Use low-tack tape and/or magnets to secure the Mosaic Stencil by AALL and Create over the inked panel. Sponge or brush Veri-Peri VersaFine Clair Ink over the stencil onto the die-cut background panel. 

Remove the stencil and move the tape to cover the top part of the die-cut background panel. Sponge or brush Medieval Blue VersaFine Clair Ink  right below the tape, then continue to sponge or brush Veri-Peri VersaFine Clair Ink  to the bottom of the die-cut background panel. Heat set.

Sponge or brush a scrap of white cardstock with Arctic VersaFine Clair Ink. Use low-tack tape and/or magnets to secure the Mosaic Stencil by AALL and Create over the inked panel. Sponge or brush ArcticVersaFine Clair Ink over the stencil onto the scrap of cardstock to create a tone-on-tone pattern.

Place this scrap onto a stamping platform and secure with magnets. Place the "purrfect" sentiment stamp from the You are Purrfect Unmounted Red Rubber Stamp Set by Katzelkraft facedown on the stenciled scrap. Ink the stamp with Veri-Peri VersaFine Clair Ink and stamp. Re-ink and stamp again to deepen the color.  Use a rectangle cutting die to cut the sentiment. Use a slightly larger rectangle cutting die to cut another scrap of white cardstock. Ink the larger rectangle die-cut with Veri-Peri VersaFine Clair Ink, heat set, and use to mat the sentiment die-cut.

Adhere the matted sentiment die-cuts to the background die-cut panel so that the stencil pattern aligns with it. Adhere the fussy-cut, colored Cat with Chair image as shown. Use a black chalk pencil to add a bit of shadow under the chair and cat.

Cut a piece of white cardstock to 8.5" x 5.75". Score at 4.25" and fold to form a card. Press and slide the Medieval Blue VersaFine Clair Inkpad along the outside .5" periphery of the card, then heat set the card. Adhere the image panel to finish up the card. 

Please pop over to my blog, Kat's Tales of Stamping, for step-by-step instructions and complete supply lists. 

Monday, February 24, 2025

Oops! A Humorous Card

NEWSFLASH! 
All AALL and Create Products are 25% off for 48 hours only! Click over right now to take advantage of this great sale! 


~~~Now back to our regularly scheduled programming!~~~

Greetings! You've got Kathi here to share a card with you today! This week the Topflight Stamps team is focusing on Katzelkraft's wonderful stamps. I decided to make a humorous slimline card scenic card with the Crocodiles Unmounted Red Rubber Stamp Set and the Les Rats des Ville - City Rats Unmounted Red Rubber Stamp Set by Katzelkraft with sentiments provided by the Sharp Tongues White Ephemera 4 by AALL and Create.

Here it is!


Use Tuxedo Black Memento Ink by Imagine Crafts/Tsukineko to stamp the Crocodile with Balloon and the Open Mouth Crocodile from the Crocodiles Unmounted Red Rubber Stamp Set by Katzelkraft onto either side of a panel of white cardstock. 


Color the crocodiles, the balloon, and the rat with Copic markers. Stamp the same images again onto repositionable sticker paper, fussy-cut the sticker paper versions, and adhere them over their counterparts on the image panel.

Place a piece of repositionable tape horizontally across the bottom part of the image panel.

Starting at the top of the image panel, use the largest of the brushes from the Blending Brushes Set by Time For Tea Designs to brush blue and light purple dye ink over a cloud stencil onto the image panel. Flip the stencil 180° and move it downwards. Continue to brush the same ink over the stencil onto the image panel and over the masked images until you have a cloudy sky.

Remove the stencil, the masks from the images, and the tape. Use Copic markers to color the grass. 

Trim the image panel to 8.25" x 3.25" and edge with a black pen. Adhere the image panel to a black slimline card.

Adhere the sentiments from the Sharp Tongues White Ephemera 4 by AALL and Create to complete the card.


Thanks for visiting today!

Friday, February 21, 2025

Chasing Spring – A Gel Press Print Journal Page

Hello crafty friends! Ericka from Strangely Creative here, and while it may be chilly (by Texas standards), I’m already dreaming of spring! To brighten up my journal, I created a quick and playful gel press print page, bringing in fresh colors and fun textures.

Layering Up the Colors

I started by laying down a vibrant layer of Cerulean on my gel press—because nothing says "spring is coming" like a pop of blue! To add more depth, I grabbed a printed paper from my stash and pressed it onto the gel plate, picking up some gorgeous background texture.


Adding a Stenciled Touch

Next, I used PaperArtsy Fresco Paint in Gumboots (such a fun color!) and placed the PaperArtsy PS226 stencil on top. I love how this stencil gives an organic, leafy vibe, perfect for a spring-inspired page. By pressing my paper onto the gel plate again, I pulled up a beautiful leafy print that added just the right amount of movement and texture.

Final Details & A Touch of Humor

To make the leaves stand out even more, I outlined them with a white gel pen, adding highlights and dimension. Then, because no journal page of mine is complete without a little personality, I finished with a witty sentiment from the AALL & Create Ephemera Funny Bone Funnies—because who doesn’t love a little snark with their art?


Time to Play!

This was such a fun and easy way to bring some spring vibes into my journal, and I’d love to see how you incorporate gel prints into your own projects! Have you tried layering different prints or using unexpected color combos? Let’s chat in the comments!

Thanks for stopping by, and I hope you have a wonderfully creative (and hopefully warmer) weekend!


Topflight Stamp Supplies
PaperArtsy - Tracy Scott PS226
Shop at:
TP
AALL & Create - Ephemera Die-cuts - 49 - Funny Bone Funnies
Shop at:
TP
PaperArtsy - Fresco Chalk Paint - Cerulean
Shop at:
TP
PaperArtsy - Fresco Chalk Paint - Gumboots
Shop at:
TP
Gel Press - Reusable Gel Printing Plate
Shop at:
TP 
Speedball - 2
Speedball - 2" Brayer
Shop at:
TP

Thursday, February 20, 2025

Winter Snowflakes

Hello!  Colleen Dietrich here, and I've got a wintry card to share today for Topflight Stamps.  I wanted to suggest a snowstorm, so I started with a deep blue cardstock and flicked Lavinia Snow White Chalk Paint by tapping a damp paintbrush overtop of the card, in a random way.  I die cut a tag, then stamped Studio Light "Vintage Christmas" snowflake stamps on it in Versafine Clair Ink - TwilightWith the same ink, I also stamped a snowflake border from the Vintage Christmas set along the bottom of the tag. The sentiment is from the same Studio Light stamp set, stamped on a little oval punched tag, with a bit of twine tied through the top.


Topflight Stamps Supplies Used:


Studio Light - Jenine's Mindful Art - Vintage Christmas - Vintage Winter Elements 


Lavinia - Chalk Acrylic Paint - Snow White


Wednesday, February 19, 2025

Visible Image Thank You Cards

 Hello, Lisa Hoel here. This week at Topflight Stamps our theme is Anything Goes! I need some thank you cards to send out so I whipped up this quick and easy quartet using Visible Image stamps and stencils.


Lisa Hoel for Topflight Stamps #creativejuicefreshsqueezed #topflightstamps


The cat images are from the That Lovin' Feline stamp set and the sentiment is from the set Go To Words. The backgrounds were stenciled using the Collision and Fibres stencils.

Thanks for stopping by and be sure to check out the Topflight Stamps store for a wide selection of different and hard to find stamps, stencils and other paper crafting supplies from all around the world! Also keep an eye on the Topflight Stamps blog. There is new inspiration posted daily!

Topflight Stamps Supplies Used:

Visible Image Stamp Set - Go To Words

Visible Image Stamp Set - That Lovin' Feline

Visible Image Stencil - Fibres

Visible Image Stencil - Collision

Versafine Pigment Ink Pad - Onyx Black
Lavinia Elements Ink Pad - SaharaLime Punch


Tuesday, February 18, 2025

Inspirational Flowers

 Greetings! It's Tuesday which means you've got Kathi here to share a project with you. This week's theme is "Anything Goes". We've had a real winter here in the Northeast and everything is cold, grey, and dreary, including my mood. 

So I decided to brighten things up a tad with a quick and easy card featuring the beautiful Steampunk flowers from the Tracy Scott TS095 Rubber Cling Mounted Stamp Set by PaperArtsy with the Brick Textures 6x6 Patterned Paper Pad by Craft Consortium, and a sentiment from the Uplifting Sentiment Stickers by Lavinia Stamps.

Here it is!


Color the flowers with Copic markers, fussy-cut them, then edge them with a black marker. Use a white gel pen to add highlights. 

Trim a piece of black brick paper from the Brick Textures 6x6 Patterned Paper Pad by Craft Consortium to 5.75" square. Edge with a gold paint pen. Adhere the patterned paper panel to a black 6" square card.

Adhere the three flowers on a diagonal as shown. Adhere two black sentiment stickers from the Uplifting Sentiment Stickers by Lavinia Stamps to the lower left corner to finish the card.

Please pop over to my blog, Kat's Tales of Stamping, for step by step instructions and complete supply lists. 

Topflight Stamps Products Used:


Thanks for visiting today!
01 09 10