Monday, October 21, 2024

2 Christmas Cards with Unexpected Embossing

Hi friends. Alanna here on the blog with you today and I have a pair of Christmas cards to share with you. 

I started by taking one of the back sides of a patterned paper from the Jingle All the Way collection from Craft Consortium and I stamped both corners with the large Sketchy Holly stamp and die from Craft Consortium with Versafine Claire Acorn ink. I then heat embossed my Merry Christmas sentiment which is from the Classic Sentiments set from Heffy Doodle with red embossing powder. 

As I was pouring the embossing powder over my sentiment, some of it was sticking to my stamped images as apparently the ink was still wet somewhat. At this point, I decided I actually liked how the image looked part red and part brown so decided to go for it. 

I trimmed down my panels and added them to some red cardstock. They were then added to white A2 notecards and that completes these cards.
Find these products I used below in the Topflight Stamps store. 
Crafty hugs! ~ Alanna

Friday, October 18, 2024

Fall in Love with Mixed Media Layers


Hello, friends! It’s Ericka from Strangely Creative, and today I’m excited to share a fall-themed mixed media card with you. One of my favorite ways to start any mixed media card is by creating a textured, layered background, and for this project, I used my trusty gel press.

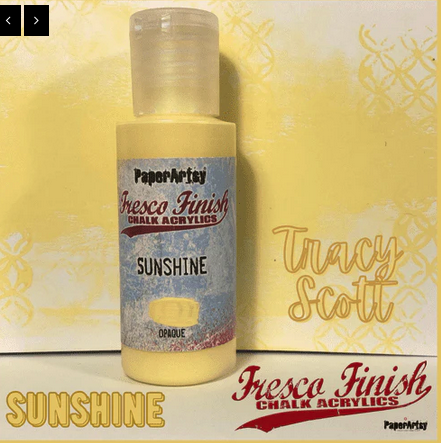
To capture those rich fall colors, I selected PaperArtsy Fresco Paints in Tango, Sunshine, and Persimmon. After pulling a vibrant print from the gel press, I wanted to add more dimension, so I reached for the PaperArtsy Sara Naumann 36 set and stamped it in Versafine Clair Pine Cone Ink to enhance that autumn feel.


No mixed media card is complete without a bit of texture! I applied texture paste through the PaperArtsy PS 248 stencil and sprinkled WOW! Embossing Powder in Twiggy on top while it was still wet. Once the paste dried, I used a heat tool to melt the powder, creating a stunning, textured, metallic layer.


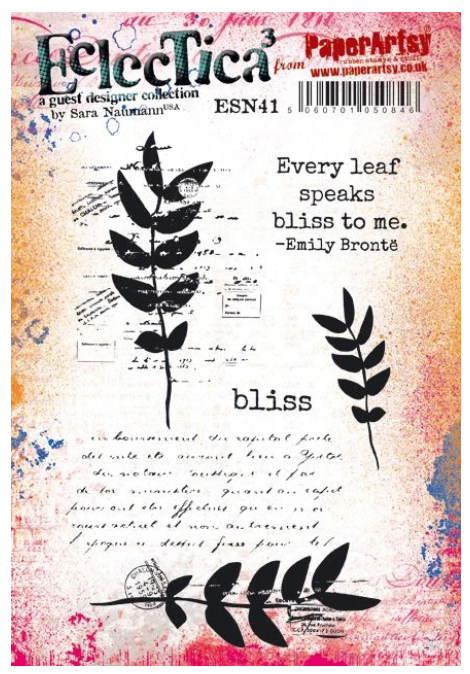
 For the main focal image, I chose a beautiful design from the PaperArtsy Sara Naumann 41 set and heat embossed it using WOW! Embossing in Decadent Ruby. The ruby tones added a lovely pop of color that really makes the image stand out against the warm background.


To tie everything together, I added a sentiment from the Sara Naumann 36 set on vellum, softening the look while keeping the focus on the texture and colors underneath.

Thank you so much for stopping by! I hope this card inspires you to dive into your own mixed media stash and create something beautiful for fall. Have a wonderful weekend!

Until next time, Ericka

Topflight Stamp Supplies


PaperArtsy - Sara Naumann 36
Shop at:
TP
PaperArtsy - Sara Naumann 41
Shop at:
TP
PaperArtsy - Sara Naumann PS248
Shop at:
TP
WOW! Embossing - Clear
Shop at:
TP
WOW! Embossing - Clear Embossing Pad
Shop at:
TP
WOW! Embossing - Twiggy
Shop at:
TP
WOW! Embossing - Decandant Ruby - Raquel Burillo Perez
WOW! Embossing - Decadent Ruby - Raquel Burillo Perez
Shop at:
TP
Tsukineko - VersaFine Clair - Nocturn
Shop at:
 TP
Tsukineko - VersaFine Clair - Pine Cone
Shop at:
TP
PaperArtsy - Fresco Chalk Paint - Persimmon
Shop at:
TP
PaperArtsy - Fresco Chalk Paint - Sunshine
Shop at:
TP
PaperArtsy - Fresco Chalk Paint - Tango
Shop at:
TP
Speedball - 2
Speedball - 2" Brayer
Shop at:
TP
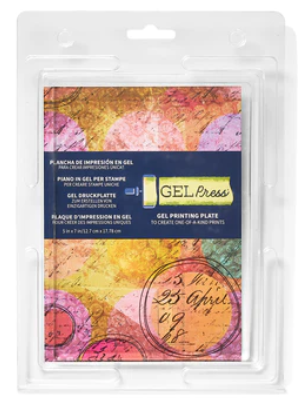
Gel Press - Reusable Gel Printing Plate
Shop at:
TP


Thursday, October 17, 2024

Trick OR Treat? Card

 Greetings! It's Kathi here again today to share another Mixed Media project since that's our focus this week! I've used stamps by Carabelle Studio with Fresco Finish Chalk Acrylic Paints by PaperArts, alcohol markers, modeling paste, a stencil, and die-cuts on this slightly deranged Halloween card.

Here it is!


Use Tuxedo Black Memento Ink by Imagine Crafts/Tsukineko to stamp both ravens from the Poe's Ravens Rubber Cling Stamp Set by Carabelle Studio and the eyeball from the Witches' Kit Rubber Cling Stamp Set also by Carabelle Studio onto white cardstock.  Carabelle went out of business last year, but some stamps are still available at Topflight Stamps!

Fussy-cut the ravens and the eyeball, color with Copic markers, and edge with a black marker. Use a gold marker from the Essential Metalllic Colorista Markers Set by Spectrum Noir to outline the raven's monocle and highlight his chain. Set the colored ravens and the eyeball aside. 

Use a door cutting die to cut mixed media cardstock. Use low-tack tape to cover the door frame. Paint the door with Twilight Fresco Finish Chalk Acrylic Paints by PaperArtsy. Let dry. Remove the tape and use colored pencils to add some shading to the door. Flip the door die-cut, place a piece of vellum over the windows, then adhere yellow cardstock over the vellum. Set the door aside.

Cut a piece of mixed media cardstock to 5.5" wide. Use Stone and Buff Fresco Finish Chalk Acrylic Paints by PaperArtsy to paint the cardstock. Use low-tack tape to adhere the painted mixed media cardstock to the back of a floor perspective stencil.

Add a dollop of modeling paste to a craft mat. Add a few drops of Stone Fresco Finish Chalk Acrylic Paint to the modeling paste and mix well with a palette knife. Spread the paint-tinted modeling paste over the stencil onto the painted cardstock. Remove the stencil and the tape. Let air dry for a bit, then use a heat gun at a distance to heat set it.

Create a 5.5" x 8.5" card from white cardstock. Adhere the stenciled dimensional floor to the bottom of the card. Cut a piece of brick patterned paper from the Bricks Textures 6x6 Paper Pad by Craft Consortium Ltd. to 5.5" and adhere to the card as shown. Trim whatever white space is left at the top of the card. 

Use Nocturne VersaFine Clair Inks by Imagine Crafts/Tsukineko to edge the card. Adhere the ravens and the eyeball to the front of the card. Adhere a silver metallic flat backed half globe to the door to become a doorknob.

Use alphabet dies to cut black cardstock and adhere to spell out the sentiment.

Please pop over to my blog, Kat's Tales of Stamping, for step-by-step instructions and complete supply lists. 

Topflight Stamps Products Used:


Thanks for visiting today!

Wednesday, October 16, 2024

Mixed Media + Halloween and Katzelkraft

Hello, Lisa Hoel here. This week at Topflight Stamps our theme is "Mixed Media". I love using "all the things" so this is right up my alley! I'm in Halloween crafting mode so I chose to make an appropriately themed card.

Lisa Hoel for Topflight Stamps #creativejuicefreshsqueezed #topflightstamps

The background is Gel Press print to which I applied texture paste through a PaperArtsy Mini Stencil, then sprinkled with Oiled Slate WOW Embossing Powder. Once the paste was dry, I heat embossed the powder. I layered on die cuts, fussy cut Katzelkraft stamped images and fabric.

Thanks for stopping by and be sure to check out the Topflight Stamps store for a wide selection of different and hard to find stamps, stencils and other paper crafting supplies from all around the world! Also keep an eye here on the Topflight Stamps blog. There is new inspiration posted daily!

Topflight Stamps Supplies Used:
Katzelkraft Stamp Set - Cats

Katzelkraft Stamp Set - Pilgrim

PaperArtsy Hot Picks stencil - PM025

WOW! Embossing Powder - Oiled Slate

Masterpiece Design Memory Planner Die Set - Tag Mini Album
AALL & Create die sets - SkyCrosssed Paradise #34
Versafine Pigment Ink Pad - Onyx Black


Tuesday, October 15, 2024

Happy Halloween - A Mixed Media MemoryDex Page

It's Tuesday so you've got Kathi here to share a project with you. This week the team is focusing on Mixed Media. Since I'm still (always) in Halloween mode, I've made another page for my Halloween MemoryDex album using the Spring Sprouts Die Set 49 by AALL and CreateDee of Darkness Clear Stamp Set 1198 by Janet KleinFresco Finish Chalk Acrylic Paints by PaperArtsy, and the Hot Picks Mini Stencil PM016 by PaperArtsy.

Here's the MemoryDex page!

Here's a close-up!


Use Tuxedo Black Memento Ink by Imagine Crafts/Tsukineko to stamp the Mummy Dee from the Dee of Darkness Clear Stamp Set 1198 by Janet Klein for AALL and Create onto white cardstock. Fussy-cut the image, color with Copic markers, and edge with a black multiliner pen. Use a white gel pen to add highlights to her eyes and a clear glaze pen to add dimension and shine to her earrings. Set her aside.

Use the main MemoryDex die from the Spring Sprouts Die Set 49 by AALL and Create to cut Mixed Media cardstock. Add drops of Vintage LaceHaze, and Stone Fresco Finish Chalk Acrylic Paints by PaperArtsy to foam, pounce the foam on a craft mat to mix, then pounce the paint onto the MemoryDex page. Let dry or heat set.

Place a brick stencil over the dried paint on the MemoryDex card and pounce the foam over the stencil to add a subtle tone on tone brick pattern to the MemoryDex page.

Position the Hot Picks Mini Stencil PM016 by PaperArtsy onto the center of the MemoryDex card. Use low-tack tape to cover the stone apertures and the bricks of the the arch. Use black acrylic paint to paint the center of the arch. Let dry. 

Remove the tape from the stones of the arch, but leave the tape on the outside of the arch. Use low-tack tape to cover the center piece of the arch. Place the center piece in the center of the arch to mask the painted area.

Place a dollop of modeling paste onto a craft mat. Add a few drops of Haze and Stone Fresco Finish Chalk Acrylic Paints by PaperArtsy onto the modeling paste, mix well, and scrape the paste over the stencil onto the MemoryDex page. Remove the stencil, the tape covering it, and toss both parts of the stencil into a tub of water.

Use a palette knife to add a tiny bit of texture to the stones on the arch. Let the modeling paste air dry, then heat set. 

Use Nocturne VersaFine Clair Inks by Imagine Crafts/Tsukineko to stamp the web from the Dee of Darkness Clear Stamp Set 1198 by Janet Klein for AALL and Create onto the top left of the MemoryDex page. Clean the stamp and use the same ink to stamp the web on the top right. Heat set both webs.

Dust the MemoryDex page with anti-static powder. Use Nocturne VersaFine Clair Inks by Imagine Crafts/Tsukineko to stamp the spiders from the Dee of Darkness Clear Stamp Set 1198 by Janet Klein for AALL and Create being sure to clean and dry the spider stamps between repositioning them and stamping. Add clear detail embossing powder to the spiders and heat set. Use a red marker to add color to the spiders' eyes.

Edge the MemoryDex page with StrawberryFantasia, and Nocturne VersaFine Clair Inks by Imagine Crafts/Tsukineko. Heat set. Adhere the fussy-cut Dee of Darkness to the MemoryDex. Add a rub-on sentiment to finish the piece.

Please pop over to my blog, Kat's Tales of Stamping, for more information including complete supply lists. 

Topflight Stamps Products Used:


Thanks for visiting today!


Monday, October 14, 2024

Stenciling over Patterned Papers

 Hi friends. Alanna here on the blog with you today with this pair of cards with a bit of a mixed media feel.

To get started, I trimmed down papers from the Wood Textures 6x6 paper pack from Craft Consortium. I then took the Leafy stencil from Visible Image and used a blending foam and white pigment ink and blended it directly onto the patterned paper.

I added foam tape directly to my white A2 notecards and then added the panels onto them. I die cut one of the butterfly dies from the Nature's Doily die set from AALL & Create. I die cut the outline die twice from white card stock and adhered them together. I then die cut the outline and center portion of the inner die together with some champagne-colored glitter card stock.  

I stamped my sentiment from the Classic Sentiments set from Heffy Doodle and trimmed it out. I added some thin strips of card stock behind it for a bit of dimension and then added it over top of my butterfly. 

I then used a die from my stash and die cut tiny circles from the same glitter card stock I used for the butterfly and added a few onto the card. 

Find these products I used below in the Topflight Stamps store. 
Crafty hugs! ~ Alanna
01 09 10