Tuesday, June 7, 2022

Steampunk Sky with VersaFine Clair Inks

 Greetings! It's Tuesday so you've got Kathi here to share a project with you! This week my teammates and I are showcasing the wonderful and versatile VersaFine Clair™ Inks by Tsukineko®, which I love and adore. They colors are bright and vibrant and the inks blend beautifully. They're wonderful for stenciling and especially good for stamping detailed images and sentiments. 

I decided to make a card using the inks several ways. Here's my steampunk themed card using MonarchCharming PinkParadiseGreen OasisWarm Breeze, and Nocturne VersaFine Clair™ Inks by Tsukineko®, the Steampunk Moon Cling Mounted Stamp Set by Indigo Blu, and the Steam Cogs Stencil #71 by AALL and Create.

Here it is!


The first thing I did was to use Nocturne VersaFine Clair™ Inks by Tsukineko® to stamp the moon and the earth cluster onto Bristol Paper and heat set with Silver Detail embossing powder. The next step was to stamp both images onto repositionable label paper, which was fussy-cut to create masks.


The masks were placed over their counterparts on the image panel. Charming Pink and Monarch VersaFine Clair™ Ink were sponged from the edges of the image panel and over the masked images using Blenders by Lavinia StampsParadise VersaFine Clair™ Ink was then blended into the image panel until I was happy with the blending and the coverage.

A mini-mister was filled with 91% isopropyl alcohol and misted over the image panel. The alcohol reacts with the ink, leaving some splatters and splotches. *Be sure to have a window open as it's not a great idea to inhale the aerosolized alcohol ink. 


Remove and reserve the masks. Use a clean cloth to remove the ink from the embossed images.

Smoosh the Monarch and Paradise VersaFine Clair™ Inks onto acetate, mist with alcohol, and use a Fantastix or a fine paint brush to color the holes in the cogs and the interior of the clock. 


Smoosh Charming PinkGreen Oasis and Warm Breeze, and  Green Oasis VersaFine Clair™ Inks onto acetate, mist with alcohol, and color the earth, the clock rim, and the little globes near the moon.

Use metallic watercolors to color the rest of the stamped images and a silver metallic pen to go over any highlights that need to be touched up. 

Stamp the mini stars and bursts onto the image panel and heat set with Detail White embossing Powder. 

Randomly stencil gears from the Steam Cogs Stencil #71 by AALL and Create using Monarch VersaFine Clair™ Ink

Trim the image panel to 5.25" x 8.25" and edge with Monarch VersaFine Clair™ Ink and adhere to a white 5.5" x 8.5" card.

Use Nocturne VersaFine Clair™ Ink to stamp the sentiment onto vellum. Heat set with black detail embossing powder. Adhere double sided tape to the reverse of the vellum, then use a decorative die to cut the sentiment. 

Adhere the sentiment die-cut to the background as shown. Add the gemstones to the finish the card.

Please visit my blog, Kat's Tales of Stamping, for detailed instructions and complete supply lists.

Topflight Stamps Products Used:


Thanks for visiting today!


Monday, June 6, 2022

Geometric Thanks with Versafine Claire

 Happy Monday, crafters! This is Rachel from rwkrafts.com and I'm excited to share my card today. This was my first time using the gorgeous Versafine Clair pigment inks, and I'm wondering why I waited so long?! These inks are so rich in color and I got full coverage after just one impression.

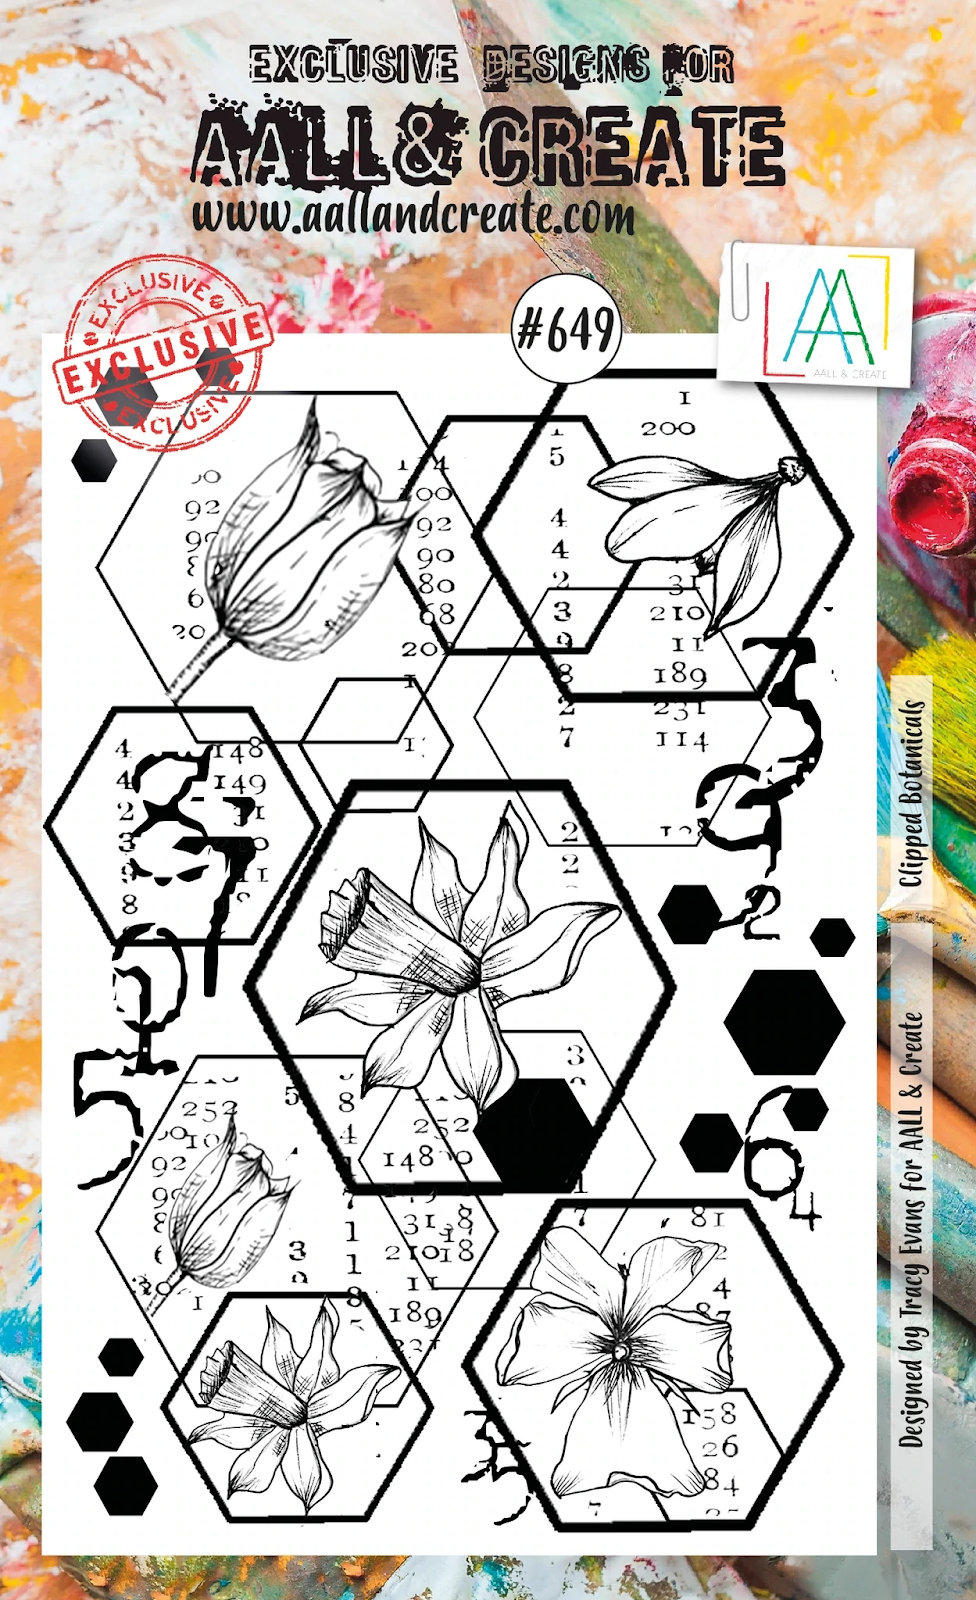
First, I stamped this cool geometric image from AALL & Create called "Clipped Botanicals". I stamped the image three times; once with Versafine Onyx Black ink, once with Versafine Clair Cheerful ink, and once in Versafine Clair Chianti ink.


Then I colored all of the flower images from the Chianti inked image. I used my Polychromos pencils and fussy cut the flowers with my detail scissors.


I also fussy cut some of the Cheerful inked hexagons. I adhered all of the cut pieces to the Versafine Onyx Black inked panel.


Thanks for joining me today. Have a creative week!


Topflight Stamps Supplies Used:


Friday, June 3, 2022

New Lavinia Acrylic Sprays


Hello crafty friends! Ericka from Strangely Creative here and today I'm playing with the new Lavinia Acrylic Sprays. I love playing with color and mediums and so when I saw Lavinia was releasing new sprays I put them all in my cart. . . but I had to pair down my cart because, well you know gas prices, ugh. Anyway I decided to start with some of my favorite colors so I picked Teal, Claret, and Midnight Blue.

I prepped my paper with some gesso and set it aside to dry. Once it was dry, I randomly sprayed the Acrylic sprays on my paper. I had a little too much ink on a couple of my sprays so I folded the paper and lightly smooshed it together to transfer the ink. 

These sprays are super easy to use, just give them a light shake, and the paint sprays nicely. For a heavier spray, aim the bottle closer to the page and for a lighter mist move farther away from the paper. Once my background was dry, I stamped the Lavinia Bron fairy and Fairy Toadstool with Versafine Clair black ink and clear heat embossed them.

 
I also added the and Mystical Swirl to the top of my page using the Versafine Claire ink in Warm Breeze. I added white gel pen highlights and finished up with a sentiment.


Thanks for stopping by and I hope you have a wonderful weekend and get a chance to play with these fun and easy to use Acrylic Sprays.


Topflight Stamps Supplies Used


Thursday, June 2, 2022

AALL&Create - Beetle Family

 Hi Everyone,

Cornelia here today. This week it's anything goes on the Topflight blog. I had this Ladybug now in my stash for quite a while and I figured it's time he sees some ink. I do love insect stamps. There are a few created by Bipasha for AALL&Create in the shop.
I first stamped the bug. Colored the bug with water brush markers. Added Crystal Laquer to the bug and let it dry. Water colored the background. Masked the center rectangle. Used the AALL&Create Totally Dotty stencil to add some texture to the background with some old and somewhat dried up Gesso (embossing paste would certainly work - probably better....)Spritzed the corners with glimmer Mist.

Also added s few more black splatters. Trimmed my card and mounted it onto black card stock.

I hope you liked this. Thanks for visiting. 
See you next week with more Topflight Stamps inspiration.

And here are the stamp supplies I used: 

Wednesday, June 1, 2022

Scars are beautiful ~ PaperArtsy, Visible Image and Carabelle Studio

 We all have them.
Some are visible and tangible, others are deep and buried far below the surface. Scars tell our stories to those who care about us, or to those who want to understand us.
 My sweet patient today was so kind and beautiful, but she is battling awful metastatic breast cancer. She has gone through multiple surgeries to evade its life-altering tentacles, yet she smiles. She is kind and gracious and full of life.  This card is for her. 

Products Used

PaperArtsy - Zinski Art 72 - Rubber Cling Mounted Stamp Set


Technique
Start by stamping the image with Copic-friendly ink onto an A2-sized cardstock. With a pencil, draw in her beautiful, lockless head. Use a Micron pen to ink the head.


Use Copic markers to give her a beautiful glow with E11, E000, E4 and 0, the colorless blender. 


Use distress oxide and the stencil for a subtle pink background. Also, add highlights to her eye and lips with a white gel pen.


Add the sentiment with Versafine Onyx ink. I drew a simple border with a micron pen to balance the image on the card.


Isn't she beautiful?
If you need this card today, let me know and I'll send it to you.

Much love,
Charmaine


01 09 10