Showing posts with label autumn. Show all posts

Monday, September 21, 2026

Leave it AALL with Walter

Happy Monday, friends!  It's Walter on the blog with you today and this week's theme at Topflight Stamps is leaves, which is appropriate since the first day of Autumn is this week.  There are so many wonderful choices to use for such a broad theme.  I wanted to be a little quirky in my design and my mind automatically turned to AALL & CREATE!  I pulled the Falling for Fall Stamp Set and Autumny Falls Stencil from my stash and got to work.

I began by choosing my color palette for my cardstock.  Since I'm going for a funky vibe, I decided to create a tan & orange checkboard pattern for my background.  I simply chose a muted shade of orange that pairs perfectly with the tan.  I cut the tan cardstock into strips and then into squares; adhered the squares to the orange panel to create the checkerboard.


I chose a set of leaves from the Autumny Falls stencil that would fit nicely and allow me to ink blend several around the edges.  I wanted the leaves to be a little on the lighter side and didn't want to use a heavy pigment ink to blend them.  I used a yellow ink, orange ink, and a little bit of red ink to create them.  I then ink blended a little Antique Linen around the edges of the panel to add some age to it.


An oval die was used to cut a piece from the center and turn this into a frame, which I adhered onto a cream cardstock panel.  I could now do my stamping!  I selected the delightfully adorable flower-eyed girl from Falling for Fall, as well as three leaves and a sentiment.  I arranged them in the inside of the oval and stamped them with Versafine Clair Fallen Leaves ink.

I colored the stamped images with alcohol markers and stayed with all colors from the Autumn color palette.  I think all of them work so well together and definitely give off a funky Fall vibe!  The last two steps were to use some Wink of Stella on the leaves to give them a little shimmer and then add some Glossy Accents around her eyes.  It's these little details that really make the design pop!

And, just like that, my card was complete.  I think it's a really fun design that definitely makes me fall for cozy!  Thanks for spending this time on the blog with me today.  I'll see you again next week.  Until then . . . be well!

Topflight Stamps Products Used:


Monday, September 14, 2026

Autumn Dreaming with Chou & Flowers

Hi, friends!  It's another Monday with Walter on the blog.  We're moving into my favorite time of the year - autumn.  I know that a lot of people don't want to rush the last few weeks of summer but I'm ready for some much cooler nights & mornings, beautiful colors, and the wonderful smells.  That's what inspired my design for this week . . . dreams of autumn!  I used two gorgeous stamp sets from the Chou & Flowers My Little Garden release to create it: Bird Cage and Artist Garden.


My thought was to have artist canvas and easel from Artist Garden be the vessel that displays the main image.  I started by stamping them onto a 4"x5.25" white cardstock panel.  I then took the woman on a swing stamp from Bird Cage and stamped it onto the center of the canvas.  With that done, I started to color the image of the woman.  I used a combination of markers from my stash to add both the main color and details.


I then used a light yellow gray alcohol marker to add a plain color around the edges of the canvas - using flicks of the brush tip to make uneven marks around it.  I then used light shades of red, orange, and yellow to blend a sunset around the woman.


I decided to add some leaves from the Artist Garden set on each side of the swing, stamped them with Rusty Hinge Distress Ink, and added some red highlights to the leaves with an alcohol marker.  A small brush and Pumice Stone Distress Oxide ink add a light gray/brown hue around the outside of the canvas.  I lightly spayed the whole stamped panel with water, let it dry, and then lightly sprayed it with rubbing alcohol to help fade the image a bit and make it look more dreamlike.

The final steps were to create the sentiment strip and faux washi tape strips that I used to embellish the card.  For the sentiment strip, I ink smooshed a strip of white cardstock into a mixture of Rusty Hinge Distress Ink & water and dried it.  I then stamped the word Dream from Bird Cage with Vintage Photo Distress ink.  I stamped two pieces of the faux washi tape with Rusty Hinge Distress Ink, colored them with markers, and fussy cut them.  The sentiment and embellishments were then added to the card.


An overall simple card to create and one which could easily be switched to a spring or summer theme.  It would be fun to do that and have the same design, with different color schemes for those seasons, to send to someone special over the course of the year!

Thanks for spending this time on the blog with me today.  I'll see you here again next week.  Until then . . . be well!

Topflight Products Used:


Saturday, November 12, 2022

Katzelkraft Pumpkins & Mushroom Fall Cards


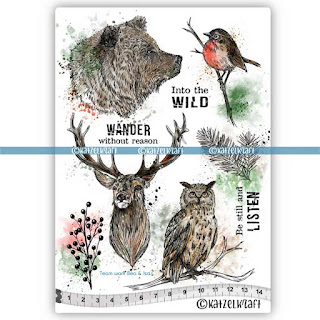
Hi friends!  It's Autumn Clark from SewPaperPaint with you today to share some fall cardmaking inspiration with you using Katzelkraft stamps.  I had a great time using these stamps and trying out different designs.  For this first card, I paired an old embossing folder to make a textured background, over which I stamped the berries from the Into the Wild stamp set.  I fussy cut the twigs from the owl and used them for my spray.  

For all of my cards, I used mixed images from the Mushroom stamp set with images from the Pumpkin Fields stamp set.  I used a combination of Distress Inks in Rusty Hinge, Antique Linen, Vintage Photo, Peeled Paint and Gathered Twigs.  For this one, I added some white highlights with a Posca paint pen.

This one was the most simple, but I really liked it.  I used the mushroom names to fill in the background and a combination of silhouette stamping with watercolor.  

For my final card, I used that adorable stacked pumpkin stamp.  The hanging berries are used in place of the vines, which I used to create the ground cover.  They were all so much fun to make and I hope they will inspire you today!  xx, Autumn


Sunday, November 6, 2022

PaperArtsy Scrapcosy Mushrooms and Squirrel Tags


Hi friends!  It's Autumn Clark from SewPaperPaint with you today to share an autumn tag trio made with Scrapcosy stamps by PaperArtsy.  Raquel is my absolute favorite designer and I was really in the mood to have a play with her fall themed stamps, so I grabbed a few sets and had a nice, relaxing play, resulting in these three tags.  I used stamp sets ESC25, ESC26 and ESC32.  


For my backgrounds I dipped each tag (handcut from Bristol) in Antique Linen and Vintage Photo Distress Ink.  For the stamping, I misted my stamps before making the impression.  I used Gathered Twigs, Aged Mahogany, Rusty Hinge and Peeled Paint.  


I used Archival ink in Acorn for my focal images and watercolored them with the same inks.  


I used a woodgrain embossing folder to the die cut ovals to make the focal images more prominent.  I hope they inspired you today and you'll check out Raquel's fabulous range of stamps at Topflight Stamps!  xx, Autumn


Visit Topflight Stamps today!


Monday, September 19, 2022

Nuts About You - 2 autumn cards

 Please tell me I'm not the only one with a secret squirrel obsession...?! I think they're the cutest things and could definitely watch them all day long. My name is Rachel rwkrafts.com and I have a squirrel addiction :) When I saw the Nuts About You stamp from Heffy Doodle, I knew I had to have it.


I stamped every image, most of them twice, and spent the afternoon coloring. I used my Brother Scan n Cut to cut the images, and all are colored with Copic markers.


And my finished coloring pieces...


Since I had so many images ready to go, I decided to create two cards.


And one with the cute birdies...


Thanks for stopping in!

Topflight Stamps supplies used:


Monday, September 5, 2022

Too Cute to Spook - Halloween Card


Happy September! I think it's fair to say that once September rolls around it is officially Spooky Season. This is Rachel from rwkrafts.com and today I'm sharing a too-cute-to-spook Halloween card.


I received the cutest Halloween stamp set from Topflight Stamps... I couldn't decide which image to focus on since I loved them all so much! With the Crafty Individuals "Halloween 1" stamp set, this card came to be.

By using a window die, I was able to incorporate a bunch of little mini-scenes and incorporate almost all of the adorable stamps from the set. Each stamp was colored with Copic markers, fussy cut, and added to their little window scene.


Here are the Copics used to create the card.


Thanks for stopping in! This was a quick one today :)

Topflight Stamps Supplies Used:


01 09 10