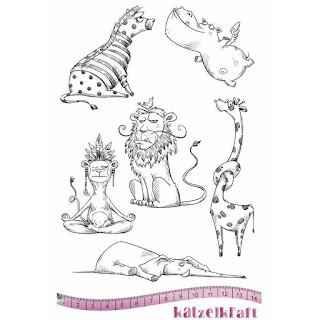
Hello Topflight fans! Ericka here today with a fun Katzelkraft Jungle Animal card. I love this set and all the different ways you can use these animals. This time I decided to pair the elephant with a coffee sentiment.
This is basically me and the way I feel before I've had my morning coffee. I am not a morning person no matter how hard I try.
I did some Distress Oxide ink blending as well as some no line Copic coloring on the elephant. The elephant was a bit of a challenge since it was a smaller image with lots of great details.
You can find these stamps over at the store here by clicking the images below.
To find out more of the details on how I created my card, feel free to stop by my blog Strangely Creative. Have a wonderful day and I hope you get a chance to start it with some coffee!
Thursday, March 7, 2019
Wednesday, March 6, 2019
Rainy Days and Wednesdays
Hi, Topflight Friends! Toni here with you today. The snow is gone so I thought I would work up a fun card in celebration of warmer times coming.
I'm using the Aall and Create Quack the Duck clear stamp set. These ducks make me chuckle big time! Perfect for snarky and/or cute cards or anything else you can imagine!

I started my card by stamping the Aall and Create Quack the Duck critter and sentiment in Versafine Onyx Black and watercoloring them with Zig Realbrush Markers. Actually, wait, I did the background first by sponging Distress Oxides on the card front then using a cover plate to create the rain.
Then I diecut the Aall and Create Quack the Duck critter and sentiment as well as an umbrella. So cute! It tempts me to go and play around in the rain but sugar melts so I best play it safe inside. LOL!
For a full list of ingredients, feel free to check out my blog, Frankie Helps Craft. Have a great rest of your week!
Tuesday, March 5, 2019
Gel Press and AALL & Create!
Good morning, Lisa Hoel here with a card to share with you today. I've been having fun with my Gel Press again. =)
I used a Gel Press Plate and stencils to print the card base.You can see more info and a video link on my blog post. I used an AALL & Create border stamp for my focal image.
Topflight Stamps products used are:
Thanks for stopping by and have a great rest of the week!
Monday, March 4, 2019
Jane Davenport | Unicorn Sparkle
Hi everyone, it's Jenny here - Happy National Craft Month! I hope you've all had a chance to get crafty this weekend but the month is still young, and there's plenty of time if you didn't!
Today I'm joining you with a sparkly card using the Spellbinders/Jane Davenport Unicorn Sparkle stamp set. I just love the sketch look of this set and I'm a sucker for anything with Unicorns on it!
This card was super simple to create. I started with an A2 panel of Bristol Smooth cardstock and using a cloud stencil, I created a very subtle ink blended pink cloud background. I left it to dry a little and then treated it with my powder tool. I then heat embossed the Unicorn in metallic silver embossing powder. The clouds do show through but are very subtle and we'll be covering it up shortly.
I colored the Unicorn in with Zig Clean Color Real Brush Markers in pinks and blue greys for the mane and tail. I also added a layer of Clear Wink of Stella over its body for the sparkle. The sentiment was stamped in the top directly onto the panel in light grey pigment ink.
To complement the sketchy look of the Unicorn, I stamped the star from the set several times on the background using the same pink ink, but stamped it off onto scrap paper first to get a pale color.
I then added some spatters of the grey ink with a paintbrush and some water and dabbed them off with a paper towel before they dried.

As a finishing touch I added a pink gem to the Unicorn's eye and backed the entire panel to a white notecard. You can check out the other supplies I used over on my blog. Have a great day all!
Jenny
This card was super simple to create. I started with an A2 panel of Bristol Smooth cardstock and using a cloud stencil, I created a very subtle ink blended pink cloud background. I left it to dry a little and then treated it with my powder tool. I then heat embossed the Unicorn in metallic silver embossing powder. The clouds do show through but are very subtle and we'll be covering it up shortly.
I colored the Unicorn in with Zig Clean Color Real Brush Markers in pinks and blue greys for the mane and tail. I also added a layer of Clear Wink of Stella over its body for the sparkle. The sentiment was stamped in the top directly onto the panel in light grey pigment ink.
To complement the sketchy look of the Unicorn, I stamped the star from the set several times on the background using the same pink ink, but stamped it off onto scrap paper first to get a pale color.
I then added some spatters of the grey ink with a paintbrush and some water and dabbed them off with a paper towel before they dried.

As a finishing touch I added a pink gem to the Unicorn's eye and backed the entire panel to a white notecard. You can check out the other supplies I used over on my blog. Have a great day all!
Jenny
Friday, March 1, 2019
Hello Friend...
Happy March everyone. Annette Allen here with you today. Today I created a simple card using Stamperia: Flower Stencil and Creative Expressions: Stylish Script stamp set. The stencil I used is sold out but there are lots of amazing stencils to choose from at Topflight Stamps.
You can create fun backgrounds using stencils.
I embossed the sentiment in gold and that is it. I stenciled the background using oxide inks but you can really use any inks you like when it comes to stencils. You can even use paints or embossing paste. Get creative and have fun.
Have a great day.
Thanks for stopping by.
Thursday, February 28, 2019
Texture Plate Tags
Hello Topflight fans! Ericka here today with two tags I made using the gel press and a texture plate from Carabelle Studio.
I'm still relatively new at using the gel plate and this was my first time using a texture plate but it was so fun to play with the designs. I used the Carabelle Studio Texture Plate with the gel press.
The texture these plates leave behind are so detailed and I love the look. For this tag I pressed the tag into the gel plate after I used the texture plate so the paint was darker.
For this tag I pressed the tag onto the plate after I had used it to pick on the ink.
I love the look and textures these plates give to a tag or card. I'll definitely be playing with them some more.
For more information on how I created these tags, feel free to stop by my blog Strangely Creative.
Thanks for stopping by and I hope you have a wonderful rest of the week!
Wednesday, February 27, 2019
Happy Dancing
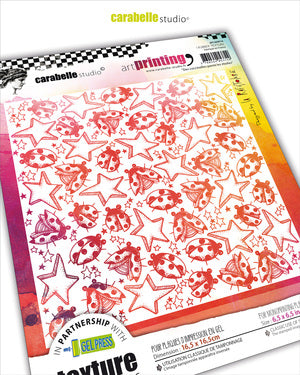
Hi, Topflighters! Toni with you today! I want to talk about crafter's block. We all have had it and, if not, please tell me your secret. I had to admit I had a tough time deciding what I wanted to do with the Carabelle Studio Ladybugs Among the Stars

Cool, huh? Didn't matter to my brain tho. I hemmed and hawed and experimented and finally decided to use it with red as a background. Once I determined that, the rest of the card came together in a snap. Whew!
Ladybugs make me think of summer and stars
make me think of the 4th of July, so I went with a red, white and blue
palette. I used the Visible Image Meshing Around stencil to add some blue and a Tim Holtz stencil to add more red.
I added one of the whimsical Katzelkraft Aviator images as though he were dancing on the sentiment. I left him uncolored to draw more attention to him. He's so fun!
Katzelkraft Aviator

If you'd like to take a look at some of my other creations, you can visit my blog, Frankie Helps Craft, or check me out on Instagram. Have a great rest of your week!
Subscribe to:
Posts (Atom)