Wednesday, January 10, 2024

Te Quiero!

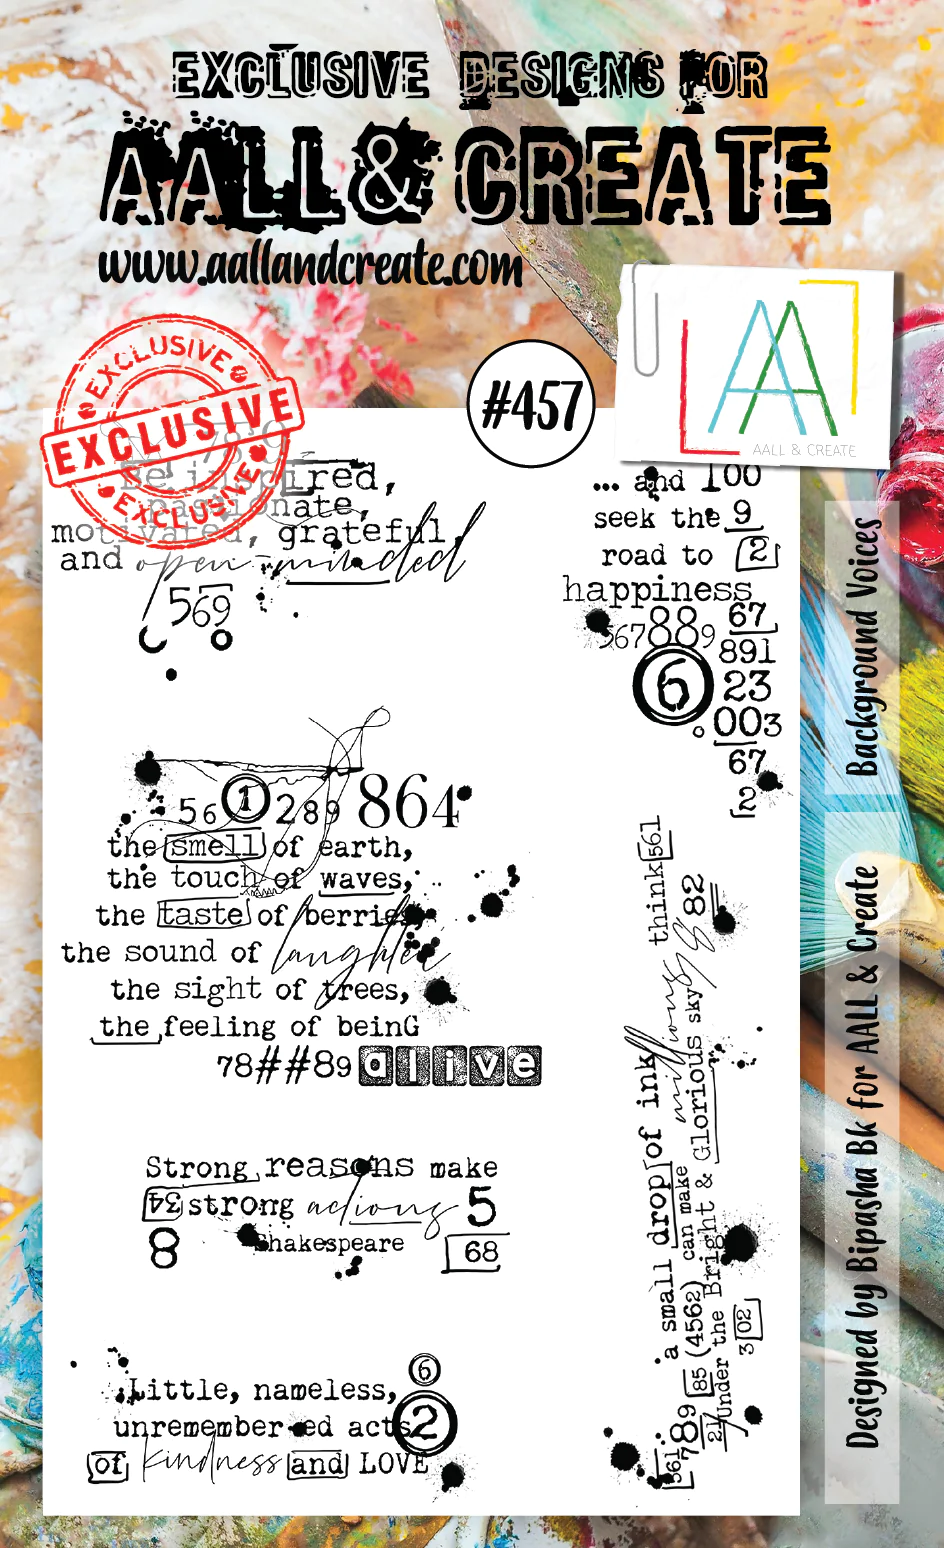
Hello my Crafty Friends, Mary Key here! This week is Valentine's Day along with my teammates. I will be using AALL & Create #481 Lil Love, #256 Cat Love, #457 Backgound Voices, and #134 Heapza Hearts stencil along with Lavinia Dinkles colors used are Pink and Periwinkle

I used watercolor paper and started to spritz water onto my mat and sprinkle a little of the Pink Dinkles and just smooshed my watercolor paper onto the color. I dried it using my embossing heat gun. The next color Periwinkle Dinkles same way I spritz some water onto my mat and sprinkle a little, then heat dry with my embossing heat gun. Then I used AALL & Create #134 Heapza Hearts stencil using Lavinia brush with Lavinia Elements Mulberry  

Then I started to stamp using AALL & Create #457 Background Voices and also added some heart stamp from #481 Lil Love.

Next stamped my images onto watercolor paper, inked with Versafine Onyx Black and heat dry and started using my watercolor markers. After coloring I did some fussy cutting and then outlined with some black ink of my fussy cuts and also added some foam to raise it a little and started putting it together. I used "Te Quiero" sentiment from #481 Lil Love onto some black cardstock and white embossing.

Here is my finished card with white cardstock and some sequins.


Thank you for stopping by and keep creating!

Topflight Stamps Supplies Used:


Tuesday, January 9, 2024

Sending Love

It's Tuesday so you've got Kathi here to share a project with you. This week my teammates and I are focusing on Valentine's Day. I've made a shaker card with the Flying Hearts Ephemera Die-Cuts 18 by Janet Klein which contains love letter envelopes, a variety of hearts, flying hearts, cupcakes, and the word "love". I've also used The Crafter Clear Stamp Set 378 and the baker from the Sugar Cookie Clear Stamp Set 421 for AALL and Create.

Here's the card!


Both images were fussy-cut, colored with Copic markers, edged with a black pen, and set aside.

A piece of blue cardstock was cut to 4.75" x 6.75" to create a background panel. A square die was used to cut a window in the top part of the panel. A piece of clear acetate was adhered to the reverse of the window on the background panel. Foam tape was used outline the aperture and to create a well for the shaker contents.

A variety of small hearts and envelopes from the Flying Hearts Ephemera Die-Cuts 18 by Janet Klein were edged with a black pen, then placed in the well created by the foam tape. Sequins and other glittery bits were added to the well. The backing of the foam tape was carefully removed and the well was sealed with a piece of sky-patterned paper.

Wishy-Washy Washi Tape 19 by Janet Klein for AALL and Create was applied to the base of the background panel. A thin strip of heart-patterned washi tape was added overtop. The background panel was edged with a black marker, then adhered to a 5" x 7" card.

A flying heart, a large cupcake, and a large envelope from the Flying Hearts Ephemera Die-Cuts 18 by Janet Klein were edged with a black marker.

The cupcake, the colored fussy-cut baker from the Sugar Cookie Clear Stamp Set 421, the envelope, and 
colored, fussy-cut Crafter were adhered as shown. 

A piece of scrap cardstock was colored with E Copic markers. Nocturne VersaFine Clair Ink by Imagine Crafts/Tsukineko was used to stamp the sentiment from the With Love Clear Stamp Set 831 by Tracy Evans to the scrap. A tag die was used to cut sentiment.

The sentiment tag and the flying heart ephemera were adhered to finish the card.

Please pop over to my blog, Kat's Tales of Stamping, for more detailed instructions and complete supply lists.

Topflight Stamps Products Used:


Thanks for visiting today!

Saturday, January 6, 2024

2 Thank you Cards letting the Patterned Paper do the Heavy Lifting

 Alanna here today sharing a couple of clean and simple thank you cards. I'm not sure about you but after the holidays I tend to need lots of thank you cards, and these fit the bill to help me get them made and out the door before too much time goes by.

To get started, I took two of the patterns from the gorgeous Ink Drops Monochrome paper pack by Craft Consortium and trimmed them down to 4x5.25 inches. Craft Consortium has several packages of this type of paper with lots of wonderful texture and inked looks. You will find more than a dozen of these paper packs in the Topflight Stamps store in many color schemes.

I added them to A2 note cards. I then took the thank you sentiment from the Basic Wishes set from Studio Light and stamped that with Versafine Claire Nocturne ink. I trimmed my panels down and added them to the card fronts with some thin foam tape. I finished off the cards by adding in some black enamel dots.

Find all the products I used today below in the Topflight Stamps store

Happy crafting! ~ Alanna

Friday, January 5, 2024

PaerArtsy Flowers with Colorista Watercolor Markers


 Hello friends and Happy New Year! Ericka from Strangely Creative here and today I have a colorful card using the Spectrum Noir Colorista Watercolor Markers with the PaperArtsy Tracy Scott 082 set. 


I first stamped and clear heat embossed a pattern on Bristol Smooth paper. I love these fun images and you can make a variety of patterns and designs with them. I then used the Spectrum Noir Colorista Watercolor Markers in Vibrant and watercolored up the images. Once my paper was dry, I added some white, black, and gold pen accents to my card.


I finished my card with a sentiment from the PaperArtsy Alison Bomber Dreaming and Doing set and heat embossed it with WOW! Embossing Gold.


Thank you for stopping by and I hope you have a wonderful and crafty 2024!


Topflight Stamp Supplies


Thursday, January 4, 2024

Just for You with Studio Light

 Hi Everyone,

Cornelia here today. This week's theme on the Topflight blog is anything goes. My favorite theme! I used those fun birds from Studio Light. I have a thing for birds - can't ever not get bird stamps....
I used an old gel press background from my stash. stamped the birds and cut them out. Added them and did a wee bit of coloring. Added the sentiment, some gem stones and Stickles.
I hope you liked this. Thanks for visiting. 
See you next week with more Topflight Stamps inspiration.
But wait - we have a great sale going on right now:

And here are the stamp supplies I used: 

Wednesday, January 3, 2024

Mixed Media Tag using Stamperia

Hello Crafty Friends, Mary Key here! Happy New Year! 

Today is "anything goes"; so I will be making a large tag using Stamperia. I will use Blue Land Bundle which is still on sale at Topflight Stamps. There is a lot in this bundle, with two stencils, paper pad 8x8, rub ons and also cardboard die cuts.

First, I decided to select my paper and then made a large tag (4 1/2" x 8 1/2"), I also cut out white cardstock to make it a little thicker but then I decided to add cardboard in the back to make it sturdy. 


I started to glue with mat medium and then added clear gesso onto my Blue Land designer paper and let it dry. 

While my large tag was drying, I started to fussy cut some of the flowers and used some cardboard die cuts from the Blue Land Bundle

After fussy cutting pieces, I started to arrange what may look like. But I kind of changed it. I like to take a picture of my layout before adding mat medium to put it together. Before anything, adding pieces to my large tag. I started to use one of the stencils and added texture paste onto my large tag. Heat dry by using my heat gun to quickly dry the texture paste. Then, sprinkle just a little Lavinia Dinkles Blueberry and spritz some water with a water spritz bottle onto the dry texture paste and heat dry with my heat gun. I added a little gold splatters before adding everything.


Now to assemble my pieces that I've chosen and started using my mat medium to put everyting together.

I added some gold pieces and some blue tone elements (small pieces of sequins mix using soft gloss gel (my stash) to give it some sparkle. Here is the finish large tag. This was fun to bring out my mat medium, gesso, soft gloss gel and texture paste to make my large tag. Getting "pasty" was fun.


Thank you for stopping by and keep creating!

Topflight Stamps Supplies Used:


Tuesday, January 2, 2024

Christmas Card for my Bestie!

Happy New Year! It's the first Tuesday of 2024 and my first blog post for the year. You've got Kathi here with a Christmas card that I created with Hobby Art Ltd.'s the Penguin Family and Besties Bundled Clear Stamp Sets. 


Use Tuxedo Black Memento Ink by Imagine Crafts/Tsukineko to stamp the penguins from the Penguin Besties Clear Stamp Set twice — once onto white cardstock and a second time onto removable sticker paper. 

Fussy-cut the label paper version and place it over its counterpart on the image panel.

Place Post-It Notes under the trees to protect the bottom portion of the image panel. Brush Della Blue Elements Ink, then grey ink over the top part of the penguins and trees to create a stormy winter sky. 

Splatter white paint over the masked images.

Remove the mask and Post-It Notes, then color the penguins, trees, and the snowy foreground with Copic markers. When done, use same white paint pen add more white paint dots to add more snow to the scene. Go over some of the snow dots with the Gelly Roll Bold Line Stardust Clear Glittering Ink pen to add some sparkle to the snow fall.

Use an A2 Polaroid die to cut a piece of blue/green plaid paper from the Gingham Christmas 8x8 Patterned Paper PadAdhere the die-cut over the penguin scene so that the window is framing the scene. Adhere the penguin scene polaroid combo a white A2 card.

Use Nocturne VersaFine Clair Ink by Imagine Crafts/Tsukineko to stamp the sentiment from the Penguin Besties Clear Stamp Set onto one of the a previously inked background, created by brushing excess ink onto white scraps of cardstock.

Die-cut the sentiment with a fancy labels die, then adhere to the bottom of the polaroid die-cut. Add gemstones to the diecut to finish the card.

Please pop over to my blog, Kat's Tales of Stamping, for more information.

Topflight Stamps Products Used: 


01 09 10