Tuesday, July 15, 2025

Merry Christmas Card

Greetings! It's Topflight Stamps Tuesday with Kathi! This week the TFS team is celebrating Christmas/Winter in July! There's also a Christmas in July Sale which means that all items in the Christmas/Winter category are 25% off!


Use Tuxedo Black Memento Ink by Imagine Crafts/Tsukineko to stamp the Santa Hat from Les Drôles d'Accessoires/Funny Accessories Unmounted Red Rubber Stamp Set by Katzelkraft twice — once about 2 ½" down on the left side of a white cardstock panel and once onto repositionable sticker paper. Fussy-cut the sticker paper version and place it over its counterpart on the image panel as a mask.

Position the grumpy cat stamp from the the Les Chats/Cats Unmounted Red Rubber Stamp Set by Katzelkraft so that his ears and the top part of his head sit on the the masked Santa Hat. Ink with Tuxedo Black Memento Ink and stamp twice — once on the white cardstock panel and once onto repositionable sticker paper. Fussy-cut the sticker paper version and place it over its counterpart as a mask.

Position the mouse stamp from the the Les Chats/Cats Unmounted Red Rubber Stamp Set so that it's next to and slightly behind the grumpy cat. Ink with Tuxedo Black Memento Ink and stamp twice — once on the white cardstock panel and once onto repositionable sticker paper. Fussy-cut the sticker paper version and place it over its counterpart as a mask. 

Repeat the above process with the singing cat from the Les Chats/Cats Unmounted Red Rubber Stamp Set.

Place a piece of low-tack tape horizontally across the image panel to cover the base of the critters and the bottom of the image panel. Sponge or brush sage green dye ink over the tape and the masked images to add a background color. Reposition the tape so that it's covering the top part of the image panel then heavily sponge the same sage green dye ink to ground the images.

Remove the masks and the tape. Use Copic markers to color the image panel. Use white gel pen to add highlights to grumpy cat's eyes and the the mouse's nose.

Use the largest die from the Polaroid Pop Die Set DI-89 by AALL and Create to cut the image panel. Edge with the green dye ink. Cut a piece of dark green cardstock ⅛" larger than the image panel die-cut and use to mat the image panel die-cut. 

Add liquid glue to the pom-pom on Santa's hat. Pour white Fun Flock onto the wet glue. Set the matted image panel die-cut aside to let the glue/Fun Flock set.

Brush the sage green dye ink onto white cardstock. Use one of the speech bubbles from the Bubble Talk Die Set 72 by AALL and Create to cut the inked cardstock. Place low-tack tape across the back of the speech bubble shaped aperture on the inked cardstock panel and place the speech bubble die-cut into the opening so that it's held securely by the tape. Position the word "Joy" from the Seasonal Words Clear Polymer Stamp Set by Lavinia Stamps so that it's centered in the speech bubble die-cut. Ink the stamp with Spruce VersaFine Clair Ink by Imagine Crafts/Tsukineko and stamp. Remove the sentiment stamp. Position musical notes from the Musical Notes Small Clear Polymer Stamp Set by Lavinia Stamps on either side of the sentiment, ink the stamps with Spruce VersaFine Clair Ink, and stamp. Remove the speech bubble die-cut from the tape, discard the tape, and edge the speech bubble die-cut with sage green dye ink. Set aside.

Position the "Merry Christmas" sentiment stamp from the Christmas Greetings Clear Polymer Stamp Set by Lavinia Stamps onto the green-inked cardstock, stamp with Spruce VersaFine Clair Ink, and die-cut with a ribbon slide die. Edge the ribbon slide die-cut with sage green dye ink.  

Select one of the green plaid patterned papers from the Distress Plaid 8x8 Patterned Paper Pad by Creative Expressions, cut to 4 ¾" x 6 ¾", and edge with Spruce VersaFine Clair Ink.

Adhere the matted image panel die-cut to the patterned paper panel as shown. Adhere the speech bubble die-cut to the top right of the image panel die-cut. 

Use a ribbon border die to cut dark green cardstock, then thread the border die through the ribbon slide/sentiment die-cut. Adhere the combination to the bottom of the plaid patterned paper panel as shown. Adhere the card front to a dark green 5" x 7" card.

Please pop over to my blog, Kat's Tales of Stamping, for step-by-step instructions and complete supply lists. 

Topflight Stamps Products Used:


Friday, July 11, 2025

Stepping Into Sunshine: A Mixed Media Card with a Twist of Yellow

Hello friends!
Ericka here from Strangely Creative, and today I’m sharing a mixed media card that surprised even me—with yellow! 🌞

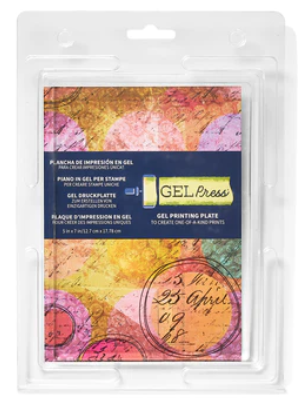
I usually shy away from yellow in my color palette, but this gel press print with soft pops of pink had such a cheerful vibe, I couldn’t resist. It felt like the perfect backdrop for the elegant silhouettes and textured elements from the PaperArtsy Alison Bomber 41 stamp set.


I started by layering in texture using Distress Inks in Wild Honey and Walnut Stain, which added a warm, vintage feel to the background. Then I stamped the beautiful floral silhouette and sentiment using Versafine Clair ink in Twilight—that rich blue hue gives such crisp contrast against the sunny yellow tones.


 To finish things off, I hand-drew a simple frame to tie it all together. I love how this small detail grounds the design and adds a bit of whimsy.

This card came together quickly, but it’s a reminder that sometimes stepping outside our color comfort zones can lead to beautiful surprises. 🌼💛


Thanks so much for stopping by—I hope you’re inspired to experiment with color and create something unexpectedly wonderful. Wishing you a weekend full of sunshine and creativity!


Topflight Stamp Supplies 


PaperArtsy - Alison Bomber 41 Pressed Umbells
Shop at:
TP
Tsukineko - Versafine Clair - Twilight
Shop at:
TP
Gel Press - Reusable Gel Printing Plate
Shop at:
TP
Speedball - 2
Speedball - 2" Brayer
Shop at:
TP


Wednesday, July 9, 2025

Garden Inspiration – Butterflies & Flowers

Hello, Lisa Hoel here! This week at Topflight Stamps our theme is "Anything Goes". I've been seeing butterflies in my garden so I was inspired by the Katzelkraft Butterfly & Dragon Stamp Set. I added stamped flowers using PaperArtsy Set 24 from Tracy Scott and then embossed them with WOW! embossing powders from the Twinkly Fizz trio.


Lisa Hoel for Topflight Stamps #creativejuicefreshsqueezed #topflightstamps


Thanks for stopping by and be sure to check out the Topflight Stamps store for a wide selection of different and hard to find stamps, stencils and other paper crafting supplies from all around the world! Also keep an eye here on the Topflight Stamps blog. There is new inspiration posted daily!

Topflight Stamps Supplies Used:

Katzelkraft Stamp Set - Butterfly & Dragon

PaperArtsy Stamp Set - Tracy Scott 24

Lavinia Stencil - Flourish

WOW! Embossing Powder Trio - Twinkly Fizz

Creative Expressions - Wordies Sentiment Sheets, Birthday
Lavinia Elements Ink Pad - Confetti


Tuesday, July 8, 2025

Katzelkraft Robot Pets Card

 Greetings! It's Tuesday, so you've got Kathi here to share a project with you. This week is an Anything Goes week. I've been feeling blah due to dental work, the weather, and increasing decrepitude. So I decided to make a card with lots of rust and patina with the Robot Dog Unmounted Red Rubber Solo Stamp and the Robot Cat Unmounted Red Rubber Solo Stamp by Katzelkraft. I also used a fabulous A5 Grunge Clocks and Grid Stencil/Mask by Studio Light.

PSA: Remember! There are still a lot of stamps by Katzelkraft in stock right now!

Here it is!


Using a stamping platform, position the Katzelkraft's Robot Dog and the Robot Cat stamps facedown centered horizontally and about one inch from the bottom of a white image panel. Ink the stamps with Tuxedo Black Memento Ink by Imagine Crafts and stamp. Remove the image panel, place a piece of repositionable sticker paper on the platform, ink the stamps and stamp again.

Use Copic markers to color the Robot Dog and the Robot Cat. Fussy-cut the repositionable sticker paper versions of the Robot Dog and the Robot Cat and place them over their counterparts on the image panel. Place a piece of low-tack tape horizontally across the bottom of the image panel. 

Sponge or brush Della Blue Elements Ink by Lavinia Stamps over the masked images and the low-tack tape to color the top part of the image panel. Place the A5 Grunge Clocks and Grid Stencil/Mask by Studio Light atop the image panel. Sponge or brush Della Blue Elements Ink over the stencil and the masked images to add a tone on tone pattern to the background.

Remove the stencil and reposition the low-tack tape so that it's covering the top part of the image panel. Sponge or Brush grey ink over the the tape onto the bottom of the image panel.

Remove the masks and tape from the image panel. Use a yellow alcohol marker to add a glow around the Robot Dog and Cat's bulbs. Use a white gel pen to add highlights to their goggle lenses and their noses. Use a glitter pen to add glitter to the  tip of the Robot Dog's tail and the Robot Cat's ear tips.

Die-cut or trim the image panel, then edge with Della Blue Elements Ink. Cut a piece of patterned paper so that it's ⅛" larger than the image panel and edge with a rust-colored Copic marker. Adhere the card to a blue A6 card.

Please pop over to my blog, Kat's Tales of Stamping, for step-by-step instructions and complete supply lists including the markers used.

Topflight Stamps Products Used:


Thank you for visiting today!

Friday, July 4, 2025

A Festive Mixed Media Celebration


Hello crafty friends and Happy 4th of July! 🇺🇸 Ericka here from Strangely Creative, and today I'm celebrating with a fun and vibrant mixed media card that blends bold textures, bright colors, and of course, a bit of sparkle!


This card features the whimsical PaperArtsy Tracy Scott 097 stamp set layered over one of my favorite gel press prints. I love pulling prints without overthinking color choices—it’s always fun to see how random combos come together to create such unique, textured backdrops!

To amp up the background, I added shine and dimension using the PaperArtsy 458 stencil with embossing ink, followed by a sprinkle of WOW! Embossing Powder in Pea Coat. The shimmer is subtle but magical—like a mini fireworks show on your card!


For my focal point, I stamped one of Tracy Scott’s gorgeous blooms in gray on watercolor paper. I played around with my watercolor pencils (still learning!) and layered in depth and contrast using my trusty colored pencils. After fussy cutting the flower, I popped it up with foam tape for a bit of lift.

The sentiment comes from the Creative Expressions Birthday Sentiment sheet, which I lightly tinted to coordinate with the colors in my background. It’s a simple finish but pulls everything together beautifully.


Thanks so much for stopping by and sharing part of your holiday with me! Don’t forget to check out the awesome 4th of July sale going on right now—perfect time to grab those supplies you’ve been eyeing!

Wishing you a day full of color, sparkle, and creativity! 💙❤️💥


 Topflight Stamp Supplies

PaperArtsy - Tracy Scott TS097
Shop at:
TP
PaperArtsy - PS458
PaperArtsy - PS458
Shop at:
TP
WOW! Embossing - Clear Embossing Pad
Shop at:
 TP
Creative Expressions - Sentiment Sheets - Birthday
Shop at:
TP
Gel Press - Reusable Gel Printing Plate
Shop at:
TP 


Speedball - 2
Speedball - 2" Brayer
Shop at:
TP

Wednesday, July 2, 2025

Lynne Perrella + PaperArtsy = Crafty Goodness

Hello, Lisa Hoel here. This week at Topflight Stamps our brand focus is on the fabulous PaperArtsy! Lynne Perrella, one of their designers, is a favorite of mine so I used one of her stamp sets for the main images. The background is a gel print and I cut the card base using the AALL & Create Die Set Counting Circles #38.


Lisa Hoel for Topflight Stamps #creativejuicefreshsqueezed #topflightstamps


Thanks for stopping by and be sure to check out the Topflight Stamps store for a wide selection of different and hard to find stamps, stencils and other paper crafting supplies from all around the world! Also keep an eye here on the Topflight Stamps blog. There is new inspiration posted daily!


Topflight Stamps Supplies Used:

PaperArtsy Stamp Set - Lynne Perrella 71

PaperArtsy Stencil - Kate Crane PS467

AALL & Create Die Set - Counting Circles #38

PaperArtsy Fresco Paint - Mahogany
Creative Expressions - Wordies Sentiment Sheets, Birthday
Clair Ink Pads - Tulip RedMonarch
watercolor paint


Tuesday, July 1, 2025

Best Fishes

Greetings! It's Tuesday so you've got Kathi here to share a project with you. This week we're showcasing PaperArtsy's wonderful products. Since it's been very hot, I've been wanting to go to the beach, but creating a slimline card beach scene with PaperArtsy's Kate Crane (KC006) Rubber Cling Stamp Set, the Kate Crane Mini 007 (KCM007) Cling Mounted Rubber Stamp, and the Kate Crane Mini 008 (KCM008) Cling Mounted Rubber Stamp Set is as close as I can get at the moment. The background was created with Mattints and Fresco Finish Acrylic Matte Glaze.

Here it is!


Use Tuxedo Black Memento Ink by Imagine Crafts/Tsukineko to stamp the fishhead man from the Kate Crane (KC006) Rubber Cling Stamp Set by PaperArtsy onto Copic-friendly paper. Fussy-cut the image, color with Copic markers, and edge with a black marker. Set aside.

Use Tuxedo Black Memento Ink and a stamping platform to stamp the big fish from the Kate Crane Mini 008 (KCM008) Cling Mounted Rubber Stamp by PaperArtsy and the five fish from the Kate Crane Mini 007 (KCM007) Cling Mounted Rubber Stamp by PaperArtsy onto an 8½" x 3½" panel of Bristol Paper. True confession time, I cut my Kate Crane Mini 007 (KCM007) Cling Mounted Rubber Stamp by PaperArtsy to separate the fish from one another.

Use Copic markers to color all the fish on the panel of Bristol Paper. Use a paint brush to apply Fresco Finish Acrylic Matte Glaze over the Copic-colored fish to seal them. 

Shake the DragonflyGreenstone, and River Deep Mattints well, add a dime-sized amount of each color Mattint to the craft mat, then use make-up sponges to apply the Mattints horizontally over the fish until the panel is tinted to your liking. Let dry. Warning: Be sure to have a relatively dust-free, cat-fur free crafting area, otherwise the cat fur and dust will be adhered to the surface of your project.

Use a slimline die to cut the stamped background panel. Edge the image panel die-cut with grey archival ink. Use the next largest die to cut greyish/purple cardstock and use to mat the image panel die-cut. Adhere the matted image panel to a grey slimline card.

Adhere the stamped, colored, and fussy-cut fishman as shown.

Cut a strip of ink jet vellum and back with two-sided tape. Use Black StazOn ink to stamp the sentiment onto vellum, cut with a speech bubble die, and adhere as shown to finish the card.

Please pop over to my blog, Kat's Tales of Stamping, for step-by-step instructions, notes, and complete supply lists.


Thanks for visiting today!
01 09 10